I was looking for recipes to prepare soymilk at home for a while now. The reason ofcourse is the recent pricehike of commercial soymilk. In big warehouse shops like Costco, the price for 3 packets of ‘Silk’ brand soymilk was 4 dollars, few years ago. It is now around 8 dollars. Vijay and I, we both like soymilk – for cereal, for cooking and whenever we feel like drinking something refreshing particularly during summer months. Cold soymilk has been our drink of choice. But now with the recent price increases, I’ve been feeling little reluctant to pay that kind of price, it felt like ‘organic’ kind of ripoff.
That’s when I found this clearly described recipe at fellow foodblogger/chef’s blog “Tasty Bytes” for home made soymilk. I had to give it a try. I brought some books from the library and also googled; what I found out was there are mainly two ways to prepare soymilk.
1.Soybeans are soaked, cooked first & then pureed to extract the milk.
2.Soybeans are soaked, pureed first to extract the milk& then the milk is boiled. (This method is traditional Japanese way of preparing soymilk according to this book.)
I was pendulating which method to follow, because this is my first time preparing at home and I wanted it to be a success taste wise. Well, I left it for Vijay and he chose the second method – Puree, extract and then boil. So last weekend, for the first time, we prepared homemade soymilk. I could not believe how easy it was. The whole thing of extracting the milk took about 30 minutes, that’s all.
What about the taste – we added vanilla and honey for flavoring and tasted the chilled soy milk. It has a strong, more robust flavor than the commercial vanilla soymilk. Not off-putting at all, but again we are motivated to like it :). Adding vanilla and honey was a good choice, because we are accustomed to vanilla flavored, mildly sweet commercial (Silk brand) soymilk. For those of you who ask, why soymilk, what’s so special about it? – We prefer it mainly because it’s a guilt free, hormone and cholesterol free choice we have available here. And soymilk is high in protein and rich in iron but low in sodium, fat and calcium. Also we like it for taste… heavy textured but it has a smooth, silky taste.

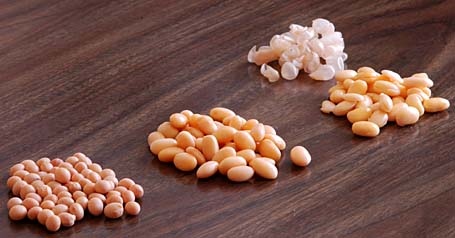
Soybeans – Dry, Soaked, Rubbed and skins removed
Recipe:
2 cups of dried soybeans
4 glasses water
2 tablespoons to ¼ cup of honey(or sweetener of your choice)
1 teaspoon of pure vanilla
Big pot and cheesecloth (gangi gudda/cotton cloth)
Preparation is real simple and 3 steps.
(1) Soak and rub (2) Blend and extract (3) Boil and chill.
Soak and Rub:
Soak the beans overnight in lot of water. They expand considerably, so take a big vessel and add at least two to three glasses of water for them to soak. By Morning, they will double in size. Rub soybeans with hands to remove the outer covering. The flimsy outer covering will easily separate from the beans and will float to the top. With hand, scoop them and remove. Repeat like this, two or three times to remove the covering. I was able to remove the outer layer for at least 75 percent of Soya beans.

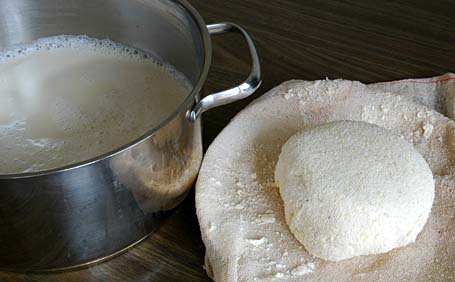
Extracted soymilk and the squeezed out soybean pulp
Blend and Extract:
Pour the beans into a colander to drain the water. Take the beans in a blender and in batches, grind them into smooth puree adding water.
Keep a big pot on the side. Cover it with a cheesecloth or gangi gudda/cotton cloth. Pour the pureed bean mixture into the cloth. Pull the cloth together and twist and allow dripping for few minutes. And then with your hands gently squeeze as much milk as possible. Take care not to squeeze the soya bean pulp.
Do this in batches. I kept the squeezed out soya bean pulp from each batch on a plate. Finally I blended this pulp again two times, adding water, to extract as much soymilk as possible.
Boil and Chill:
Pour the milk through a fine sieve into a big pot. You see white foam (the kind, that forms when you blend urad dal or moong dal) floating on the top of milk. Scoop it with a spoon or with your hand. I did this to clear the surface of milk.
Bring the milk to a boil. Add honey and vanilla. Reduce the heat to medium. Partially covered, simmer it for about 30 minutes, stirring in-between. Just like cows milk, layers of skin (meegada) were forming on top, I removed the skin (meegada) layers to a cup and later added this meegada to the ‘aloo chole’ I was preparing for supper. The meegada skins tasted melting delicious.
Allow the milk to cool to room temperature. Pour into a clean bottle and keep the bottles in the refrigerator to chill. Serve and enjoy.

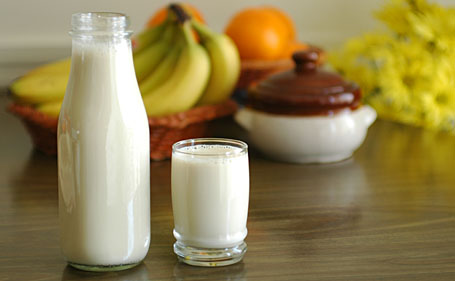
Home made soymilk – all ready for chilling in the refrigerator.
Caution: Extremely acquired taste.
Recipe Source: Foodblog – Tasty Bytes and Cookbook – “The science and lore of the Kitchen”
Yield: 1 liter (quart) or two bottles like in the photo above.
