Mahanandi

Living in Consciousness ~ Indi(r)a’s Food and Garden Weblog

Chocolate Coconut Burfi

Chocolate Coconut Burfi

Chocolate is the spoiled brat in the dessert world. There is already loads of sugar and butter in a single chocolate bar. But this delicious diva demands more butter and sugar if you try to make anything with it. There are some occasions where I wouldn’t hesitate to indulge in chocolate tantrums. But today is not one of those, with New Year resolutions and all. Instead I have given a microwave timeout to chocolate. It simply melted and when applied to the coconut burfis, it seemed content. I guess it found a natural fat to cling to. There is no way we can win with chocolate. This is a spoiled brat everybody loves to indulge in.

Dark Chocolate and Coconut Fudge
Chocolate Bar and Coconut Burfis

Recipe:

12 medium sized Coconut burfis
1 chocolate bar of your choice. I went with TJ’s brand

Break the chocolate bar into big chunks. Take them in a microwave safe bowl. Microwave, stirring in-between. Usually it takes one to two minutes for the chocolate to become shiny liquid.

Line a plate with parchment paper or wax paper.

To chocolate coat: Dip the coconut burfi into the melted chocolate with your fingers or with a fork. Completely submerge and cover. Lift, and run a knife underside and to the sides, to remove excess chocolate. Place the burfi on a wax or parchment covered plate. Quickly coat all the pieces in same way. Place the tray in a cool place, or refrigerate. Once the coating firms-up, gently remove them from plate and store them by placing a wax paper in-between.

Coconut burfi coated with chocolate tastes superb and for choco-cocoholics, this is a simple and easy way to indulge in chocolate-coconut cravings.

Coconut Burfis Covered with Chocolate


Chocolate- Coconut Burfi ~ A Satisfied Craving for Jihva: Chocolate at Deepz

Coconut Burfi – Recipe

Posted by Indira©Copyrighted in Chocolate,Coconut (Fresh),Jihva For Ingredients,Sugar (Thursday January 3, 2008 at 9:05 pm- permalink)
Comments (41)

The New Home of Mahanandi: www.themahanandi.org

Boiled Chestnuts

Boiled Chestnuts

Due to my craving for something I have never tasted before, the chestnuts have leaped from roasting skillet into the steaming pot on New Year’s Day at my home.

The chestnuts that appear during winter season here have been a fascination for me for the last couple of years. I like roasted chestnuts. This year I ventured into boiling and cooking with chestnut territory. The boiling process is similar to how we do with fresh crop peanuts in India. But with chestnuts we have to score and then steam. Once the shell softens, drain the water. Peel the outer covering and enjoy the tender chestnut inside. Boiled chestnuts taste almost like boiled peanuts (and jackfruit seeds san the smell). Sweet, nutty and starchy, with aroma typical of boiled nuts.

For our New Year’s Day meal, I prepared a chestnut and date yogurt. Finely chopped few dates and boiled chestnuts and then added them to yogurt. A sprinkle of salt. There it is, a fine and exotic side dish welcoming the 08.

Boiled Chestnuts and Finely Chopped Dates with Yogurt

Posted by Indira©Copyrighted in Chestnuts (Marrons),Dates (kharjuram),Yogurt (Wednesday January 2, 2008 at 7:44 pm- permalink)
Comments (10)

The New Home of Mahanandi: www.themahanandi.org

Chestnuts

Chestnuts

Chestnuts, with a plus shaped cut, Chestnuts, Prepped for Roasting

Roasting Chestnuts in an Iron Skillet on Stovetop (Almost done)

Shelling the Roasted Chestnuts

Chestnuts
Roasted Chestnuts (kuri) ~ Satisfying Sweet Snack to Warm up on Cold Winter Days

How to roast chestnuts on stove-top:
Method in detail
Holiday Treats ~ Roasted Chestnuts

Posted by Indira©Copyrighted in Chestnuts (Marrons),Revisiting Old Recipes (Thursday December 13, 2007 at 2:05 pm- permalink)
Comments (15)

The New Home of Mahanandi: www.themahanandi.org

Prune-Pecan Fruit Bread

Prunes
Sweet and Tart, Plump Prunes

Like many folks these days, I have gotten away from baking bread often, but when I do, I would go for a dense, deep flavored bread full of fruit and nuts. Prune-pecan bread is one such bread. The recipe is inspired by the one I have read at war-time recipe booklet, circa 1910-20. You can see how conservative the recipe methods were at that time. No dumping of butter and eggs for everything, like they are nothing. People were rational during those days, it seems. Also, if you read the bread bibles of present day, you would think that ‘yeast is west’. It doesn’t have to be yeast all the time, and also bread-baking without yeast matches our chapati/roti cookery style.

The original recipe has 4 teaspoons of baking powder, and it sounded too much to me, so I reduced the amount to one teaspoon, and mixed the dough with buttermilk. I purchased prunes, and I already have pecans and maple syrup at home. So I decided to include those ingredients along with prunes in my recipe. The bread may not look much, but it baked up great. The juicy, moist prunes, pecans and sweet maple syrup – it’s a good kind of bread.

Prune Pecan Bread
Bread Dough Ready for Baking

Recipe:

1 ½ cups barley flour
1 ½ cups all-purpose flour
1 cup prunes, finely chopped
1 cup pecans, finely chopped
1 cup maple syrup, more if you like a sweet bread
¼ cup ghee, melted
1 cup buttermilk, at room temp. (mine was from homemade yogurt)
1 teaspoon baking powder
Warm water to mix, about half cup to one cup

Take the barley and all-purpose flour in a big vessel. Add baking powder. Mix. Then add the prunes, pecans, maple syrup and ghee. Gradually adding buttermilk and warm water, whisk the ingredients to combine well. Pour the batter into bread pans. Cover the pans, and keep them in a warm place for about 30 minutes.

Bake at 350 F for about 45 minutes, until a toothpick inserted into the bread comes out clean. Remove and cool it for about ten minutes. Run a knife around the rim of the pan to loosen the cake and invert onto a plate. Let it cool completely. Slice and serve with your favorite jam.

Prune Pecan Bread
Prune-Pecan Bread

Prune Bread recipe from My Little Kitchen

Posted by Indira©Copyrighted in All-Purpose Flour(Maida),Maple Syrup,Pecans,Whole Wheat Flour (Tuesday December 11, 2007 at 8:39 pm- permalink)
Comments (24)

The New Home of Mahanandi: www.themahanandi.org

A Date with Cashew

Dates with Cashews

What could be a more delirious combination than a cashew encased in a sweet date. To my mind, nothing! Cashew-date is a pure, natural treat, and has particularly been a long tradition in Hyderabad region (Charminar area). A favorite at tens of small shops specializing in dates, dates with cashews is prepared by stuffing sweet, moist dates with fresh cashews. When you take a bite, first you would get the caramel like date and then the cashew, which balances and enhances the date experience. It’s a pleasant mini jugalbandi. Vijay and I, we both enjoy cashew-dates.

I think it would be refreshing to eat something uncooked, raw as it is given by the earth at the end of a meal before leaving the table. I believe that’s why fruit is served at the end of traditional meal. A date with cashew is another succulent way to conclude the meal with the sweet taste of Mother Earth.

Date with Cashew
A Date with Cashew ~ for Chandrika’s Date Event

How:
Moist and sweet dates – pits removed
cashews – whole, raw (or unsalted, roasted ones)
****
Gently push the cashew into the date, in place of pit.
If the dates are on the firm side, warm them in a oven/microwave for five seconds to soften. This will make the dates pliable and placing cashews will be easy. (This works on firm dates, trust me). Store them in a box, or wrap each one like a candy.
Natural pick-me uppers and also make a sweet gift to share with friends and family.

Posted by Indira©Copyrighted in Amma & Authentic Andhra,Cashews,Dates (kharjuram),Dry Fruits, Nuts & Seeds (Monday December 10, 2007 at 12:50 pm- permalink)
Comments (26)

The New Home of Mahanandi: www.themahanandi.org

Date and Prune

Date and Prune
A Date with Prune ~ for this Week’s Indian Kitchen

Weekend Blog Read:

Hey, Sweetheart!

Love Song for Trader Joe’s

I Finally Said Goodbye to Food Network

Saturday Night at the Movies, The Obligatory Top Ten List

Blogging in Telugu: Tools and Tips

What’s Wrong with American Academia

Posted by Indira©Copyrighted in Dates (kharjuram),Indian Ingredients,Indian Kitchen (Sunday December 9, 2007 at 2:42 pm- permalink)
Comments (10)

The New Home of Mahanandi: www.themahanandi.org

Gobi Kasuri Methi with Golden Raisins

Cauliflower, Golden Raisins, Dried Fenugreek Leaves
Gobi, Golden Raisins, Kasuri Methi

Recipe:

Skillet
Peanut oil, slivered garlic, cumin, and mustard seeds for tadka
Red onion, ripe tomatoes and fresh cauliflower
Kasuri methi, golden raisins, grated coconut, turmeric, chilli powder and salt
With puri, chapati or with rice.

Puri and Gobi Kasuri Methi with Golden Raisins
Puri and Gobi Kasuri Methi ~ for Weekend Brunch


Feel free to size up the recipe, for a sweet tasting and serenely scented Gobi Kasuri methi.
From Hindi to English, Gobi=cauliflower, Kasuri Methi=Sundried Fenugreek Leaves

Posted by Indira©Copyrighted in Amma & Authentic Andhra,Cauliflower,Golden Raisins,Methi, Kasuri Methi (Monday November 26, 2007 at 1:10 am- permalink)
Comments (22)

The New Home of Mahanandi: www.themahanandi.org

Pecan Persimmon Cake for Thanksgiving

Persimmon

“Do you dream in chocolate?”

The television ad voice for Lindt chocolate asks us.

I don’t dream in chocolate, but I do dream in recipes. The following combination is what I dreamt last weekend:

Persimmon coated with maple syrup
Pecans
Ghee and
Wheat-barley pancake flour

The pecan-persimmon cake turned out to be a vision in real life as well. A delectable, one of a kind dessert that taste buds never forget.

Pecans and Persimmon
Pecans and Persimmons

Recipe:

Pancake flour – 2 cups
Persimmon, 2 ripe fruits, peel the skin and finely cube – 1 cup
Pecans, finely chopped – ½ cup
Maple syrup – ½ cup
Ghee, melted and at room temperature – ¼ cup
Baking powder and crushed cardamom – ¼ teaspoon each

8 mini cake pans

Take the flour in a vessel. Add the persimmon, pecans, maple syrup and ghee. Sprinkle baking powder and cardamom. Stir in about half to one cup of warm water. Combine thoroughly. Divide the batter between the cake pans and spread evenly.

Pre heat the oven to 350 F. Place and bake the cakes to warm sunset hue, for about 20 to 30 minutes, until a knife inserted in the center comes out clean. Let cool and invert to serve.

Pecan Persimmon Mini Cakes
Just Out of the Oven ~ Pecan Persimmon Cakes in a Warm Sunset Hue

Pecan Persimmon Cake
Pleasures of Persimmons ~ Pecan Persimmon Cake


Recipe Source: My own creation
For this recipe, I used Maple Grove Farms brand buttermilk-honey pancake mix, which has both wheat and barley flours in it. The flour-mix worked beautifully and offered a great remedy to my egg-fruit combo cake phobia. I purchased this pancake mix from Fred Meyer’s grocery.
This is a egg-free cake, but it came out crumbly and flaky due to buttermilk in pancake mix. The acidity of buttermilk, warm water and maple syrup combo created cake crumbs full of flavor.

Posted by Indira©Copyrighted in All-Purpose Flour(Maida),Maple Syrup,Pecans,Persimmon (Monday November 19, 2007 at 1:57 pm- permalink)
Comments (38)

The New Home of Mahanandi: www.themahanandi.org

Mooga-Gaathi with Moong Bean Sprouts

Sprouted Moong Dal and Fresh, Tender Coconut
Fresh, Tender Coconut and Moong Beans, Sprouted at Home

Mooga-Gaathi, a traditional Goan-Konkani recipe with sprouted moong beans and fresh coconut may sound like another unassuming moong dal preparation. But you would be delighted to find out the appetite-arousing attitude of this homey, gentle sounding dish. All thanks to spices – nutmeg, cloves, coriander and peppercorn.

The recipe is from my friend Veena Parrikar‘s kitchen. I made small changes here and there to the original to suit my taste. Easy to prepare, minimum work, no cutting or slicing things, and satisfying results. A perfect autumn recipe and a must try for sprouted moong bean fans. I totally recommend.


a Round of Ground Coconut and Spices – Black Peppercorn, Cloves, Nutmeg and Coriander Seeds

Recipe:
(for two, for two meals)

Sprouted moong(mung) beans – 4 cups
Fresh coconut gratings – 2 tablespoons
Spices:
Nutmeg – a small piece
Cloves – 3
Coriander seeds – 1 teaspoon
Black Peppercorn – ¼ teaspoon
Dried red chillies – 2
Tamarind pulp – 2 teaspoons
Turmeric – ¼ teaspoon
Salt – ½ teaspoon or to taste
For popu or tadka:
1 tablespoon ghee or oil
8 curry leaves
¼ teaspoon each – cumin, mustard seeds and asafoetida

1. Place a wide pot on stove-top and heat.
Add and dry-roast the nutmeg, cloves, coriander seeds, black pepper and dried red chillies to fragrance. Remove them to a mixer. Add fresh coconut and grind to smooth paste. For easy blending, you could also add about half cup water.

2. In the same pot, take sprouted moong beans. Add about 2 to 3 cups of water and stir in salt. Cover and cook. When moong beans reach required level of tenderness, add the ground-spice paste, tamarind and turmeric. (I also added a tablespoon of jaggery.) Mix well and simmer on medium heat.

3. While the moong is simmering, do the popu or tadka. In a small skillet, heat oil until a curry leaf tossed in it sizzles. Add and toast curry leaves to pale gold. Next goes the cumin, mustard seeds and asafoetida. Wait for the mustard seeds to splutter. And, immediately add the skillet contents to simmering moong dal. Mix, reduce heat and simmer for another five to ten minutes to blend the flavors.

Serve or spoon into a small bowl and enjoy with rice or chapatis.


Mooga-Gaathi with Chapatis and Jujebe Fruits (Gangiregi Pandlu) ~ Meal on a Autumn Day

Notes:
The original recipe did not have cumin seeds in tadka/popu. They are not used in gaathi.
How to sprout Moong Beans: Soak moong beans in water overnight. Next morning, drain into a muslin covered colander. Cover the beans with cloth, and keep the colander in a warm area. Sprinke water occasionally to keep the cloth moist. Within a day, you start seeing the sprouts. Wait for next morning. There you go, you have your own homemade sprouts ready for Mooga-Gaathi.

Posted by Indira©Copyrighted in Coconut (Fresh),Moong Dal (whole),Sprouts (Molakalu) (Monday October 8, 2007 at 9:28 pm- permalink)
Comments (20)

The New Home of Mahanandi: www.themahanandi.org

Kalakand


On Krishnatashtami, we celebrate the Bhagavan Krishna’s birthday. The scriptures portray bala (baby) Krishna as a happy and mischievous child with boundless energy and great fondness for all things milk. Milk, yogurt, buttermilk, cream, ghee, venna, and milk based sweets are lovingly offered to bala Krishna during this festival time. In our family, for pooja neivedyam we prepare venna (the cream layer from yogurt) and pala kova or kalakand.

Kalakand, an exquisite milk-based sweet preparation is an interesting process. Concentrated milk called khoya and fresh paneer called chhana are mixed and simmered together with sugar to a luxurious thick, firmness. The mixture is cooled, then cut to squares and garnished with pistachios. That is kalakand of my hometown Nandyala. As you can imagine, the kalakand has a rich taste.

Depending on the khoya-chhana ratio and sugar variety, kalakand is 2 types.
Milky-white kalakand: Three parts chhana and one part khoya together simmered slowly with white sugar for hours. Continuous stirring and low heat cooking result in a pure-white kalakand. It’s a labor intensive process and usually you will find this milky-white kalakand at Indian sweet shops.
Coral-pink kalakand. Chhana and Khoya are in 1:1 or 1:3 ratio and unprocessed, old-world style red sugar (turbinado) sweetens and colors the kalakand. This is the type we prepare at our home. Both varieties taste equally delicious, but I prefer the Coral-pink colored kalakand. Here is how I made it for Krishnashtami prasadam.

Recipe:
(takes about 2-3 hours. Makes about 18 to 20 2x2x1 square shaped Kalakand)

½ gallon whole milk and juice from one lime – to prepare chhana
½ gallon whole milk – to prepare Khoya
2 to 2½ cups – unprocessed cane sugar (turbinado)
1 cup, shelled and unsalted pistachios – coarsely crushed for garnish
Silver or gold foil to decorate the kalakand

2 big, sturdy, wide based pots
Lots of patience. Family or friends on the side definitely will help and make the process more enjoyable.


Chhana for Kalakand

1. Milk: Place the pots on stove-top and add half gallon milk to each pot to prepare chhana and khoya simultaneously.

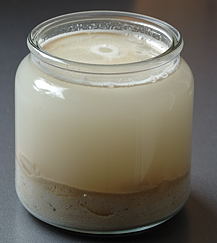
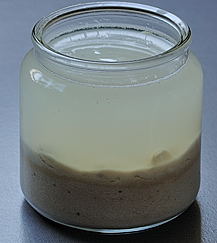
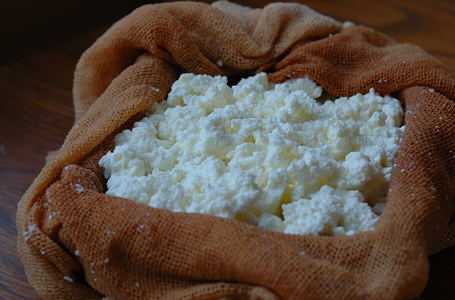
Chhana: In one pot, once the milk starts to boil, reduce the heat. Add the limejuice (lemon juice) and stir. Within minutes, you will see small clouds like white curds floating on top. Wait till they get bigger (if they don’t, add some more limejuice and stir) and the whey below gets less milky. This process takes few minutes, so wait at least five minutes. Switch off the heat and let it stand for few more minutes. Then pour the whole thing immediately into a clean muslin or cheese-cloth in a colander, over a sink. Gather the curds by twisting the cloth into a firm lump. The fresh paneer called chhana is ready.

Milk simmering thickened milk after 1 hour on the stove
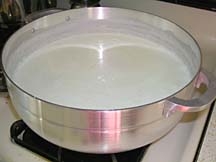
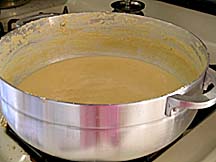
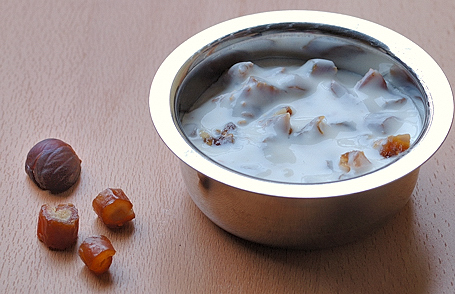
Simmering Milk ………….. Thickened milk (khoya) after 2 Simmering Hours

Khoya: In another pot, once the milk starts to boil and lower the heat and simmer, until the milk gets thick and is reduced to about one fourths of the original quantity. This is khoya. (While thickening, stir frequently. Care must be taken that milk does not stick to the bottom of the pot and burn/black.)

2. Add Sugar: To the khoya, add the freshly prepared chhana (paneer) and sugar. On low heat, cook, continuously mixing, until the khoya-chhana mixture thickens to a waterless-firm lump. This process takes about 45 minutes to one hour.

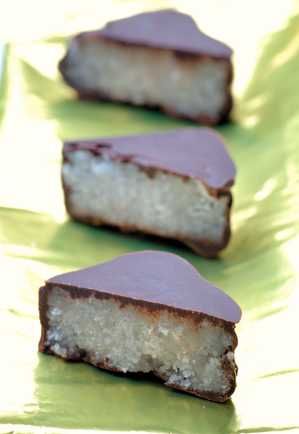
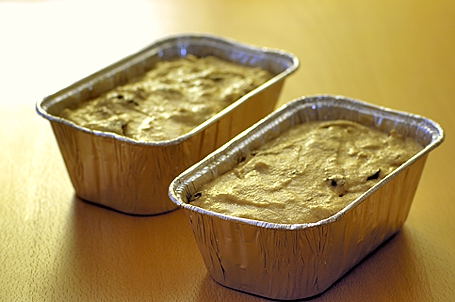
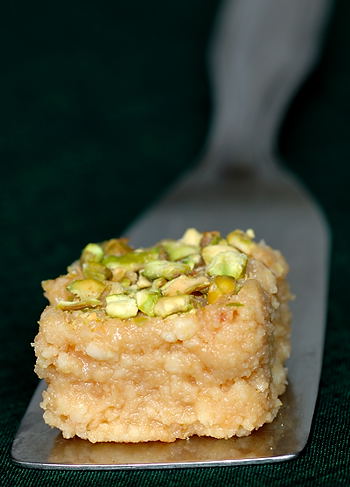
3. Decorate: Pour the firm mixture onto a plate. Level it evenly and allow to cool completely. The mixture thickens and firms up even more on cooling. With a knife, cut the cooled kalakand to squares or diamonds. Place the gold or silver foil on kalakand and sprinkle pistachios. Offer the jewel like decorated kalakand neivedyam to Bhagavan Krishna and enjoy the prasadam pieces with family and friends.

Kalakand stays fresh up to a week when refrigerated.
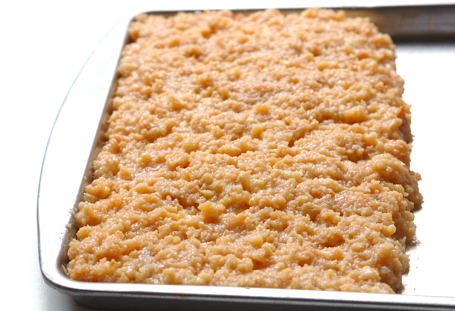
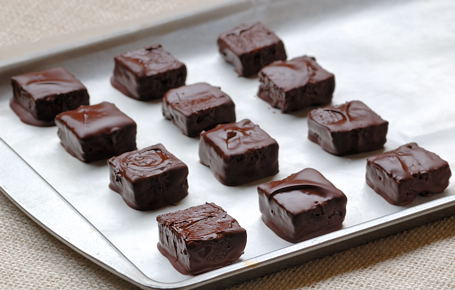
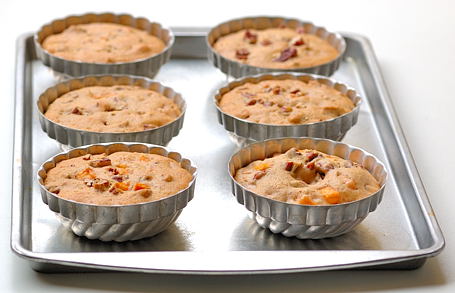

Kalakand Cooling


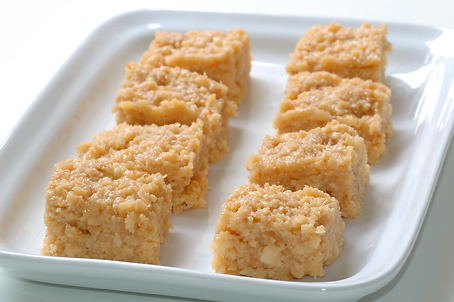
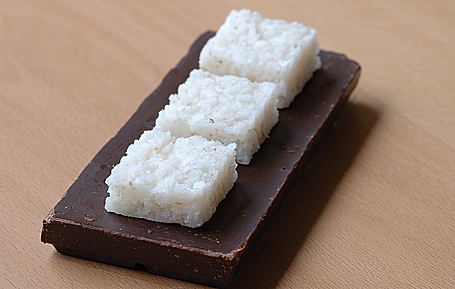
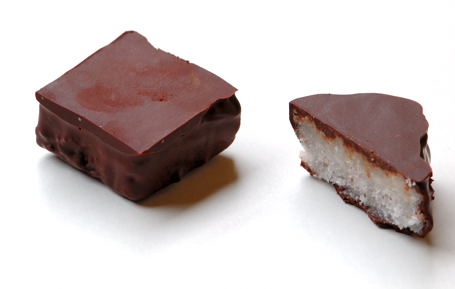
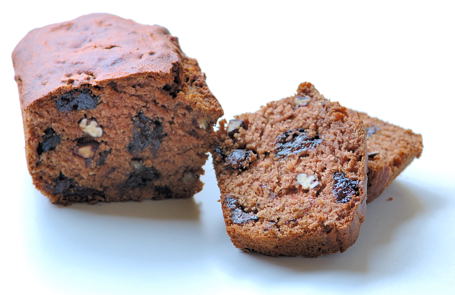
Kalakand Cut to Squares

Kalakand
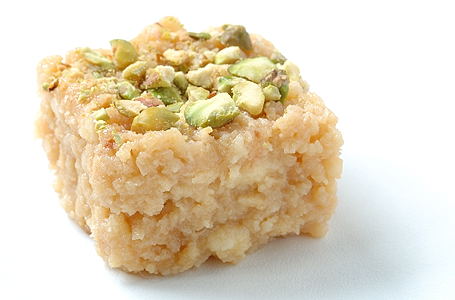
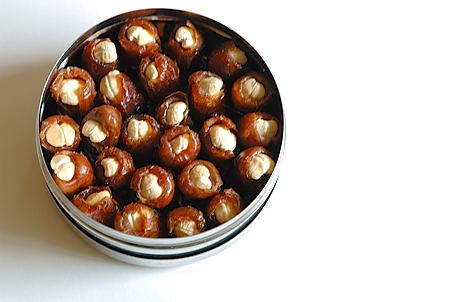
Kalakand Jeweled with Pistachios ~ for Indian Sweets 101

Posted by Indira©Copyrighted in Indian Sweets 101,Milk,Mitai,Naivedyam(Festival Sweets),Paneer,Pistachios (Wednesday September 5, 2007 at 3:42 pm- permalink)
Comments (64)

The New Home of Mahanandi: www.themahanandi.org

Homemade Rice Milk (Horchata)

Homemade Rice Milk
Homemade Rice Milk

Simple, inexpensive and adaptable to many flavors, rice milk is like glacial water. Thick, creamy and sweet. My recipe is loosely based on the Horchata that they serve at mom and pop style Mexican restaurants. Rice and almonds ground together and I flavored the milk with cardamom and jaggery. This is my first try and we both, Vijay and I, liked the result very much. Here is how I prepared it:

Ingredient list:
(Fills 4 small glasses)

3/4 cup – brown basmati rice
1/3 cup – almonds
6 cardamom pods- seeds coarsely crushed
6 cups – water
1/4 cup – jaggery (or sugar)

Wet grinder or blender


Brown Basmati Rice and Almonds

1: Soak almonds in warm water for about 30 minutes and then peel the skins.
Grind rice to fine, using a blender or spice grinder, until a semolina like texture is achieved.

Pulverized Brown Basmati Rice and Almonds without skins

2: Combine the rice powder, almonds and cardamom. Add about 4 cups of water and mix. Keep the mixture covered overnight.

Rice, Almonds and Cardamom covered with water for overnight soak Rice, Almonds and Cardamom covered with water for about 12 hours
Rice, Almonds and Cardamom ~ Before and After Overnight Soak

3: Next morning, place the mixture and jaggery in a stone grinder or blender. Gradually adding two cups of water, blend to smooth. Pour the rice milk through cheesecloth or filter into a bowl. Gently squeezing/stirring, extract the milk. Refrigerate the rice milk for about 15 minutes. Serve and enjoy.

If you wish, add lemon or orange juice and bananas to the milk and blend to make a great tasting rice milk smoothie.

Horchata, Rice milk for JFI:Rice Food blog event
Refreshing Rice Milk ~ for JFI: Rice, hosted by Sharmi of Neivedyam

Kitchen Notes:
The idea here is to use unpolished, unmilled rice. If you think for a minute, it’s easy to see that nutrient-rich brown rice makes a great tasting milk than the one prepared with polished, white rice. And, brown rice goodness and basmati’s sweetness make brown basmati, a perfect choice to prepare rice milk.

Recipe idea for leftover rice-almond sediment: Vennai Puttu (Sweet from Tamilnadu, India)

Posted by Indira©Copyrighted in Almonds,Biyyamu (Rice),Brown Basmati,Jihva For Ingredients (Saturday September 1, 2007 at 9:42 pm- permalink)
Comments (29)

The New Home of Mahanandi: www.themahanandi.org

Gasagasalu ~ Bendakaaya

Okra ~ Poppy Seed Curry:

When people think of Andhra kuralu (curries), they think of chana dal, chilli and coconut podi flavored ones. Although these are very commonly added to spice-up the vegetables, in our homes in Nandyala, Kurnool regions, along with peanuts and sesame, poppy seeds also make frequent appearance. Alone or together with coconut, both in dry style curries like the one I prepared today with okra and in sauce form like the one blogged here.

I realize that poppy seeds are not a familiar ingredient to many of you fellow Bharatiya. Their creamy-nut like flavor is really worth getting to know. You won’t regret trying, I assure you.

Poppy Seeds (Khus Khus, Gasagasalu)Poppy Seed PowderOkra (Bendakaya, Bendi, Ladies Fingers)

Recipe:

20 young and fresh looking okra (Bendakaya, Bendi)
3 tablespoons poppy seeds (Gasagasalu, Khus Khus)
3 dried red chillies – Indian variety
Salt and turmeric – to taste or ½ teaspoon each
Popu or tadka: 1 tablespoon peanut oil,
Pinch each – cumin, mustard seeds and 6 curry leaves

1 Trim the ends and cut the okra to quarter to half inch wide rounds. For a gummy free okra experience, follow the tips outlined here.

2 Roast poppy seeds in a dry, hot iron skillet for about 3 minutes, until they just start to color and release their aromas. Add dried red chillies and a pinch of salt and pound or blend all the ingredients together. Keep working until a nice, moist paste is formed. I usually use a spice grinder or Sumeet small jar for this purpose.

3 In a wide skillet, heat a tablespoon of oil. Add and toast the tadka ingredients first and then add the okra pieces. Mix once and fry the pieces, very rarely stirring, until they are free from moisture. A well seasoned cast-iron skillet charms the okra to a beautiful crispiness. If you have one, use it for this recipe. When okra pieces transform from clinging kids to leave me alone type teenagers, it’s time to introduce the adulthood delights with spices. Add the poppy seed powder, turmeric and salt. Mix gently and saute for few more minutes.

Serve the curry hot with rotis/chapatis or with rice and dal. Okra-poppy seed curry makes a great tasting side dish.

Okra-Poppy Seed Curry
Okra-Poppy Seed Curry with Ragi Roti and Olive Chutney ~ Meal Today

Recipe Source: Amma, Nandyala
Poppy Seed Based Recipes from Archives:
Brinjal-Potato Curry ~ on Oct 25th, 05
Banana Pepper-Baby Potatoes in Poppy Seed Sauce ~ on April 21st, 06
Moong Dal Payasam ~ on June 9th, 06
Ridgegourd (Turai/Beerakaya) in Poppy Seed Sauce ~ on May 22nd, 07
Ratatouille:India Inspired ~ on July 10th, 07

Posted by Indira©Copyrighted in Amma & Authentic Andhra,Benda Kaaya(Okra),Poppy Seeds (Tuesday August 28, 2007 at 9:45 pm- permalink)
Comments (20)

The New Home of Mahanandi: www.themahanandi.org

Coconut for Pooja

Coconut for Pooja
Pooja Coconut

The festival season officially will begin tomorrow for us. Last year in moving hungama, I totally missed the pooja, but this year I have planned to celebrate all festivals.

For Varalakshmi vratham:

Shopping – done
House cleaning – done
Pooja mandir decoration – done

Can’t wait for tomorrow.

Varalakshmi Vratha Shubhakankshalu!
వరలక్ష్మి పూజ శుభాకాంక్షలు!

Posted by Indira©Copyrighted in Amma & Authentic Andhra,Coconut (Fresh),Indian Ingredients,Zen (Personal) (Thursday August 23, 2007 at 10:10 pm- permalink)
Comments (13)

The New Home of Mahanandi: www.themahanandi.org

Kobbari Kaaram


Coconut sweetness
Curry leaves aroma
Chillies divine spiciness
Chana dal and Urad dal nutty crunchiness

That is kobbari kaaram. The traditional, famous spice powder from Andhra Pradesh, India. The secret to success of this spicy powder lies in slow-roasting of ingredients to seductive gold color. As you can see, there is a lot going on in this deceptively simple spicy powder.

Some recipes make us feel defeated while also stirring in the feelings of joy. Kobbari Kaaram is one such recipe for me. It has too much amma (mother) association and attached memories to it. While standing in front of the stove, waiting for the ingredients to reach that perfect gold color, the deep longing for gentle landscape of my childhood days was too much to feel. But once I finished the preparation and started to dip the warm gheelious rice-ravva upma rounds in kobbari kaaram, I rolled back to my routine content self and began to make happy cooking plans.


Oven-Dried Coconut, Toasted Curry Leaves, Roasted Dried Chillies, Chana dal and Urad dal

Recipe:
2 cups – thinly sliced dried coconut pieces
Quarter cup each – chana dal and urad dal
20 fresh curry leaves
15 dried red chillies – Indian variety
1 teaspoon – sea salt

Break a fresh coconut. Remove the coconut from shell. Thinly slice and spread the pieces on a baking pan and bake/ovendry to pale brown color at 200 F. Or simply sun-dry the coconut pieces to golden brown, like we used to do at Nandyala.
Place an iron skillet on stove-top, on medium heat. Once the skillet is hot, reduce the heat to low and one after another, add and roast chana dal, next urad dal and finally red chillies to pale brown color. Mix frequently and take care not to black the ingredients. Remove each one to a plate. In the end, coat the skillet with a teaspoon of peanut oil. When the oil is hot, add and toast curry leaves to gold color. Remove to a plate.

Let the ingredients come down to room temperature. Both texture-wise and taste-wise, this is important. Go sit down and wait.

When they are cool enough to touch, take the coconut pieces, roasted ingredients in a Sumeet style mixie jar. Add salt and grind to fine powder. Store the kobbari kaaram in a clean glass jar. Kobbari kaaram tastes great with all types of breakfast items like upma, pongal, dosa, idly and also on stir-fried vegetables like bell peppers, potatoes, brinjals, ridge gourd and okra etc. It’s a good thing to have in the kitchen.

Kitchen Notes:
I prefer either Ballari coconut or fresh coconut for this recipe because of their superior taste.
(From Telugu to English : Kobbari=coconut, Kaaram=Chilli)

Posted by Indira©Copyrighted in Amma & Authentic Andhra,Coconut (Dry),Dried Red Chillies,The Essentials (Monday August 13, 2007 at 5:57 pm- permalink)
Comments (22)

The New Home of Mahanandi: www.themahanandi.org

Ratatouille ~ India Inspired

Cheeseless and Cheerful, India Inspired Ratatouille
Cheeseless and Cheerful ~ India Inspired Ratatouille

When it comes to international cuisine, French cuisine ranks among our favorites. Then again, we are devotees of Tibetan, Thai, Mexican and Italian … well you get the picture. But back to French food, if we may. So delighted are we of the new Pixar animated movie, we decided to recreate one of our favorite French recipes at home. Cheeseless and cheerful ~ The Ratatouille.

Dictionary defines Ratatouille as “A vegetable stew, usually made with eggplant, tomatoes, zucchini, peppers, and onions, seasoned with herbs and garlic”. Ratatouille, Pulusu, Kurma or Subzi …different names in different languages but the underlying wisdom is the same. Isn’t it? When vibrant and fresh looking vegetables are available, the recipe served will make happy people happier and comforts those who aren’t. Really, we don’t have to do much in order to make a miraculous meal.

The India inspiration is addition of poppy seeds. When added to bobbling vegetables in the pot, the powdered poppy seeds will bring sweet aroma and subtly enriches the ratatouille in a typical Indian way.

Cheeseless and Cheerful, India Inspired Ratatouille
Farm Fresh Vegetables from Pike Place Market for Ratatouille ~ Round Zucchinis, Red and Green Capsicum, Shallots, Purple Garlic, Baby Carrots, Fresh Peas, Tomatoes & Green Brinjals (Total Cost $8).

Recipe:
1 teaspoon peanut oil
¼ tsp each – cumin, mustard seeds and 6 curry leaves
4 garlic cloves and 2 shallots – finely chopped
6 each – tomatoes, brinjals, carrots & 2 each – zucchinis, capsicums ~ cut to chunks
Half cup each – freshly shelled peas and finely chopped coriander leaves
Quarter cup poppy seeds – powdered fine in a spice grinder
¼ tsp red chilli powder, salt and turmeric or to taste
**************
In a big saucepan, heat the oil until a curry leaf tossed in it sizzles. Lower the heat to medium. Add the curry leaves and toast to pale brown. Toss in cumin, mustard seeds. When seeds start to jump, add the garlic and shallots. Stir fry few minutes. Add the remaining vegetables and peas. Cook, covered for about ten minutes. The vegetables start to get tender and you will see lot of water in the pot. At this stage stir in poppy seed paste, chilli powder, salt and turmeric. Sprinkle coriander leaves, mix and simmer another ten minutes, until the sauce becomes thick but pourable.
Serve warm with rice/chapati/bread or pasta.

Posted by Indira©Copyrighted in Bell Pepper,Poppy Seeds,Vankaya (Brinjal),Zucchini (Tuesday July 10, 2007 at 9:06 pm- permalink)
Comments (16)

The New Home of Mahanandi: www.themahanandi.org

« Next PagePrevious Page »