Mahanandi

Living in Consciousness ~ Indi(r)a’s Food and Garden Weblog

Sunnundalu(Urad Dal Laddu)~Indian Sweets 101

Sunniundalu

When Sailaja of Sailu’s Food selected dals to feature this month’s Jihva For Ingredients, I was ecstatic. The one and only ingredient that truly represents India is the variety of dals, in my opinion. There are rice states and there are wheat states, but common to all 28 states in India are dals. Each state has dazzling array of dal dishes both sweet and savory. Menus always include dal dishes for everyday, for celebrations and as well as for festivals. Even in a foreign land, our meals always would include dals in one way or other. It’s not stretching the truth, when I say dal dishes are the true heart and soul food of India.

By the way, if you haven’t been to Sailaja’s blog already, please go visit now. She blogs from calm, coastal city of Vishakapatnam by the Bay of Bengal, from my home state Andhra Pradesh. Her recipes are visual delight and pure gold. Whenever I visit her blog, I feel happy to see her creations and also feel nostalgic about what I am missing being away from home.

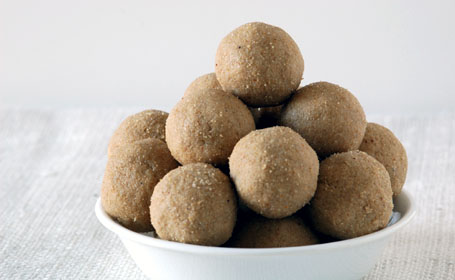
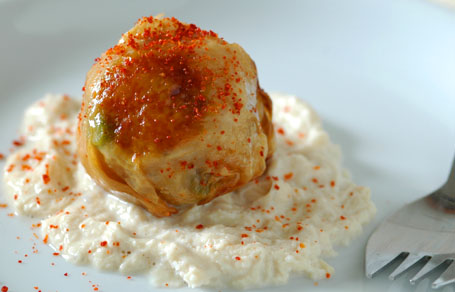
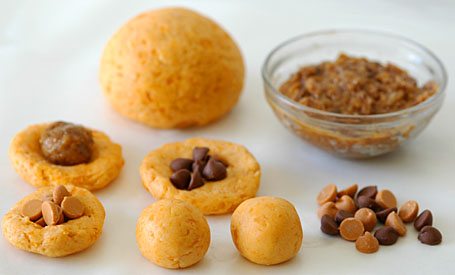
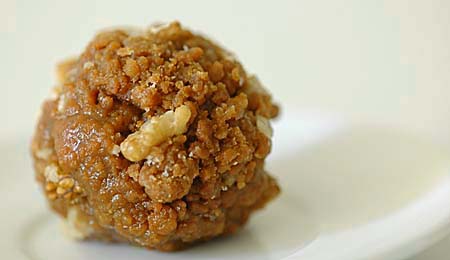
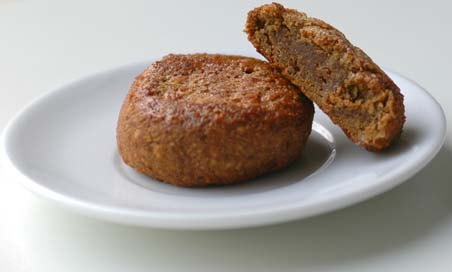
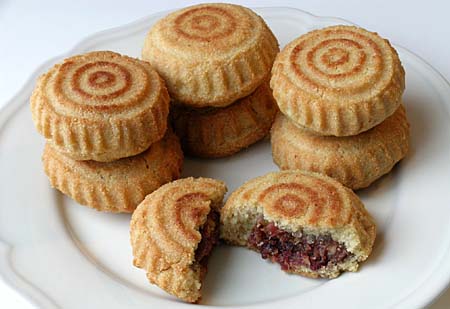
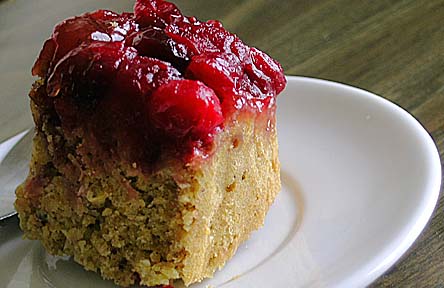
As an entry to JFI~Dals, I have prepared Sunniundalu, a traditional Andhra sweet. Roasted urad dal is ground with sugar into super fine sand like powder, mixed with pure ghee, and the mixture is shaped into round balls. This sweet is much beloved because of its unique taste and nutritional value. These are often prepared for special occasions like baby showers (srimantham) etc., I am so happy that I am able to recreate this favorite sweet of mine for JFI, an event created to celebrate the natural ingredients.

Recipe:
(for 15 medium-sized laddus)

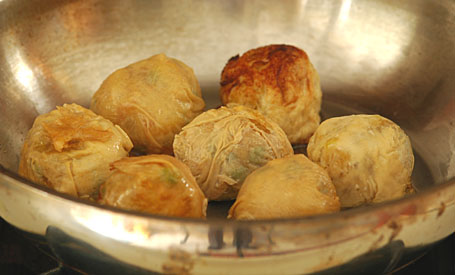
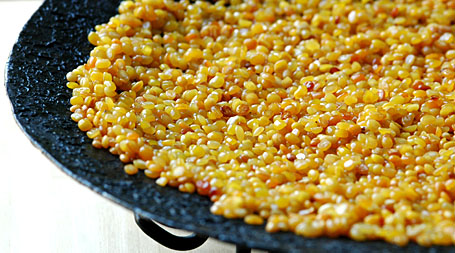
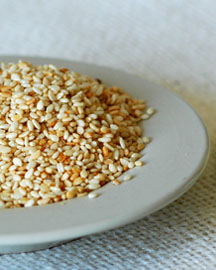
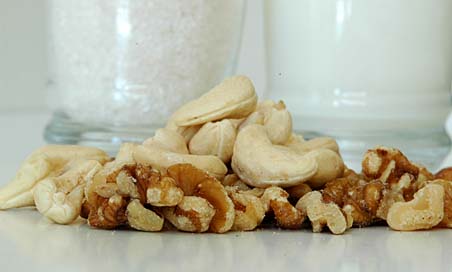
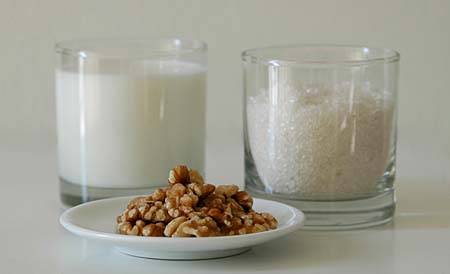
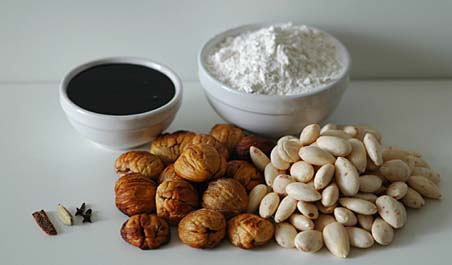
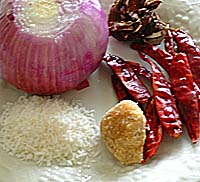
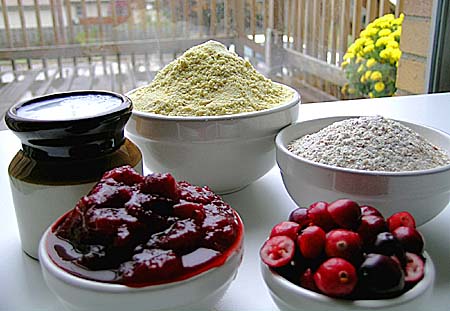
3 cups of whole urad dal – roasted to golden color slowly and on low heat, continuously stirring in a big iron skillet
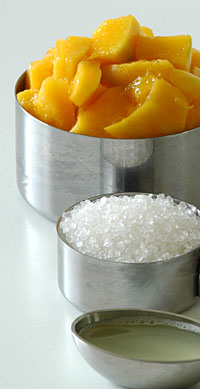
1½ cups of sugar
1 cup of melted ghee at room temperature
For grinding – esirayyi (grain mill) or Food processor
How this sweet tastes, 50 percent, depends on grinding method. Old world stone grain-grinder is the traditional method of choice. High powered, sharp bladed, food processor comes close. Whatever machine/method you use, the end product must be like fine sand.

Whole urad dal - Roasted to light gold color
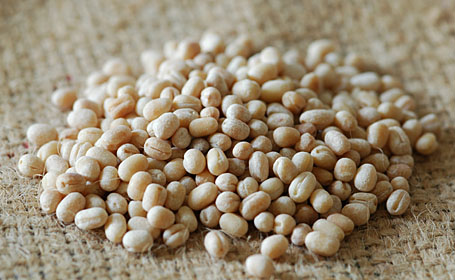
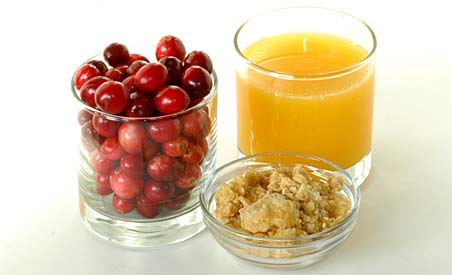
Whole urad dal – Roasted to light gold color

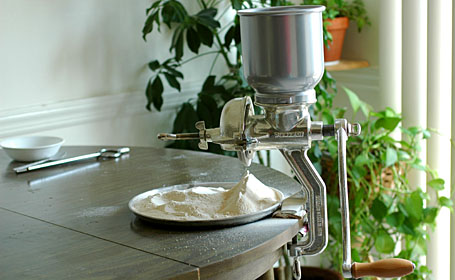
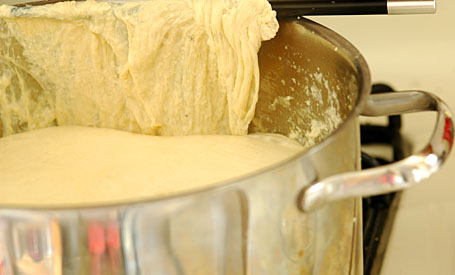
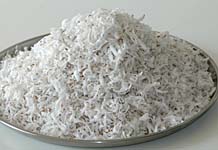
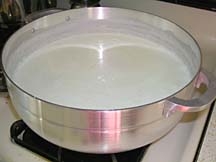
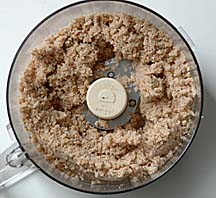
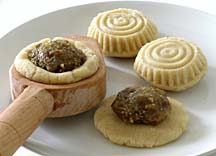
Grinding urad dal and sugar to superfine sand like powder using a grain mill

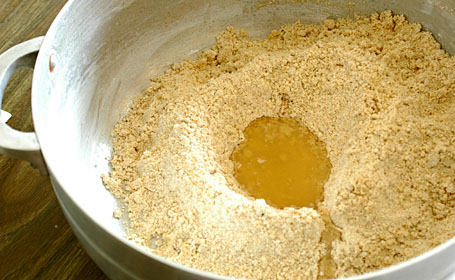
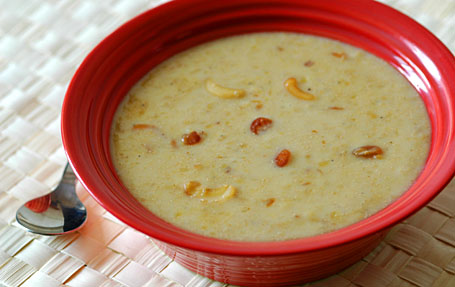
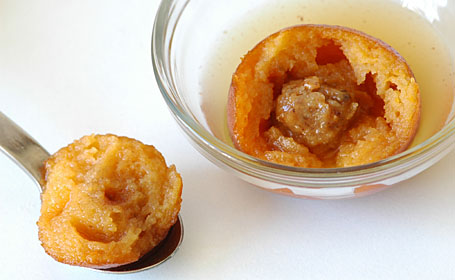
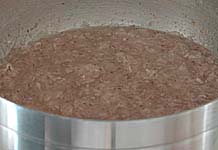
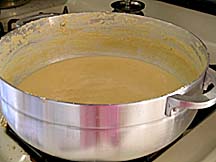
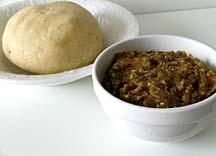
Adding melted ghee to the urad dal-sugar powder

Urad dal-sugar powder and ghee mixture being made into laddus
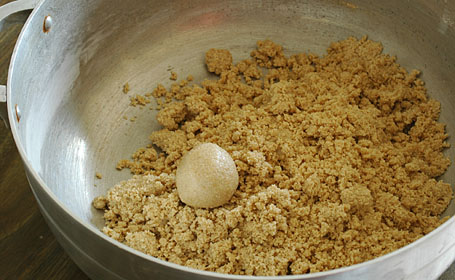
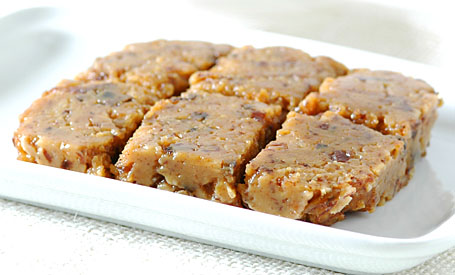
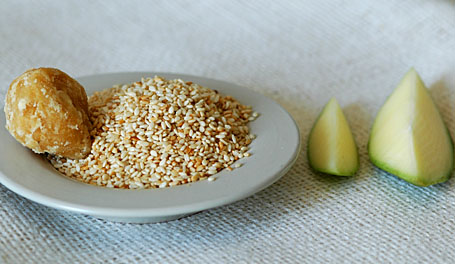
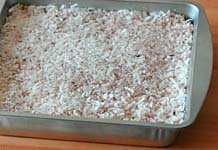
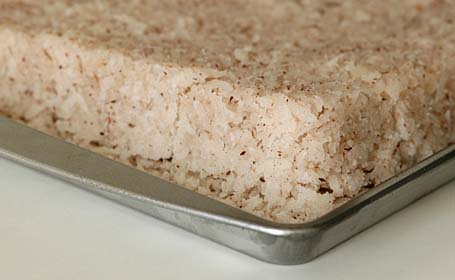
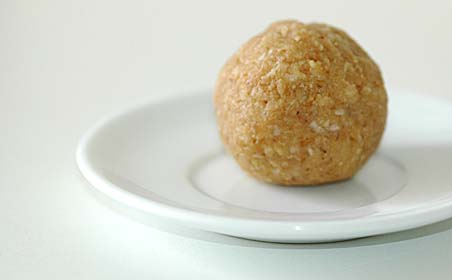
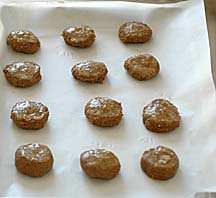
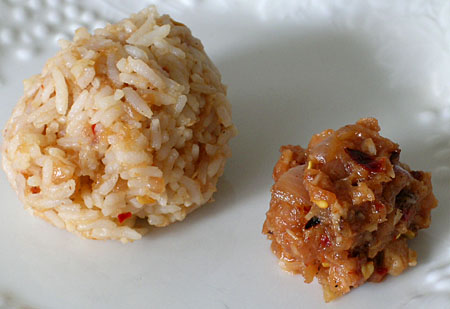
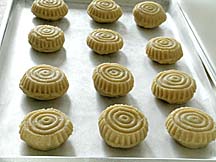
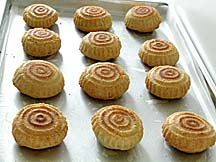
Urad dal-sugar powder and ghee mixture being made into laddus.

Sunnundalu
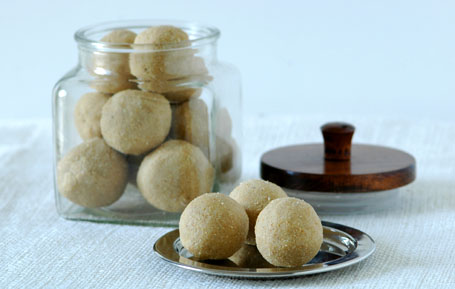
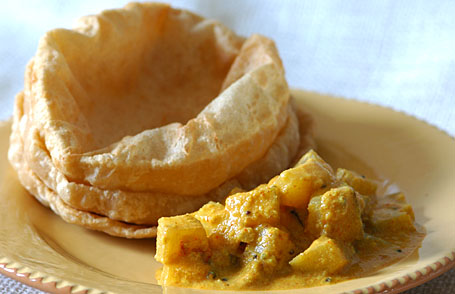
Indian Sweets 101 ~ Sunnundalu for JFI-Dals

Many thanks to Sailaja for hosting this month’s Jihva For Ingredients. I am sure the roundup of this event is going to be spectacular. The entries that I have seen so far – Munthirikkotthu (Sweet Moong Dal Balls), Dal Podi Sushi Roll (Indianized Sushi roll), Mid-Eastern Mujadarah (rice-lentil dish) and Azuki paste ravioli in caramel sauce make this obvious. Have a fun and happy dal day on this July 4th weekend, everyone!

Notes:
Grain mill brand Name: PORKERT’s Kitchen Grinding Mill, Type 150
Purchased at a clearance sale from Tuesday Morning.
Sailu’s Sunnundalu – Link

Posted by Indira©Copyrighted in Amma & Authentic Andhra,Ghee,Indian Sweets 101,Jihva For Ingredients,Mitai,Sugar,Urad Dal (Washed) (Saturday July 1, 2006 at 12:02 am- permalink)
Comments (53)

The New Home of Mahanandi: www.themahanandi.org

Soymilk Skin (Fresh Yuba) ~ Savory & Sweet


Fresh Soymilk Skin (Fresh Yuba, Uba, Bean Curd Skin, Fuzhu, Foo Pi)

Few months ago, after much hesitation I dared and prepared soy milk at home. The milk was alright, but what I liked most was the skins that would form while boiling soymilk. Do you remember from India, when you boil cows/buffalo’s milk, a thick layer of skin would form on top of boiled milk. You can just lift the layer and eat – Milk meegada or malai, do you remember the taste? Mildly sweet and irresistible because of limited amount. Same thing here with soymilk.

Soymilk skins are much thicker, almost like samosa/wonton wraps. They taste sweet and have a distinct soy smell. What I gathered from the web is that Japanese call this soymilk skin “Yuba” and they are an expensive delicacy. Famously and religiously prepared by Buddhist Monks and used in several Buddhist recipes for its protein richness.

I wanted to try an Indianised yuba recipes and prepared two entries with soymilk skins. A savory and a sweet – Yuba:Potato Curry Rounds and Soymilk Halwa. As entries to IMBB+SHF ~ Soy, hosted by Reid of Ono Kine Grindz. Started the whole process first by preparing fresh soymilk. And then boiled the milk for about an hour. Constantly picking up the milk skins with a chopstick. I wrapped these milk skins around the potato curry and sauteed them for few minutes. With leftover soymilk skins and soymilk, I prepared halwa by adding sugar, finely chopped dates and freshly grated coconut. Simmered the whole thing until it came together like pala kova. Removed to a box and kept it in the freezer to make the halwa little bit firm.

Both the yuba-potato rounds and soymilk halwa tasted superb. Time consuming but worth my effort and I am glad that I tried this ancient classic Buddhist delicacy.

Here is the whole process in images. Enjoy!


Boiling homemade soymilk to pickup soymilk skins (Yuba, Milk Meegada)


Wrapping Potato curry in soymilk skins (Yuba, Milk Meegada)


Sauteing the Soymilk skin (yuba) wrapped potato curry rounds on low heat


Golden colored yuba-potato curry rounds – in closeup


Yuba-Potato Curry Round in fresh soymilk skin (soy paala meegada) with red chilli-garlic powder as garnish


Soymilk Halwa with dates and fresh coconut


More about YubaHere and from Egullet
Yuba making – in images
Tags: +

Posted by Indira©Copyrighted in Dates (kharjuram),Potato,Soy (Tofu, Yuba),Sugar (Friday June 23, 2006 at 9:33 am- permalink)
Comments (49)

The New Home of Mahanandi: www.themahanandi.org

Moong Dal Payasam (Pesara Pappu Payasam)

A Cup of Moong dal Payasam
A Cup of Moong dal Payasam for Indian Sweets~101

If I have to choose between a cup of payasam and a slice of cake, I’d always go for the cup. Here, mothers prepare cakes lovingly; back in India, payasams are the norm. Every Saturday my mother would prepare payasam for puja naivedyam. I believe she prepared payasam mainly because of us, four little darlings:), who would come home from school hungry for something sweet. We had half-day school on Saturdays and afternoon meals at my mother’s home always included a type of payasam. Creamy rich with full of cashews and golden raisins, it was like spoonful of heaven on a warm afternoon.

Together between my mom and mother-in-law, there are recipes for at least a dozen different payasams. Who would really need a cook book when you have this type of rich resource right a phone call away? Because they all follow a basic method, it’s not that difficult to remember the procedure. Moong dal payasam is one such easy recipe I picked up from the family.

Moong dal is cooked in sweetened and thickened, rich poppy seed milk. Light golden hue, incredible, inviting aroma and delight to the senses – this is how I would describe this payasam.


Roasted in Ghee – Yellow Moong Dal

Recipe:

Moong dal, yellow (pesara pappu) – 1 cup
Sugar – 1 cup
Milk – 5 cups
Poppy seeds (Khus-khus, gasa gasalu) – ¼ cup
(Soaked in ½ cup of warm water for at least half an hour, to soften them)
Cashews and Golden Raisins, each – ¼ cup
Cardamom (Elachi, aluka) – 6
Ghee (neyyi) – 2 tablespoons

Prep Work:

1 In an iron skillet or tava, heat a teaspoon of ghee on medium heat. Add and roast, yellow moong dal until the color changes from yellow to light red and releases the wonderful fragrance. Remove them to a plate. Aromatherapy starts with this first step.

2 In the same iron skillet or tava, heat a tablespoon of ghee on medium heat. When it is hot, add and toast first golden raisins and then cashews. Golden Raisins puff up like little gold balloons and cashews turn from creamy white to light gold. Take care not to burn. Remove them to a plate.

3 Powder cardamom seeds to smooth powder in a mortar using the pestle or in a spice grinder.

Toasted in Ghee - Cashews and Golden Raisins
Toasted in Ghee – Cashews and Golden Raisins

In a pressure cooker, take roasted moong dal, sugar, milk and soaked poppy seeds along with the water it’s soaked in. Mix and close the lid. Pressure cook until two whistles. Once all the valve pressure is released, remove the lid and with a wood-masher or immersion blender lightly mash the dal. Pressure-cooking is my method; I follow it mainly for the convenience of not stirring and for the speed. In actual recipe, they would take all the ingredients in a wide, thick-bottomed vessel and cook until the dal reaches fall-apart stage. If you don’t have a pressure cooker at home, then follow the second method. It may take little bit more time, but the end result will be worth the trouble, I promise.

Add the toasted cashews and golden raisins along with the ghee they toasted in. Also stir in the cardamom powder to the cooked payasam. Have a taste and add sugar and milk, if needed. Simmer the payasam on medium-low heat about 20 to 30 minutes, until it reaches thick, creamy consistency. Serve warm or cold.


A Cup of Moong Dal Payasam with Poppy Seeds, Cashews and Golden Raisins

Poppy seeds can block the cooker nozzle and that may create a mess, if they not soaked in warm water beforehand. Soak poppy seeds in water first, if you are to cook this in a pressure cooker.
Chana Dal Payasam – Link

Posted by Indira©Copyrighted in Amma & Authentic Andhra,Indian Sweets 101,Milk,Moong Dal (Washed),Naivedyam(Festival Sweets),Poppy Seeds,Sugar (Friday June 9, 2006 at 8:31 pm- permalink)
Comments (45)

The New Home of Mahanandi: www.themahanandi.org

Ripe Plantain Dessert (Pazham Puzhungiyathu)

Steam-Cooked Ripe Plantain
Steam-Cooking the Ripe Plantain

Vijay loves all things plantain; so much so, he even wrote a guest post on homemade plantain chips on my blog few months ago. When I saw the recipe for sweet plantain dessert, at LG’s Ginger and Mango, I knew Vijay is going to like it.

Dessert with sweet plantains usually involves deep-frying, but this traditional Kerala recipe was different and healthy because it was steam cooked. I tried it with one ripe plantain and we both liked the end result. Easy dessert and they were like small venna(butter) biscuits, the kind that would melt in mouth but with gooey, banana sweetness.


Steam Cooked Ripe Plantain Piece ~ Removing the Skin

Recipe:
I ripe plantain
Ghee and sugar – half tablespoon each or to taste.

Wash and cut plantains into 4 or 5 pieces crosswise. Steam-cook them for about 15 to 20 minutes, until they soften. The outer skin will turn black and insides will turn soft. Remove the steam basket from steamer and let them cool. Peel the skin, cut each piece into 3 or 4 thin rounds.

Take melted ghee and sugar in a small cup. Stir until sugar melts in ghee. Lightly dip each plantain round in ghee-sugar mix, remove. Or sprinkle some sugar on top of these rounds and serve. Good treat, I think particularly for toddlers.

Semolina Upma with Peanut chutney and Sugar Coated Ripe Plantain Rounds
Sugar Coated Ripe Plantain Rounds and Semolina Upma with Peanut chutney ~ Our Simple Meal Today

Recipe: LG’s Ginger and Mango – Traditional Kerala Recipe

Posted by Indira©Copyrighted in Arati Kaaya (Plantain),Ghee,Sugar (Monday June 5, 2006 at 2:33 pm- permalink)
Comments (13)

The New Home of Mahanandi: www.themahanandi.org

Mango~Sesame Curry (Mamidi~nuvvula kura)

Before moving to US, we lived for about 2 years in Hyderabad, India. The capital city of my home state, Andhra Pradesh, lately known as Hi-Tech city, Hyderabad, has its own unique cuisine. A mishmash, a culinary amalgam influenced by people who migrated to this city from small villages, towns all over Andhra and from out of states on jobs, business and to work in political bureaucracy. Foodwise, you can get everything and anything there, almost:). Strong personalities and strong flavors are needed to survive in that city.

One such bold flavored recipe that I learned from a Hyderabad native, is this mango~sesame curry. Unripe mangoes are cooked in jaggery flavored sesame sauce. 3 strong flavors, unbeatable taste, perfect side dish for subtly bland naans/chapatis and puris.

Jaggery, Roasted Sesame Seeds, Unripe Mango
Jaggery, Roasted Sesame Seeds, Unripe Mango ~ Three Strong Flavors

Recipe:

2 green, unripe mangoes – peeled, seed removed and cubed into bite sized pieces
1 cup sesame seeds – lightly roasted and powdered
¼ cup of jaggery – powdered
1 teaspoon of each – red chilli powder, salt and turmeric
For popu or tadka:
1 teaspoon of peanut oil
½ teaspoon of each mustard seeds, cumin and few curry leaves.

1 Heat peanut oil in a saucepan over medium heat. Add and toast cumin, mustard seeds, curry leaves.

2 Add mango cubes to the pan, stir in sesame powder, jaggery, chilli powder, salt and turmeric. Add about 2 cups of water and mix thoroughly.

3 Cover with lid and cook on medium heat for about 15 to 20 minutes, until the mango pieces soften and the sesame sauce comes together into medium-thick mass. Have a taste and adjust the salt, sweet, spicy levels to your taste. Cook for another couple of minutes and turn off the heat.

Serve warm with chapatis/naans or with puris and enjoy this unique curry of zinging taste.

Mango sesame curry with puris
Mango-Sesame Curry with Puris

Posted by Indira©Copyrighted in Jaggery,Mamidikaya (Green Mango),Sesame Seeds (Monday May 22, 2006 at 6:20 pm- permalink)
Comments (19)

The New Home of Mahanandi: www.themahanandi.org

Mango Jam

For some, mangoes are exotic fruits. For me, mango jam is exotic. Cooking the ripe fruit with sugar until they are mush and set, may be an age old technique of fruit preserving, but I never did that with mangoes until now. As part of JFI-Mango Event on May 1st, Ripe Mango Cubes, Sugar and Lime Juice 
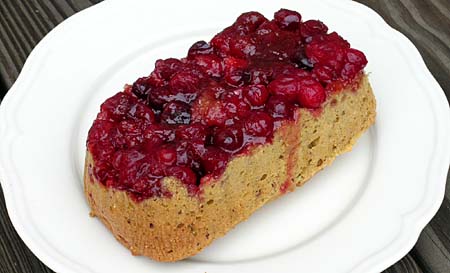
I’ve decided to try some new recipes and feature some of my old favorites with mangoes. This is one of the recipes that I selected to write about.
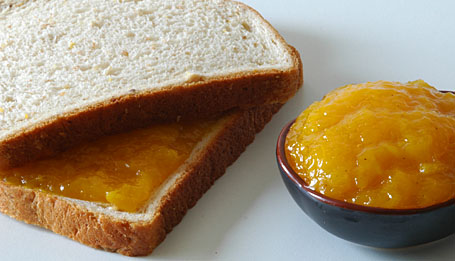
Who doesn’t love jam toast in the morning? It’s quick and easy. The type of breakfast many of us here, prefer on a weekday morning for that rush hour energy boost. But, often store-bought fruit preserves are loaded with more cheap corn syrup than the fruit. Preparing jam at home means controlling the sugar quantity that is added to the fruit to our liking.

My recipe for mango jam is simple. Pick ripe mangoes, peel and cut them into small cubes. Add little bit of limejuice to give that extra acidic edge and cook the fruit with sugar until it turns mushy and comes together like firm, yet moist solidity. Store it in a clean glass jar and refrigerate. Buy or bake bread and you don’t have to worry about “what’s for breakfast?” question, at least for few days.

Recipe:
(for about 1 cup of jam)

1 big, ripe mango
(Peeled and cut into small cubes – 1½ cup of cut fruit)
¼ cup of sugar
1 tablespoon of lime juice

Take them all in a clean pot. Cook on medium heat, stirring in-between. The sugar will melt and the fruit will break down. Within 15 to 20 minutes, The soggy, watery mass will come together into solid, moist lump, like halwa or kova and set. Turn off the heat. Let it cool completely and store in a clean jar.

One cup of mango jam lasted for 4 toasts for us. We couldn’t resist the quiveringly tender, rich yellow-sapphire like mango jam and consumed half of it even before cooling.

Mango Jam


Recipe Notes:
My version is low sugar preserve.
For sweet commercial type of jam taste – increase the above sugar quantity to half cup.
Mango jam sets easily because of pectin content in mangoes. But if you are planning to prepare this jam on a big scale, adding some commercial pectin might be helpful.

Posted by Indira©Copyrighted in Mango,Sugar (Tuesday April 25, 2006 at 1:45 pm- permalink)
Comments (37)

The New Home of Mahanandi: www.themahanandi.org

Sweet Potato Gulab Jamuns (Ranga Alur Puli)

Kova Gulab Jamuns with Sweet Potato

The recipe that was in my mind to be tried is Sury‘s sweet potato dessert or Ranga Alur Puli. The fabulous food blogger, Sury from Delhi, not only writes about food but also studies American English. She recently published her first book “Making Out in America” on American vernacular. Congratulations Sury!

Few weeks ago, she blogged this recipe in her blog. The name of this sweet, the way it was prepared and the traditional Bengali aspect, all captured my interest. When I read her recipe, I did imagine the taste and I couldn’t wait to give it a try. Finally today I prepared this delicious sweet.

I did change the recipe little bit. Instead of adding flour and sugar to sweet potato pulp, I mixed it with gulab jamun powder. Also in addition to traditional coconut-milk-sugar fudge filling, I added some chocolate chips and butterscotch chips, just to create variety. I’ve been preparing gulab jamuns in this way, so I applied the same idea here.

Steam-Cooked Sweet Potato
Steam-cooked sweet potato (yam)

Recipe:
(for 15 pieces)
For Dough
1 medium sized sweet potato (yam)
1 packet of gulab jamun powder (100g)
For Filling
½ cup of coconut fudge (coconut-milk-sugar halwa)
¼ cup of chocolate chips – plain and butterscotch
To Deep Fry
2 cups of peanut oil or ghee
For Sugar Syrup
1 cup sugar
2 cups of water
1 teaspoon of rose water
¼ teaspoon of powdered cardamom

Sweet potato-gulab jamun dough, coconut fudge, chocolate and butterscotch chips
Chocolate Chips, Coconut Fudge, Sweet Potato-Gulab Jamun Dough & Dough balls

Preparation:
1. Cook the whole sweet potato on steam until just tender. Remove the skin and mash the sweet potato to smooth paste.

2. Take gulab jamun powder in a vessel. Mix it with sweet potato paste. The moisture of sweet potato is enough to prepare a firm dough. After a rest period of 15 minutes or so, divide the dough into big marble sized rounds.

3. Make a dimple by pressing the dough ball with your thumb. Fill the dimple with a teaspoon of coconut halwa(fudge) or with chocolate chips. Cover the hole with dough from the sides; roll into smooth round ball. Prepare all the dough balls like this and keep them ready for deep-frying.

4. Meanwhile prepare sugar syrup. Take sugar and water in a big pot. Bring to a boil. Let simmer for few minutes (5 to 10 minutes maximum on medium heat). Have a taste and add more sugar if needed. This is just plain sugar syrup, do not thicken the syrup and do not cook it for longer period. Just before turning off the heat, stir in rose water and cardamom powder.

Deep-Frying the Jamuns
Deep Frying the Jamuns

5. Heat oil in a kadai or in a saucepan. Deep-fry the jamuns until golden on medium-low heat. One tip is, keep the heat medium and do not overheat the oil. Deep-fry the jamuns, slowly. The color changes from light gold to much deeper color gradually within 3 to 4 minutes. If the colour changes to brown immediately after dropping into oil, it is a signal that the oil is too hot. In that case, reduce the heat or turn off the heat for few minutes. You need to cook these slowly on moderate heat because the dough should get cooked evenly inside also.

6. Remove the jamuns and place them on a paper towel to dry off any oil that’s attached to them. Quickly and gently drop them into sugar syrup. Take care not to spill the oil into sugar syrup.

7. Keep them soaked in syrup for about 15 to 30 minutes. Jamuns will absorb the syrup and will increase in size a little bit. I would like to serve gulab jamuns cold, so usually, I keep them in the refrigerator for one hour before serving.

Sweet Potato Gulab Jamuns (Ranga Alur Puli) with coconut halwa filling
Sweet Potato Gulab Jamuns (Ranga Alur Puli) ~ For this week’s “Indian Sweets 101

They tasted great, just like I’ve imagined, particularly the coconut halwa filled ones (shown above) and the ones filled with butterscotch chips.

This is my contribution to “Blog Party – Bite Sized Desserts” hosted by dear Stephanie of Dispensing Happiness.

Posted by Indira©Copyrighted in Chocolate,Indian Sweets 101,Mitai,Sugar,Sweet Potato (Wednesday April 19, 2006 at 10:06 pm- permalink)
Comments (42)

The New Home of Mahanandi: www.themahanandi.org

Coconut Burfi (Kobbari Paakam, Kobbari Lauju)

Coconut Burfi

Sweet, flavorful and chewy, coconut burfi is one of my favorite sweets. Fresh coconut meat cooked in cardamom flavored sugar syrup – recipe is so simple, method is very easy and the taste is heavenly. We, in our family prepare it without adding milk in contrast to some other versions, where milk and ghee are also added along with fresh coconut to sugar syrup.

Last weekend, weather was so perfect and spring like. We felt like having some sweet. So we went to neighborhood Rulli Brothers grocery shop and purchased two coconuts, each for about 79 cents. Came home, prepared the sweet and enjoyed it. We still have some pieces of burfi left but the spring like weather – gayab ho gaya (disappeared). It’s snowing here today!

Grating the Coconut

Recipe:
(For 12 medium sized squares)

2 cups of fresh grated coconut
1½ cups of sugar (or 2 cups – your choice)
Half glass of water
2 cardamom pods, seeds finely powdered
A tray greased with ghee (for pouring the cooked mixture)

Freshly grated coconut, Indian sugar, Cardamom pods

Method:
In a big sturdy vessel take water and sugar. Keep the heat on medium-low allowing the sugar to melt completely to prepare the sugar syrup. Cook it until the sugar syrup reaches softball like consistency. To know the right consistency – do the cold water candy test. Take few tablespoons of water in a cup, add a drop of sugar syrup to water. If it holds its shape (softball) doesn’t dissolve into water then it’s at the right consistency.

Fresh Grated Coconut Plain sugar syrup
Fresh Grated Coconut ………………Sugar Syrup on the way to softball stage

Grated fresh coconut is added to sugar syrup Coconut Burfi cooling
Fresh coconut is added to the thickened sugar syrup…… Coconut burfi – pressed into a squarepan to cool

Add the grated coconut and cardamom powder to the sugar syrup. Keep the heat on medium and cook, stirring frequently to prevent the mixture from sticking to the pan. In 10 to 15 minutes, the mixture will be reduced to half, becomes very thick and comes away easily from the sides of pan – this is the signal to turnoff the heat. (At this stage, you’ve to be fast and alert, otherwise, the mixture will be overcooked and turns into dry sweetened coconut flakes – commercial kind of mixture.) Immediately pour this mixture into the greased tray. Level it evenly with a spatula, and cut into squares. Let cool.

To serve or store, reverse the tray onto a big plate, separate the squares and store them in an airtight container. Because it doesn’t have any milk products, this sweet can stay fresh up to two weeks.

Kitchen notes:
Authentic South Indian coconut burfi is prepared only with fresh grated coconut. Grating the coconut takes little bit effort but I think of it as an exercise, mainly upperarm workout.
Checkout this site for clear photo and video demonstration of sugarsyrup stages.

Tray of Coconut Burfi
Indian Sweets 101 – Celebrating Holi with Coconut Burfi

Recipe Source:Amma

Posted by Indira©Copyrighted in Amma & Authentic Andhra,Coconut (Fresh),Indian Sweets 101,Mitai,Sugar (Tuesday March 14, 2006 at 11:07 pm- permalink)
Comments (57)

The New Home of Mahanandi: www.themahanandi.org

Cashew~Walnut Laddu (Kaju-Akhrot Burfi)

When I invited my friends to celebrate Sankranthi festival, in addition to the traditional ‘sweet pongal’, I also prepared cashew walnut laddu. Low in sugar calories, high in nut energy! Cashews and walnuts are first roasted and powdered, then cooked in milk-sugar kova till they all came together into solid fudge like consistency. Cooling further solidifies the mixture and then small portions are taken and shaped into rounds -‘laddus‘ or cut into squares-‘burfis‘. I like the round shape, so I always go with round laddus. Very convenient to hold and eat, children particularly love laddus.

Cashews, Walnuts, Milk and Sugar in the Background

Recipe:

Half gallon- Whole milk
2 cups-sugar (3 cups if you like the laddus on the sweeter side)
1 cup – cashews
1 cup – walnuts

Preparation:

Milk and Sugar: In a thick bottomed big pot, bring milk to boil. Add sugar. Stirring occasionally, simmer the milk-sugar mixture until it gets thick and is reduced to about one fourths of the original quantity. It takes at least 45 minutes to one hour.:) Do this on medium heat. Avoid high heat and take care not to scald the milk.

Cashews and Walnuts: Meanwhile, lightly roast cashews and walnuts separately in an iron skillet. Let them cool down to room temperature. Separate 10 pieces from each and chop them into small pieces. With the remaining ones – make fine powder of them in a food processor/mixer.

Milk and sugar simmering thickened milk and sugar after 1 hour on the stove
Milk and sugar simmering………………..Thickened milk and sugar kova after one hour on the stove

Kova into Laddu: Add this fine powder to the thickened milk-sugar kova and cook for 15 minutes, stirring continuously, until the mixture is firm. Sprinkle chopped chunks of cashews and walnuts that were kept aside. Continue cooking for another 10 minutes until the mixture is almost crumbly and comes away easily from the sides of pan.

Take a spoonful of mixture and press it with your hands into a ball. If it holds shape, then mixture is ready for cooling. Turn off the heat. Spoon the mixture into a greased square or round pan. Level it with a spatula and let it cool for at least 4 to 5 hours. Cut into squares for burfis or take a spoonful of mixture, shape it with your hands into a round ball for laddus. Store the laddus in glass jar. They will stay fresh for upto one week.

(This recipe makes 15 medium sized laddus.)

Cashew-Walnut Laddu

One medium sized cashew-walnut laddu, my entry to ‘Sugar-Low Friday’ event hosted by lovely Sam of Beck & Posh.

By the time my friends left, I had only four laddus remaining out of 20. Two for me and two for Vijay, enough for us. This is how I do my ‘Sugar – Low’, by portion control. In my view, this is also one of the ways to lower the sugar consumption.

Tagged with:

Posted by Indira©Copyrighted in Cashews,Indian Sweets 101,Milk,Mitai,Sugar,Walnuts (Friday January 27, 2006 at 7:16 pm- permalink)
Comments (26)

The New Home of Mahanandi: www.themahanandi.org

Cranberry Jam

Cranberries and Orange

When I first made cranberry jam, I was pleasantly surprised at how good it turned out. One wintry day, on a whim, I cooked up cranberries with orange juice and added some jaggery – viola, a spectacularly delicious tartly, tangy and sweet jam in a beautiful shade of Burmese ruby.

Tart cranberries and tangy oranges, in brilliant red and orange colors, dazzled me with promises of healthy glow and much needed Vitamin C. Who would think that, these two beautiful looking tarts taste that good when combined. Adding another tartly, sweet ingredient – jaggery, completed and complemented those two – making the end result, a tasty jam/preserve to enjoy.

Native Indian and Indian ingredients for a western style breakfast of bread and jam – cost is low, recipe is easy, preparation time minimal. Give it a try, if you haven’t already.

Cranberries, Orange Juice and Powdered Jaggery

I usually make this jam, in small quantity for a week’s worth, but never in big batches like the seasoned jam makers do. So I’m not familiar with the sealing techniques for long-term storage etc., can’t offer any tips about that. My jam never lasted more than a week.

Recipe:

1 bag (12 ounces) of fresh cranberries
2 cups of freshly squeezed orange juice (4 to 6 oranges)
¾ cup of powdered jaggery (½ cup to 1 cup, how sweet your choice, I used ¾ cup)

Rinse the cranberries thoroughly. Pick out the bad ones, that are soft, shriveled or discolored. In a large pot, take orange juice and jaggery. Cook them until jaggery melts completely. When the juice starts to thicken, stir in the cranberries. Cook for about 15 to 20 minutes on medium heat, stirring in between. Cranberries first pop, then break down completely and turn into thick mush. Turn off the heat when it reaches jam like consistency, it further thickens on cooling. Store in a clean, dry jar.

Cranberry Jam on a Slice of Whole Wheat Bread
Cranberry jam on a toasted slice of whole wheat bread ~ our breakfast this week

Posted by Indira©Copyrighted in Citrus Family,Cranberries,Jaggery (Tuesday January 24, 2006 at 2:59 pm- permalink)
Comments (57)

The New Home of Mahanandi: www.themahanandi.org

Walnut Burfi (Akhrot Laddu)

Vijay got a good grade in this semester. He is studying for his master’s degree in software engineering, part time at Carnegie Mellon University. And the walnut burfi is for celebration. The combination of walnuts and milk-sugar is a classic. The resulting walnut burfi or laddu is a rare indulgence for us.

Milk, Sugar and Toasted Walnuts

Recipe:
(makes about 6 medium sized laddus)

2 cups of walnuts (Akhrots)
2 cups of whole milk
3/4 cup of sugar

Lightly roast walnuts in an iron skillet and let them cool down. Keep one fistful of nuts aside and grind the remaining walnuts into powder.

Boil milk and sugar until they come together into very thick mass almost like the final stages of pala kova. It takes about 30 minutes. At this stage, stir in powdered walnuts. Mix thoroughly and keep stirring until, the walnut-kova mixture leaves the sides of the pan and comes together into one big lump. Takes about 10 to 15 minutes. Sprinkle the whole walnuts and mix once and remove the mixture into a pan. Allow it to cool and make small laddus with it or press the whole mixture evenly and tightly in a greased pan to cut squares.

Walnut Burfi (Akhrot Laddu)
Walnut burfi (Akhrot laddu) – Old fashioned

Posted by Indira©Copyrighted in Indian Sweets 101,Milk,Mitai,Sugar,Walnuts (Monday December 26, 2005 at 1:07 am- permalink)
Comments (12)

The New Home of Mahanandi: www.themahanandi.org

Chestnut-Almond Cookies

For Indian recipes, I can’t and won’t break the tradition and I will always follow the elder’s footsteps in preparing food. I believe the ingredients they use for a particular recipe have been chosen for a reason, and the steps they followed to make a recipe work are methodic, implicitly giving a perfect taste and nutritional boost.

But when it comes to western food, since I ‘m not used to making these traditionally, I feel very free to experiment. Also I believe most of ‘traditional’ recipes that I see in magazines and TV shows are the stuff that they makeup as they go, to promote some food ingredients or products following the corporate orders. When food ingredients have their own associations and mega budgets to promote and influence peoples opinion in their favor with advertisement blitzes, I am not sure how traditional most of these recipes are, though they proclaim otherwise.

Chestnut cookies first posted by Mine of Teatime then submitted to cookie swap event by Ulrike of Kuchenlatein, captivated me mainly because they sounded real authentic, traditional and old world. When I saw the beautiful photographs, I so wanted to try these cookies. I changed few things here and there, going all the way to make them rustic pure. Use of molasses in place of powdered sugar, turned the cookies golden brown instead of creamy white. I tried decorating cookies differently, but it didn’t come out as I expected. Except for that one gaffe, the cookies turned out to be mouthfuls of wholesome goodness. Thanks Mine and Ulrike for sharing this wonderful, traditional recipe.

Molasses, All purpose flour, Almonds, Roasted Chestnuts, Clove, Cardamom, Cinnamon

Recipe:

2 cups of almonds, soaked in water overnight, then skins removed
15 chestnuts, roasted, then shells removed
1 cup of all purpose flour
11/2 cups of molasses
(Molasses is an acquired taste, difficult to like. Sugar/honey works fine too)
2 egg whites
1 inch cinnamon, 1 clove, and seeds from 1 cardamom pod – finely powdered together

Powdering Almonds and Chestnuts in a Food Processor Almond-Chestnut cookies all ready to go into oven
Powdering Almonds and Chestnuts in a Food Processor…Almond-Chestnut cookie dough, ready to be baked

Preparation:

Powder the almonds and roasted chestnuts in a food processor to a smooth powder. Make it easy on the motor and do it in batches. In a vessel, take egg whites and beat them until they turn to foamy white. To these egg whites, add molasses and cardamom-cinnamon-clove powder. Mix and stir in all purpose flour and almond-chestnut powder. Mix them thoroughly. Shape the dough into a log, wrap it in a wax paper and store it in the freezer, until the cookie dough firms up. I had to keep it overnight in the freezer.

Preheat the oven to 350° F. Remove the hardened cookie dough from the freezer, cut it into 1 to 2 inch rounds crosswise. Place them neatly in rows on a greased or parchment paper lined baking tray. I egg washed the tops and sprinkled some brown sugar on top of each cookie, my idea of decoration, not so successful, I have to say.:) Place the baking tray in preheated oven and bake them at 350°F for about 20 minutes.

Believe it or not, they tasted like, do you know the South Indian sweet “Ariselu“, exactly like that. Roasted chestnuts and molasses gave a special and characteristic taste to these cookies, a first for us and we liked them very much.

chestnut cookies
Chestnut-Almond Cookies

Posted by Indira©Copyrighted in All-Purpose Flour(Maida),Almonds,Chestnuts (Marrons),Molasses (Tuesday December 13, 2005 at 7:16 pm- permalink)
Comments (12)

The New Home of Mahanandi: www.themahanandi.org

Onion Chutney (Ulli Gadda Pacchadi)

This onion chutney is very popular in North Karnataka and also in our Raayala Seema region. Rural in origin and a favorite of hard working people and farmers, this chunky, saucy, sort-of-sweet, sort-of-spicy chutney tastes terrific with rotis, both wheat and jowar and also with rice.

Recipe:
(for two, for one serving)

1 tablespoon peanut oil
1 big red onion – cut to big chunks
5 dried red chillies
1 tablespoon grated coconut (fresh or dried)
Small piece of jaggery – powdered (sugar won’t work in this recipe)
Cherry tomato sized tamarind – Presoaked in very little water (one tablespoon is plenty) for about 15 minutes, so that it can grind well.
Salt to taste

Onion is the main ingredient in this chutney; so don’t skimp on the onion. If you have small onions, use two or three, and red onions or shallots are the best for this recipe. At Nandyala, we make it with erra gaddalu (shallots here).

Red Onion, Coconut Powder, Jaggery, Red Chillies and Tamarind - Ingredients for Onion Chutney

Place an iron skillet on stove-top. Add oil, swirl to coat the pan. When the oil reaches smoking point, add chunks of onion. Saute them to soft brown on high heat stirring frequently. Remove them to a plate, then add the dried red chillies. Saute them to brown. Remove to a plate. Allow them to cool to room temperature. Texturewise and tastewise, this is important. Go, sit down and wait.

When they are cool enough to touch, take the red chillies, coconut, jaggery, tamarind and salt in a mortar or in a food processor. Pound or blenduntil the red chillies are smooth. Then add the onion pieces. Pulse few times to coarse consistency. Do not puree the onions, we do not want that. They should be coarsely crushed like shown in the image below. Stone mortar really comes to a great use for this kind of recipe and I made this chutney in a stone mortar for todays meal.

Remove to a cup and serve with rice or chapati and dal.

Onion Chutney, Red Onion Chutney (Ulli gadda Pacchadi)
Red Onion Chutney and Sona Masuri Rice mixed with Chutney ~ Meal Today

Posted by Indira©Copyrighted in Amma & Authentic Andhra,Jaggery,Onions (Thursday December 1, 2005 at 7:42 pm- permalink)
Comments (20)

The New Home of Mahanandi: www.themahanandi.org

Ma’amoul (Dates & Pistachios Filled Cookies)

Chanit of My Mom’s Recipes and More left a comment on my blog last month. To return the compliments I visited her blog, and what I found was a very detailed recipe for mamoul (dates filled cookies) with photos. I knew I had to try it. What attracted me to this recipe more than anything is the use of semolina for dough. I did some googling on these famous Middle Eastern cookies to know more about them and how they are made. Next, I went and bought the ingredients: fine Tunisian pitted dates, pistachios and wooden ma’amoul mold from the only ethnic grocery store in our small town, Ghossians Mid East Bakery.

I did experiment with the recipe. First, I used ghee instead of butter because ghee is not only more flavorful and unlike butter has no unnecessary baggage. I reduced the ratio of all-purpose flour to semolina. I also complimented the dates filling by adding pistachios. Finally I skipped the eggs. One more thing is I prepped the mamoul mold with ghee so that when cookie dough pressed into the mold and reversed, it can come out easily without sticking to the mold.

The final result of my experimentation was exquisite, one of a kind sweet cookies, the one I am going to make many more times from now on. A delicious paradox, they have a mildly sweet, crisp and grainy outside because of semolina and insides are moistly sweet and tender. Thanks Chanit! It is little bit of time consuming to make these using the ma’amoul mold but I had time and so happy with the beautiful outcome.

Ma'amoul mould, Pistachios, Dates, Rose water, Semolina, All Pupose Flour (Maida)

Recipe:

Dough:
2 cups – semolina
½ cup – all purpose flour (maida)
½ cup – melted ghee
½ cup – powdered sugar ( or more if you like sweet cookie covering)
1 tablespoon – rose water
1 teaspoon – active dried yeast melted in 1 tablespoon of luke warm water
Pinch of salt

Melt the ghee and cool it to room temperature. Sift the all purpose flour(maida) and mix it with semolina and ghee. Add the yeast water, rose water, powdered sugar and salt. Mix and make a dough by adding little bit of water. Set aside for about 3 hours, covered, to rest.

Cookie Dough after 3 hours of rest and Dates-Pistachios Filling Making of Ma'amouls - Pressing the cookies dough into ma'amoul mold

Dates- Pistachios Filling:
2 cups – fresh soft-pitted dates
½ cup shelled pistachios
¼ cup – powdered cane sugar
1 teaspoon – rose water
and Ma’amoul mould to press and shape the cookies

In a food processor, take pistachios and powder to fine. Then add the dates, sugar and rose water. Blend them together into fine paste. Remove to a cup.

Ma'amouls (Dates-Nut filled Cookies) Ready for Oven Ma'amouls After 20 minutes in the Oven

Preparation:

After 3 hours of rest, knead and divide the dough into lime sized balls. Flatten each ball using your hand and lift the sides up to form a hollow. It is now ready for the filling. Place one tablespoon of dates-pistachios filling into the hollowed dough. Close the dough over the dates mixture. Press the edges to seal well. Press it into the ma’amoul mold to give it a decorated appearance. Reverse the mold; gently shake to loosen it from the mold. Prepare each one in this way and place them neatly in rows, on a greased/parchment paper lined baking tray.

Place the tray in a preheated oven at 350° F and bake for about 20 minutes. I reversed the cookies to the opposite side after 10 minutes in the oven for even baking. After 20 minutes or when they turn lightly golden, remove them from the oven and let them cool.

Ma'amouls (Dates-Pistachios Filled Cookies)

Ma’amoul (Dates-Pistachios Filled Cookies) ~ Delicate, rose flavored and naturally sweet. Our Thanksgiving treat and contribution to this month’s SHF-IMBB Cookie-Swap event.

Posted by Indira©Copyrighted in All-Purpose Flour(Maida),Dates (kharjuram),Ghee,Molasses,Pistachios,Sugar, Jaggery and Honey,Suji/Semolina (Friday November 25, 2005 at 8:46 pm- permalink)
Comments (63)

The New Home of Mahanandi: www.themahanandi.org

Cranberry Upside-Down Cornbread

I love the taste of cranberries. Tangy and tart! Their flavor, like their color, is intense. Full of Vitamin C and antioxidants, they are perfect antidote to the blues of coming winter. This American fruit of holiday season does not cost that much, when purchased during the harvest time (Sep, Oct). A dollar or two for a bag of 12 ounces. A good thing for budget conscious people like me.

Today, I tried this recipe from W.H MD, changed it little bit to my taste and made an upside-down cranberry cornbread. The result was as the recipe says,- moist, tender cornbread with the sweet and tangy cranberry sauce on the top. Tasted really good!

Cranberry Upside-Down Cornbread

Recipe:

Cranberry Topping
1 bag (12 ounces) fresh cranberries
1 glass of orange juice, freshly squeezed
Half cup of powdered jaggery

Cornbread
1½ cup yellow cornmeal
½ cup whole-wheat flour
1 teaspoon baking powder
½ teaspoon baking soda
½ teaspoon salt
1 cup buttermilk
3 tablespoons peanut oil
1 large egg

Corn Meal, Whole Wheat Flour, Fresh Cranberries, Cranberry sauce, Buttermilk

The sauce: In a saucepan, combine orange juice, jaggery and cranberries. Bring to a boil and let it simmer, stirring frequently for about 10 minutes or until berries have popped and sauce is thick.

The Cornbread: Preheat the oven to 400° F. Combine dry ingredients – cornmeal, whole-wheat flour, baking soda, baking powder and salt. In another vessel, beat the egg; combine with peanut oil and buttermilk. Add this to the flour mix and mix them thoroughly. I also added some cut cranberries to this mix. If you want, you can also add some sugar to this mix.

Grease a baking dish or bread pan with peanut oil. Pour the cranberry sauce first, then the flour mixture on top of it. Bake it at 400°F for about 30 minutes or until knife inserted in center comes out clean. Let it cool in the pan, then invert onto a plate, carefully. Serve warm or at room temperature.

Last Slice of Cranberry Cornbread  - Just because Shammi asked for it
Last Slice of Cranberry Cornbread – Just for you Shammy:)

Posted by Indira©Copyrighted in Corn Meal,Cranberries,Jaggery (Tuesday November 8, 2005 at 9:10 pm- permalink)
Comments (33)

The New Home of Mahanandi: www.themahanandi.org

« Next PagePrevious Page »