Mahanandi

Living in Consciousness ~ Indi(r)a’s Food and Garden Weblog

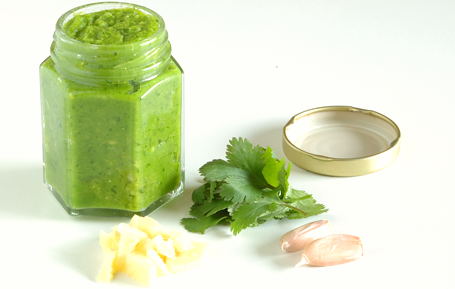
Ginger~Garlic~Coriander Paste : For Jihva (Allam Vellulli Kottimera Mudda)

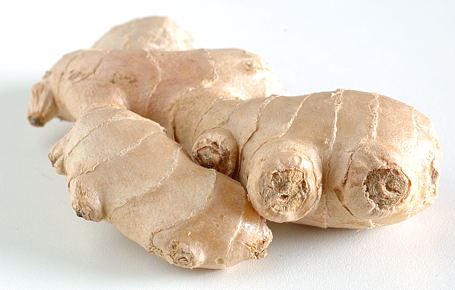
Root vegetables, as if happy to be unearthed, usually mingle well with other vegetables by being subtly sweet. But when it comes to Gingerroot-the rhizome, it’s quite another story.

Like an unruly tiny tot, ginger is full of attitude. Potent, pungent and incomparable, it is nothing like other rhizomes or root vegetables. To put it gingerly, ginger is never needed in pounds, just a small quantity is enough to liven up an otherwise ordinary culinary experience. And Indian cuisine, one of the mother cuisines in the world, pairs ginger with garlic and coriander. The pungency of ginger is controlled and counteracted with more pungent flavors. What a way to civilize the taste of ginger! A perfect pairing appreciated by mature palates.

Ginger, garlic and coriander, together ground into a smooth paste is something that I often use in my daily cooking. Almost all traditional tomato and coconut based curries (pulusu, subjis) need at least a teaspoon of ginger-garlic-coriander paste. So depending on the market price of these three ingredients or my time constraints, I prepare this paste in quantities large (which would last for at least two weeks) or small (just enough for that day’s meal).

Here is my recipe for ginger-garlic-coriander paste, and an entry to “Jihva for Ginger” event. Hosted from Scotland by lovely Rosie of “What’s the recipe today, Jim?”.


Ginger-Garlic-Coriander Paste ~ for “Jihva : Ginger” event.

Recipe:

Ginger root – peeled, sliced to small pieces – Half cup
Garlic – peeled and sliced to small pieces – Quarter cup
Fresh coriander (cilantro) -finely chopped – 1 cup
Salt – quarter teaspoon

Take them all in a blender/food processor or in a mortar. Grind them to smooth consistency without adding water. Remove to a clean glass jar, seal tightly and store in the refrigerator. (Remains fresh from one week up to a month.) Whenever needed, take the required amount with a clean spoon.

To Jihva participants:
Rosie is in the process of moving and requesting “Jihva-Ginger” entries as early as possible.

Posted by Indira©Copyrighted in Ginger & Sonti,Indian Ingredients,Indian Kitchen,Jihva For Ingredients,Kottimera(Cilantro),The Essentials (Monday January 29, 2007 at 2:33 pm- permalink)
Comments (13)

The New Home of Mahanandi: www.themahanandi.org

Coriander ~ Pappula(Bhuna Chana) Chutney


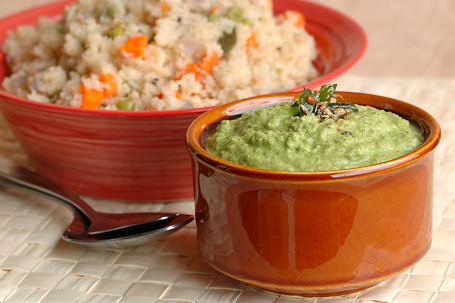
Coriander~Pappula Chutney with Upma

Just like dear Supriya (Tweety) of Bengaluru, I also prepare upma often, at least once a week for lunch or dinner. Rice and roti are good but sometimes I feel like taking a break from those two and upma usually comes to my rescue.

Upma recipe is very forgiving. We can make it as elaborate, nutritious (by adding lot of vegetables, nuts etc) or simple (just plain water and some salt) as we like. One thing the recipe does need is a pickle or chutney on the side. A meal is healthy when it’s homecooked and upma is pleasing when it’s served with chutney on the side. One such simple and easy chutney recipe that taste terrific with upma or for that matter all varieties of breakfast items is coriander-pappula (roasted chana dal) chutney.

Pappulu or putnala pappulu (Telugu) are sold as ‘dalia’ in US. See this label here. I always thought the name dalia is a North Indian one, but not so says Anita of ‘A Mad Tea Party”. So now the question is who calls pappulu or bhuna chana ‘dalia’? Which Indian language is it from? Or unknown to us mere mortals, Indian grocery wholesalers have a separate language to confuse us more?:)

Edited to add:
Thank you Darshana and Madhuli for clearing the confusion. Dalia is a Gujarati word for pappulu or bhuna chana.


Pappulu (Putnala Pappulu, Dalia, Bhuna Chana, Roasted Chana Dal) and Fresh Coriander

Recipe:

1 cup of roasted chana dal (Pappulu, dalia, bhuna chana)
1 bunch of fresh coriander (cilantro, Kottimera)
8 green chillies – short, Indian variety
1 T of tamarind juice or limejuice or to taste
1 T of coconut fresh or dried (optional)
1 teaspoon of cumin
½ teaspoon of salt

Take them all in a blender, add about half glass of water and grind to smooth paste. Remove to a cup.

Do the popu or tadka:
Heat a teaspoon of peanut oil in a tadka pan. Add and toast in this order – 5 curry leaves, half teaspoon each of urad dal, then cumin and mustard seeds. When seeds start to splutter immediately add the popu to chutney. Mix and serve with breakfast items.

Posted by Indira©Copyrighted in Amma & Authentic Andhra,Chana Dal-Roasted (Dalia),Kottimera(Cilantro) (Thursday November 9, 2006 at 1:28 pm- permalink)
Comments (37)

The New Home of Mahanandi: www.themahanandi.org

Coriander~Tomato Chutney

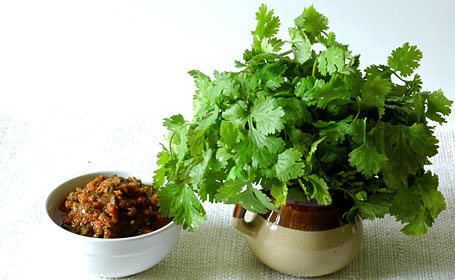
Coriander-Tomato Chutney and Fresh Coriander

We had my dear friends comeover for weekend visit. They brought ThumsUp, lots of laughter and fun stories to share and we on the other hand fed them until they said no more. All and all we both filled up each other to our heart’s content.

What’s good company without good food so I tried some new recipes for them. One is dear Karthi Kannan’s (writes at Kitchenmate and proud mother of cutest toddler ever) coriander chutney. She mentioned in her fabulous food blog, that this chutney is her favorite recipe and got it from her mom. What I liked about her recipe is – no prep work is needed like roasting peanuts or cracking a coconut open as with peanut and coconut chutneys. Also it uses one whole bunch of cilantro. During summer, the sky-high prices of cilantro come to earth level at Boardman. 2 bunches for 1 dollar here at local farmers market. Not bad, right? Perfect recipe to finish off lot of cilantro in one setting, I thought, so prepared the chutney for utappams and it was indeed tasted super. Sometimes cilantro can be overwhelming, but here in this chutney roasted tomato and onion addition, balanced out the intense cilantro flavor, making it pleasant chutney to have.

I followed Karthi’s recipe mostly. First chopped one red onion, 8 dried red chillies and 3 tomatoes to big pieces and roasted them in an iron skillet until they are golden brown and wilted. Meanwhile I washed and chopped a big bunch of fresh cilantro (leaves and branches included), added them to the skillet for few minutes of saute. Took them all in a blender, added a small piece of tamarind and a pinch of sugar and quarter teaspoon of salt – blended them to coarse puree. Removed the chutney to cup and added the tadka (toasted cumin, mustard seeds and urad dal in 1 tsp of oil) to the chutney.

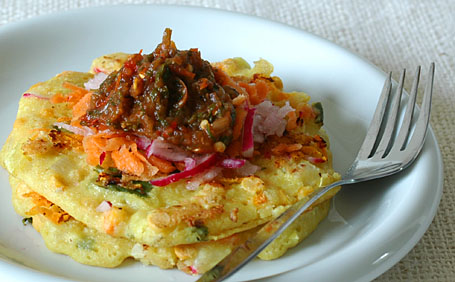
We had the chutney with utappams. My friends who are very much interested in our food blogging wanted to play food stylists. Grated carrots and red radishes for the chutney, was their contribution, which made it look more attractive, I think. Thanks my dear friends for the stylish touch and thanks Karthi for this wonderful recipe.

Coriander-Tomato Chutney with Utappams

Coriander~Tomato Chutney Ingredients:
1 big bunch of fresh coriander
1 red onion
3 tomatoes
6-8 dried red chillies
1 inch piece of tamarind
A pinch of sugar
Salt to taste or ¼ tsp
For Popu or Tadka:
1 tsp of peanut oil
¼ tsp each – cumin, mustard seeds, urad dal and few curry leaves

Recipe adapted from:
Food blog: Kitchenmate

Posted by Indira©Copyrighted in Kottimera(Cilantro),Tomato (Monday July 10, 2006 at 2:01 pm- permalink)
Comments (13)

The New Home of Mahanandi: www.themahanandi.org

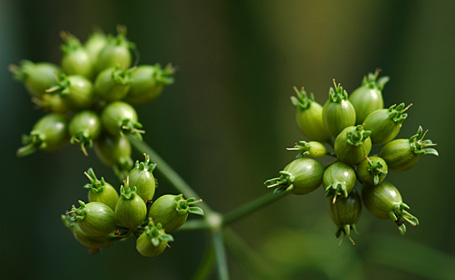
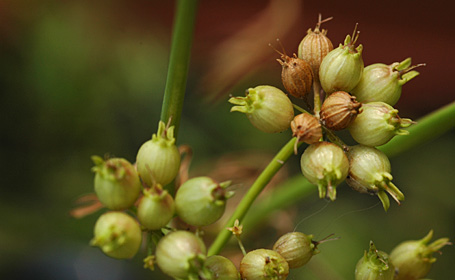
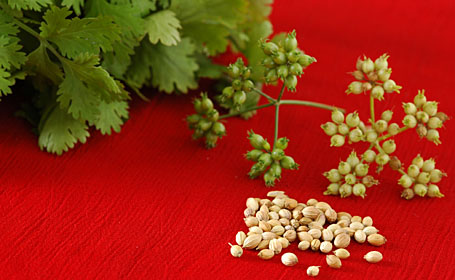
Coriander Seeds (Dhania, Kottimera)


Coriander Seeds – Young


Coriander Seeds – In Different Stages of Drying


Coriander (Dhania, Kottimera) – Fresh leaves, Seeds (young and drying), Coriander Seeds
Photography By Vijay Singari ~ For This Week’s Indian Kitchen

Posted by Indira©Copyrighted in Indian Ingredients,Indian Kitchen,Kottimera(Cilantro) (Sunday July 9, 2006 at 7:06 pm- permalink)
Comments (26)

The New Home of Mahanandi: www.themahanandi.org

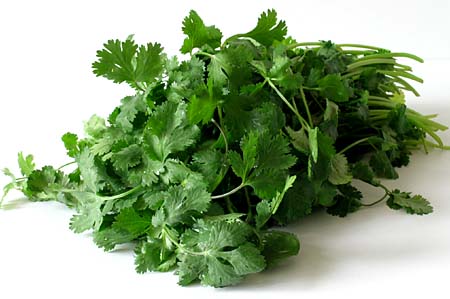
Cilantro (Coriander, Kottimera)

Fresh Cilantro (Coriander, Dhania, Kottimera):

Coriander (Cilantro, Kottimera, Dhania, Hu Sui, Dhanyak)

Indispensable to my cooking, I can’t imagine preparing food without this herb. More about Cilantro – here and here.

For this Weekend Herb Blogging, it’s Curly Parsley at Kalyn’s Kitchen and Keerai(Amaranth) at My Dhaba.

Posted by Indira©Copyrighted in Indian Ingredients,Kottimera(Cilantro) (Sunday November 6, 2005 at 11:37 am- permalink)
Comments (13)

The New Home of Mahanandi: www.themahanandi.org

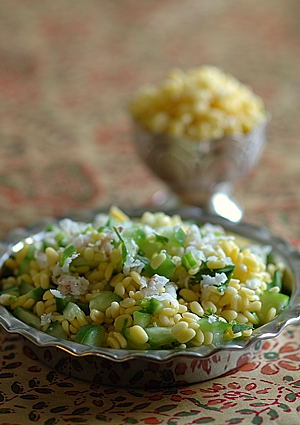
Vadapappu Kosambari

Vadapappu
Vadapappu Kosambari

This kosambari with yellow moong dal (Vadapappu) is an ideal Upavaasa food. They would take a while to eat, giving the body a chance to register its satisfaction and that in turn would prevent hunger pangs and overeating. Completely raw, this traditional kosambari makes a decent, light meal for health and weight-conscious people.

Recipe:
(for two, for one meal)

Half cup yellow moong dal – Soaked in water for about 4 hours.
1 palm-length cucumber
1 green chilli, Indian or Thai variety
2 sprigs of fresh coriander
1 tablespoon – fresh coconut gratings
Pinch of salt, or to taste

Drain and rinse moong dal. Take them in a bowl.
Finely chop cucumber, chilli and coriander leaves. Add them to moong dal.
Sprinkle salt and coconut gratings.
I also added fresh juice from a small mandarin orange for the sweet note.
Combine and serve. Enjoy with a glass of buttermilk for a light meal.

Recipe Notes:
Traditional India – Vegan, Raw and Upavaasa Food
Diet-friendly and protein rich.
Upavaasa = Fasting

If anyone decides to make this Upavaasa food, I would love to hear how you like it taste/flavorwise.

Posted by Indira©Copyrighted in Amma & Authentic Andhra,Cucumbers,Moong Dal (Washed) (Wednesday April 16, 2008 at 5:32 pm- permalink)
Comments (24)

The New Home of Mahanandi: www.themahanandi.org

Ragi Kudumulu with Garlic Ghee

Ragi kudumulu is an old classic from Andhra Pradesh, India. Dumplings like kudumulu are prepared with ragi flour and steam-cooked in flavorful kura (curry). The main ingredient of kura in which ragi kudumulu are steamed changes with the seasons. Sometimes the kura is prepared with vegetables, sometimes with meat or a combination. Depends on the cook’s mood and the market prices. Popular in agricultural community, this protein powerhouse is a build or nourish the muscle-on-the-bone kind of one-pot meal.

For Mathy’s Jihva, I have been thinking about a new recipe using garlic-ghee. Then I thought, why not incorporate garlic-ghee into ragi dough and make kudumulu with it. When people say developing new things or techniques is like constantly rediscovering the wheel, it’s very true, indeed. Years of nutritional strategies and accumulated wisdom among cooks throughout the world before us are right to benefit us all through good times and hard times.

Ragi kudumulu is one such nutritional strategy, and here it is in a new avatar. An acquired taste, but a delight to an adventurous palate. Give it a try.
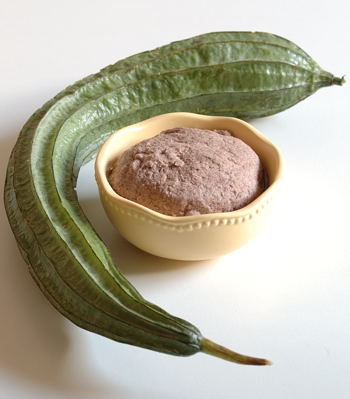
Ridge gourd and Ragi Dough
Ridge Gourd and Ragi Dough (Beerakaya mariyu Raagi Mudda)

Recipe:
(for two adults, for two meals)

Recipe happens in three steps. 1. Prepare Ragi dough for Kudumulu.
2. Prepare kura (curry or kurma) for Kudumulu. 3. Prepare kudumulu and steam-cook.

Step 1:

Take one-cup ragi flour in a bowl. Add a tablespoon of garlic-ghee puree and quarter teaspoon salt. Stir in a tablespoon of garlic infused ghee. Sprinkling few tablespoons of hot water, make soft dough. Cover and keep it aside for about 15 to 30 minutes. The dough firms up on resting.

Step 2:

While the ragi dough is resting, prepare kura for ragi kudumulu. It can be with either vegetables, (traditional choice: Indian broad beans, silk squash and ridge gourd), or meat (chicken or mutton). For my meal today, I have prepared Ridge gourd curry (beerakaya kura) for ragi kudumulu.

– – 2 ridge gourds: peel, rinse and cut into ½ inch, big pieces
– – 2 tomatoes and one onion – finely chop to small pieces

Heat a tablespoon of garlic infused ghee in a wide, deep-bottomed skillet. Add and toast a pinch each – cumin and mustard seeds. When seeds start to pop, add the onion. Sauté to soft. Then tomatoes. Add about a cup of water and cook the tomatoes to mush on high heat.

While tomatoes are cooking, prepare the kura masala:
For kura masala: Two tablespoons of grated coconut, 4 green chillies and an inch of peeled ginger, two cloves, one inch cinnamon, a teaspoon each – coriander seeds and cumin. Take them all in a mixer. Add a pinch of salt. Blend to fine consistency.

Tomatoes will be cooked to soft by now. Mush them by pressing with a sturdy spoon. Add the ridge gourd pieces and the masala paste to the skillet. Also half teaspoon each- turmeric and salt. Stir in another cup of water. Close the lid and simmer on medium-low heat.

Step 3:

While kura is cooking, quickly prepare Ragi kudumulu.

Take the ragi dough out onto a plate. Knead and divide into small, about key lime-sized rounds. The dough came about 16 rounds for me. Take a round on your palm, and close the fingers around the round to make a fist. The shape changes to cylindrical with conical ends. That’s what we call “Kudumu” shape in Telugu. Compared to the round shape, the kudumu shape will have more surface area exposed, and that would facilitates thorough steaming. Prepare all rounds in this way. You have to make them fast in two to three minutes.

Place them one after another neatly in simmering kura. Close the lid tightly, and steam for about 15 to 20 minutes on medium-low heat. Ragi kudumulu have to be cooked properly inside. To test, take one out and cut into half. A well-steamed one has the color of red soil (erra mannu) that you see in moderate rainfall areas like Telengana, Andhra Pradesh. On taste, they should have the comforting texture of a well-chewed bubblegum.:) Sticky with unique ragi flavor. The size/volume also increases on steaming.

Garnish with fresh coriander leaves and lime juice. Serve hot. Until serving time, cover the skillet with tight lid and keep the kura hot on low heat.

How to serve: Place four ragi kudumulu in a wide bowl or plate along with vegetable or meat pieces. Pour the tomato-masala gravy around.

How to eat: With fingers or spoon, take a portion of ragi kudumu with kura. Blow to cool for once or twice. Eat. Ragi flour has gummy properties and it would stick to the mouth roof. So don’t chew on the kudumu, just swallow. The masala gravy and vegetables or meat pieces, together they make a memorable meal experience.

Why: Ragi is rich in Iron, minerals and protein, gluten-free, and is known for it’s health benefits. Ragi is cultivated from ancient times in many parts of India, and in fact the name Ragi is a Sanskrit word. So, Ragi consumption means nourishment to the body and also nourishing the traditional agricultural practices.

Here is the preparation process in photos:
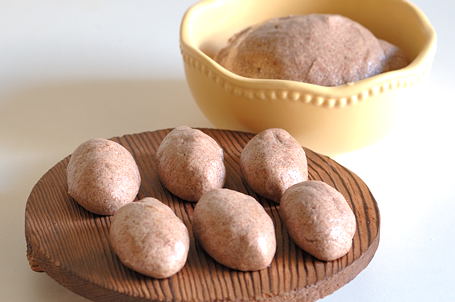

Ragi Kudumulu and Ragi Dough
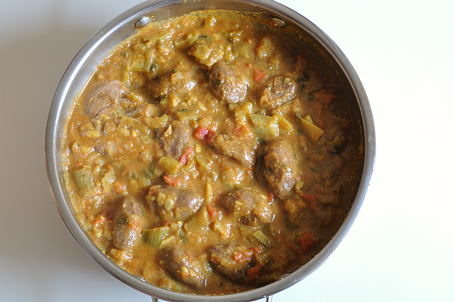

Steamed Ragi Kudumulu in Ridge Gourd Kura
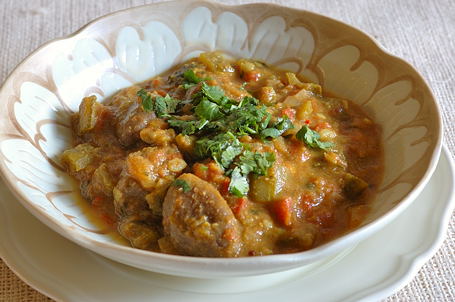

Ragi Kudumulu Flavored with Garlic Ghee in Ridge Gourd Kura ~
Meal today and My Contribution to Mathy’s Garlic-Jihva Event.

Notes:
Ragi flour is available in most Indian grocery shops.
Kudumu is singular and kudumulu is plural in Telugu language.
Traditional Kudumulu from other parts of Bharath:
Jonna (Corn) Kudumulu from En Ulagam
Jowar-wheat Kudumulu from My Food Court

Do you have this type of tradition where kudumulu or dumplings are steam-cooked in the stew itself?
Posted by Indira©Copyrighted in Amma & Authentic Andhra,Beera kaaya(Ridge Gourd),Garlic (Vellulli),Ghee,Ragi,Ragi Flour (Tuesday April 1, 2008 at 5:45 pm- permalink)
Comments (26)

The New Home of Mahanandi: www.themahanandi.org

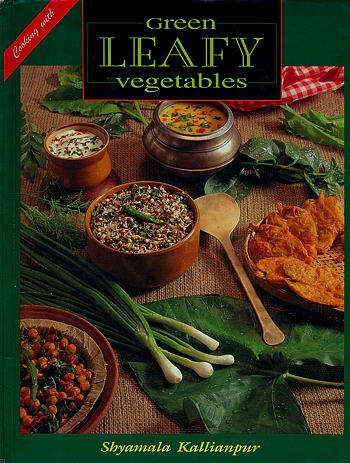
Cookery, Indic (2) ~ by Veena Parrikar

Cooking with Green Leafy Vegetables
by Shyamala Kallianpur


Published in 1997 by Shyamala Kallianpur at Secunderabad, in Andhra Pradesh, India. ISBN 81-7525-059-3. (Click on the Bookcover for Author’s image)

If I were Eve in the Garden of Eden, the genesis of my fall from grace might not be the rosy apple, but the seemingly mundane edible greens. Such is the sway that this earthy bounty holds over my taste and imagination. They beckon me at markets with their dewy-fresh looks in variegated shades of green and their promise of glowing health. Thus, each weekend sees the grand entry of a motley bunch into my kitchen. Some of them get used up quickly in a zuNka, aloo-somegreenorother, or a soup. Then my inner child awakens and begins to clamour for something different. This would trigger a search through my cookbooks while the greens waited in anticipation and then shrivelled up with disappointment. For, my cookbooks have plenty of vegetable recipes, but leafy vegetables are almost an afterthought. Even in books that provide a respectable number of greens recipes, the varieties are restricted to spinach and methi, and sometimes mustard leaves. Part of this negligence stems out of certain inherent traits of edible greens; namely, they tend to be stubbornly local and seasonal. Most of them are not amenable to traveling long distances; hence, there are variations in the types of greens found even between neighbouring states. Cookery books intended to reach a pan-Indian or global audience cannot afford to waste space on recipes with main ingredients that are not found everywhere or at all times. It is perhaps a reflection of this constraint that the only cookbook in English on green leafy vegetables in India is self-published by the author.

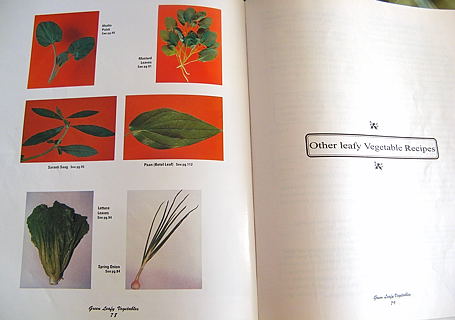
Cooking with Green Leafy Vegetables by Shyamala Kallianpur should not have gone out of print. It is the only book that provides recipes for over 30 different kinds of edible greens found in India. It has clear colour photographs of about 35 varieties of leafy vegetables. More importantly, greens are treated with the care and respect they deserve. With a couple of exceptions (such as the Sindhi Sai Bhaji), the recipes never involve pressure-cooking the leafy vegetables or overpowering them with spices. They are steamed, sometimes fried, or cooked just until soft or wilted. Thus, the greens retain their flavour, colour, and nutrients in the final dish. The author also demonstrates a meticulousness that is not often seen in Indian cookbooks. For example, she explains the difference between “roughly cut”, “chop”, and “finely cut” for leafy vegetables. She not only explains her rationale for giving the measurements for greens in volume, but further tells you how to measure them in the cup (“do not press….but just fill it”). There are many traditional recipes from different regions of India; however, there are also enough innovative dishes to satisfy the need to do something different once in a while.

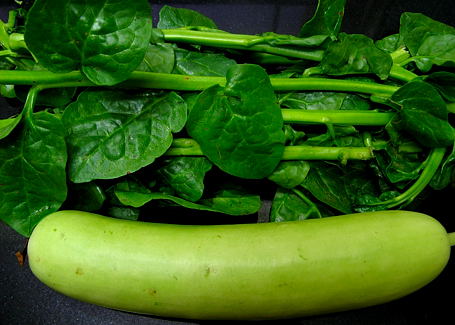
The chapters are organized according to specific greens: the commonly available ones such as spinach, methi, amaranth, Malabar spinach (see photo below), and cabbage have separate chapters. Within these chapters, the recipes run the gamut from dry sabzi and gravies to soups, snacks, and salads; especially for the first four of the aforementioned greens. With 64 recipes for these greens, I am now never at a loss when faced with yet another bundle of spinach or methi. The chapter titled Other Leafy Vegetables deals with other easily-available greens such as bathua, green-stemmed and purple-stemmed colocasia leaves, coriander leaves, curry leaves, gongura, kulfa (purslane, paruppu keerai), ambat chuka (khatta palak), mint, mustard leaves, manathakali leaves, spring onion stalks, and saranti saag (ponnanganni). It is the last chapter, however, that I find the most interesting. Rather awkwardly titled, Some More “Other Leafy Vegetables” covers greens that grow in home gardens and are not available in the market, or not used much despite their market availability. Here you will find recipes for beetroot leaves, cauliflower greens, radish leaves, carrot greens, garlic leaves, pumpkin leaves, pomegranate leaves, drumstick leaves, tamarind leaves, brahmi, shepu (dill) taikiLo, omum (celery) leaf, and gherkin (kundru) leaf. There are only a few recipes for each of these vegetables, but the book gives a glimpse of the sheer expanse of possibilities that exists with edible greens.

Before writing this review I tried, rather unsuccessfully, to find the total number of edible leafy vegetables that grow in India. It is no secret that the undocumented heritage of Indian cuisines far exceeds the documented, but I can think of no other area, besides edible greens, where this truism applies more strongly. This study identified 42 species of plants with edible leaves or flowers in a single district in West Bengal. Our awareness is limited to only those greens that make it to the market, either through wholesalers or small village vendors who sell seasonal homegrown fare. Kallianpur’s book should have been just one in a long series of such works by various authors from several Indian states. This might be a tall order for commercial publishers, but an initiative funded by the government or NGOs with a nationwide reach might be one of the ways to highlight this rich culinary biodiversity and preserve it from the forest-fires of globalization.

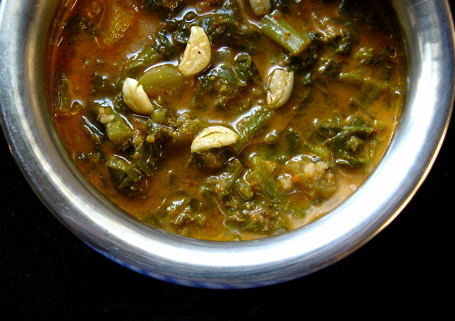
Recipe: Kothchol (Indian Red Spinach with Bottle Gourd)

Adapted from Shyamala Kallianpur’s Cooking with Green Leafy Vegetables


Top: Malabar spinach, also known as Indian Red Spinach. Bottom: Bottle gourd

Ingredients:
Chopped Indian red spinach – 4 cups
Tender stalks of the spinach, cut into 2-cm length – 2 cups
Bottle gourd – ¼ kg (peeled and diced into small cubes)
Jaggery – 1 tablespoon
Salt to taste

Grind to a fine paste:
Grated coconut – 1 cup
Dried red chillies – 5 (sauté them in a little bit of oil first)
Raw rice – 1 tablespoon (soak it water for 10 minutes)
Tamarind – one lime-sized ball (use less if your tamarind is strong)

Tempering:
Oil – 1 teaspoon
Garlic – 8 to 10 cloves, crushed (no need to peel).

Method:
Take the chopped stalks in a vessel, add one cup of water, cover and cook on low heat till the stalks are tender. Then add the diced bottle gourd and salt. Cover and cook until the bottle gourd is just-cooked, but not too soft. Now add the chopped spinach, jaggery, and ground masala. Bring to a boil and simmer until the spinach is cooked. Remove from heat. Prepare the tempering: heat oil in a small pan or tempering vessel and sauté the garlic, but do not let it brown. Pour the oil and garlic pieces onto the hot cooked vegetables and cover them quickly. Keep for five to ten minutes, then serve hot with rice.


This is a typical dish from Shyamala Kallianpur’s Chitrapur Saraswat community.

Text and Photos: Veena Parrikar

Previously in the Cookery, Indic series:

Introduction
Salads for All Occasions – Vijaya Hiremath

Posted by Indira©Copyrighted in Bacchali(Malabar Spinach),Coconut (Fresh),Reviews: Cookbooks,Sorakaya(Dudhi,Lauki),Spinach,Veena Parrikar (Monday February 4, 2008 at 12:03 am- permalink)
Comments (42)

The New Home of Mahanandi: www.themahanandi.org

Chickpea ~ Chestnut Chili (Chole)

Due to severe winter storm and repair works, internet service at our place got disconnected last Thursday. Four days of no Net, and I survived. Sincere thanks to my dear friend Anjali for keeping the Mahanandi alive with her gorgeous Kokum and Sol Kadhi photo-article, and to my dear husband Vijay for taking time from his busy schedule to check on the website during my absence.

Instead of worrying about IS/ISO certification for Mahanandi to appease the latest blight – the “quality concerned” visitors, I simply spent time on things that really matter, which of course invariably led to food. One of the recipes that I prepared last weekend was very unusual and rather substantial meal with chickpeas and chestnuts.

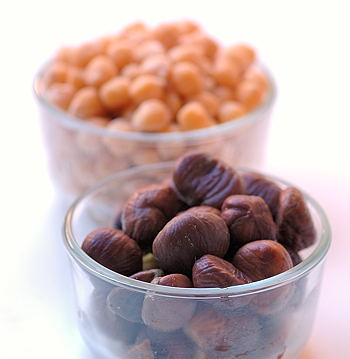
Chickpea chili with chestnuts happened due to my desire to experiment with chestnuts. I like chestnuts, and I can get quality chestnuts, already roasted, shelled and packed at low prices here in Seattle. The local Vietnamese and Chinese grocery shops offer a delightful variety of packed chestnut goodies ready for consumption. I was little bit anxious during the chili preparation, being the first time and all. But the sweet tasting, starchy chestnuts simmered happily in tomato-onion sauce, and made good companion to chickpeas. I am glad I tried this Indian inspired chickpea-chestnut chili or chole.

Chestnuts and Chickpeas

Recipe:

1 tablespoon peanut oil
Pinch each – cumin and mustard seeds
1 cup diced onion
3 cups finely chopped juicy tomatoes
2 cups chickpeas, cooked to tender
1 cup roasted or boiled chestnuts, cut to bite sized pieces
1 tablespoon CCCC powder (aka garam masala)
½ teaspoon each – red chilli powder and salt
¼ teaspoon – turmeric
Lemon juice or amchur to taste (for tangy flavor)
Chopped herbs to taste – cilantro or dried fenugreek

Heat oil in a deep skillet or saucepan. Add cumin and mustard seeds. When seeds start to pop, add the onion. Saute to gold. Stir in the juicy tomatoes. Cook them on high heat to mush.

Add chickpeas, and chestnuts. Also stir in the seasoning, the CCCC powder, chilli, salt, turmeric, and lemon juice or amchur. Add about one to two cups of water. Mix. Simmer for about 15 to 20 minutes.

Garnish with herbs and serve the chickpea-chestnut chili or chole hot, with a dollop of yogurt or raita on the side with chapati or paratha.

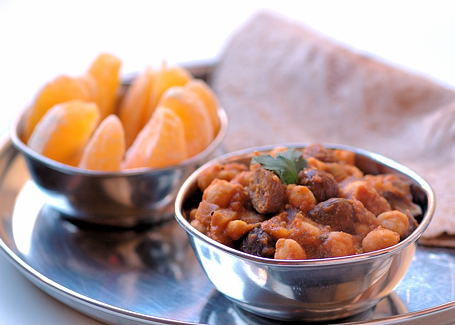
Chickpea-Chestnut Chili with Chapati
Chickpea-Chestnut Chili (Chole) with Chapati and an Orange

Note:
CCCC Powder – Cumin, Coriander, Clove and Cinnamon Powder
Chili with one ‘L’ is American version of our kurma. Chili contains tomatoes, beans, meat and/or vegetables with spices, and sometimes rice is also added.

– Indira

Posted by Indira©Copyrighted in Chestnuts (Marrons),Chickpeas (Monday January 28, 2008 at 8:36 pm- permalink)
Comments (21)

The New Home of Mahanandi: www.themahanandi.org

Teepi Gummadi Kura for Sankranthi

(Pumpkin Subzi with Winter Melon from Nandyala)

Photo Purchase Keywords: Pumpkin, Subzi
(It takes money, time, effort and energy for food photography. Please don’t photosteal. Click on the links and purchase the photos legally to digital download and to print. Thanks.)

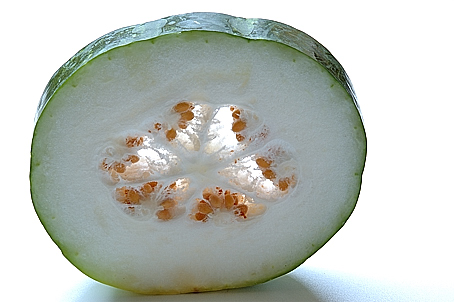
Winter melon, Ash Gourd, Gummadikaya, Gummadi

Pumpkin kura sweetened with jaggery is a Sankranthi tradition at Nandyala and in many parts of Andhra, Bharath. Pumpkin is a winter vegetable, and jaggery is made fresh from sugarcane during this season. So on Bhogi, the first day of three day festival Sankranthi, we cook these two together as part of harvest celebration. The pumpkin cubes coated with jaggery-spice mixture glisten like an early morning Sunshine on wintry day in this curry. Usually we serve it with Sajja Rotte (Millet Roti) on Bhogi.

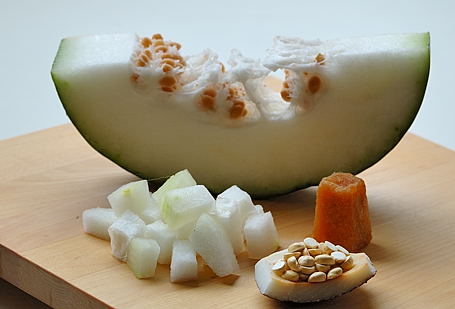
The white fleshed pumpkin is called boodida gummadi in Telugu. Here in US, it is sold as ash gourd or winter melon, often cut into small portions like shown in the image. Winter melon tastes like cucumber, mildly sweet and no smell whatsoever. If this variety is available in your area, do try this recipe. Sweet, aromatic and with ruchi, this curry is a hearwarming wintry delight and a must try for winter-melon fans.

Gummadi, Winter Melon, Ash Gourd, Kaddu
Winter Melon, Coconut, Dalia and Jaggery

Recipe:
(for two, for two meals with roti)

Boodida Gummadi (Winter melon): Peel the skin, remove the seeds and cut the white part to bite-sized cubes : 4 cups

Jaggery-spice Paste:

Dalia (putnala pappulu, Bhuna Chana) – quarter cup
Jaggery, crushed to small pieces – 3 tablespoons
Coconut, fresh or dry, grated – 1 tablespoon
Dried red chilli – 4
Coriander seeds – half teaspoon
Take them all in a mixer, blend to fine consistency.

Kura Preparation:
In a pot, heat a teaspoon of peanut oil. Add and toast a sprig of curry leaves, pinch of cumin and mustard seeds. When mustard seeds start to pop, add the pumpkin cubes. Also the jaggery-spice paste along with a glass of water. Mix. Stir in a pinch of turmeric, and salt to taste. Mix, and simmer, covered for about 15 to 20 minutes, until the pumpkin pieces cook to tender.

Serve the teepi gummadi kura with chapati, sorghum roti or sajja roti. (This curry is not that good with rice.)

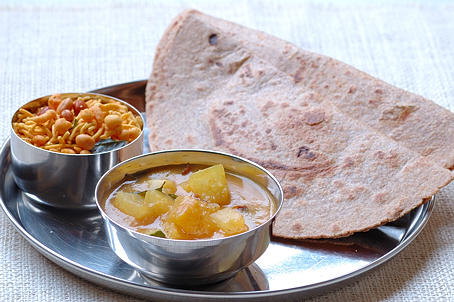
Teepi Gummadi Kura, Pumpkin Curry with Roti
Teepi Gummadi Kura with Roti, and Boondhi Mixture

Recipe Source: Amma, Nandyala
This kura is also prepared with orange pumpkin. The recipe is same except the change in pumpkin.
Kura=Curry, Teepi=Sweet, Gummadi=Pumpkin, Ruchi=Flavor (from Telugu to English)

Posted by Indira©Copyrighted in Amma & Authentic Andhra,Chana Dal-Roasted (Dalia),Jaggery,Pumpkin (Wednesday January 9, 2008 at 2:35 pm- permalink)
Comments (19)

The New Home of Mahanandi: www.themahanandi.org

Jihva for Toor Dal ~ Bisi Bele Huli Anna

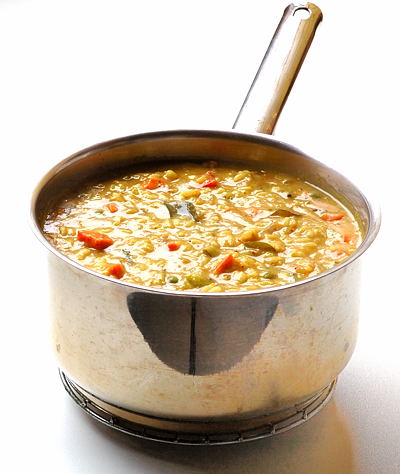
Bisi Bele Huli Anna

They see each other everyday.

Unassuming and simple, darling daughter of lentil family – the golden Toor Dal.

The upright, some even call almighty – the proud and pristine Rice.

A hill of rice on a banana leaf, and a ladle full of dal next to it. Served and seated next to each other, the attraction between them was instantaneous and electric. It hasn’t escaped the wise hostess notice. The marriage was inevitable. Nourishing vegetables and sensual spices were added for a seductive liveliness. Under the sacred fire, they seized to be toor dal and rice, instead became Bisi Bele Huli Anna. “A match made in heaven, for good times and for hard times”, people praised the joyful union.

Bisi bele huli anna. Yes, all would be all right!

That was the “once upon a time” story for Bisi Bele Huli Anna, the famous south-Indian comfort food. Originated in Karnataka region of India, the rustic and rural Bisi bele huli anna with its uncomplicated, unfettered and fundamental recipe has many fans. From children to very elderly, many Bharatiya find delight in this humble food.

This week’s cold snap made Bisi bele hule anna a prudent choice for us. And, I remembered I had a jarful of Rosematta rice. The plump, terracotta colored rice from Kerala region absorbs flavors very well and I know that toor dal will be swooning in Rosematta company. My preparation started with fresh Bisi bele ground masala and cutting up the vegetables. We can add any number of vegetables and I went with gawar beans, red bell pepper, red onions, peas and carrots. The Bisi bele huli anna turned out to be a delightful meal. Long live Bisi Bele Huli Anna!

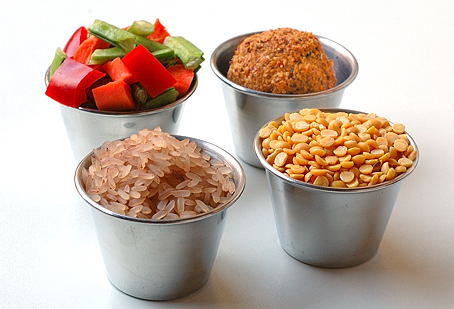
Rosematta Rice, Toor Dal, Vegetables and Bisi bele Masala
Rosematta Rice, Toor Dal, Vegetables and Bisi Bele Masala ~ for Bisi Bele Huli Anna

Recipe:

1 cup Rosematta rice
1 cup toor dal (Kandi Pappu)
3 cups cut vegetables (beans, carrots, peas and peppers etc)
2 tablespoons tamarind pulp
1 tablespoon jaggery
½ teaspoon each – turmeric and salt
2 tablespoons – Bisi bele masala (Homemade or store-bought)
Popu or tadka ingredients:
(12 Curry leaves, pinch each- cumin, mustard seeds and hing)

Take rice and toor dal in a wide pot. Add about 6 cups of water. Cook the dal and rice to very tender. Gently mix and mush them. I resorted to pressure-cooking, but back at home, they cook it for an hour or so on slow heat. Results in superb taste.

While the rice and dal are cooking, in another big vessel, heat a tablespoon ghee or oil. Add and toast the tadka ingredients (curry leaves, cumin, mustard seeds and hing).

To the tadka, add the cut vegetables and saute. When they start to get tender, add the tamarind pulp, jaggery, turmeric and salt. Also the cooked and mashed rosematta rice-toor dal mixture. Stir in the masala along with two cups of water. Combine well. Have a taste and adjust the spices to your liking. Cover the pot and simmer for about ten to fifteen minutes on medium-low heat.

Serve hot with a teaspoon of ghee drizzled and with papads.

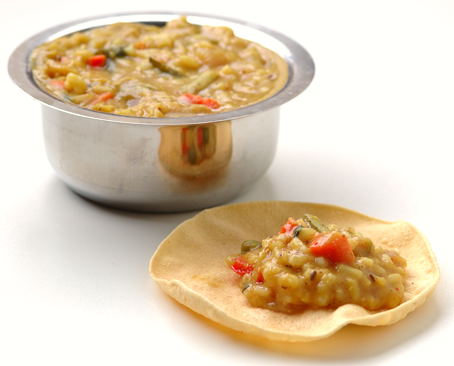
Bisi Bele Bhath
Bisi Bele Huli Anna with Papad ~ My Jihva for Toor Dal and Our Meal Today

Recipe Notes:
Rosematta idea from My Chow Chow Bhath. Brown rice or brown basmati also works well for this recipe.
My recipe for Bisi bele masala:
5 dried red chillies, 1 tablespoon each- chana dal & coriander seeds, 1 teaspoon cumin, ¼ teaspoon each -cloves, cinnamon, methi seeds and black peppercorn. Dry roast. Cool. Then take them in a Sumeet Mixer or blender. Add 2 tablespoons of freshly grated coconut and pinch of salt. Grind to fine consistency.

Posted by Indira©Copyrighted in Biyyamu (Rice),Rosematta Rice,Toor Dal (Tuesday November 13, 2007 at 3:35 pm- permalink)
Comments (38)

The New Home of Mahanandi: www.themahanandi.org

It’s Chakalaka, Baby!

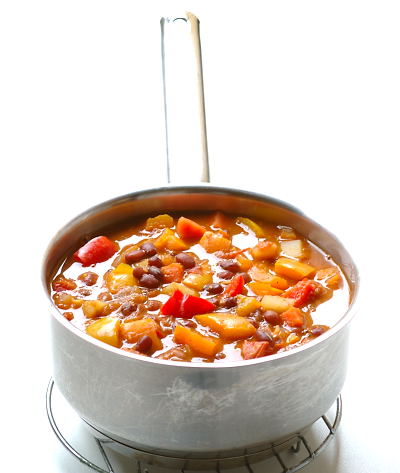
Chakalaka ~ South African Vegetarian Dish
Chakalaka

African food, at least here in the west, is usually restricted to East African staples like the delicious Ethiopian dosa, the Injera or entrees such as the equally delectable Moroccan chickpea stew (normally served over couscous) common to North Africa.

But what of the quintessentially South African Chakalaka?
As one examines the recipe, it’s not hard to imagine South African cooks venturing out into their vegetable garden one hot day, picking onions, red peppers, tomatoes and any other readily available seasonal produce. As the vegetables cooked, they probably craved some of the flavors they remember smelling as they walked down a street with Indian houses. Inspired, they might have thrown in a liberal dose of curry powder into the simmering vegetables in the pot. Since many variations also include tinned baked beans, hungry laborers might have adapted it as a quick and satisfying one-pot meal at the end of a hard day of slogging it in the gold mines.

With my well-equipped Indian kitchen, Chakalaka was a breeze to whip up. Indeed, the Indian influences are not surprising. Indians have been in South Africa longer than Caucasians have been in Canada! So at least for 7-8 generations. In fact, our beloved Mahatma Gandhi cut his revolutionary teeth in South Africa.

But back to Chakalaka (don’t you just love the sound of the name?)

While the jury is still out on whether Chakalaka is a chunky ketchup or a sauce or a cooked salsa (could be either); on whether it should be served as a side dish or a condiment (served as both) and if it should be eaten hot or cold (served either way), this spicy and always vegetarian concoction has now come to be identified as the definitive taste of South Africa. There’s even a restaurant in London named for this dish. Featuring a standard base of onions, tomatoes and peppers; this versatile dish is open to endless experimentation.

Other bloggers tell us that traditionally, Chakalaka is often served as a sauce with a maize porridge (Mielie Pap) that is eaten predominantly by the local black population. It’s also served with bread or the ragi-like Samp, made of maize. It can also be spotted as an accompaniment at South African barbecues called Braais (pronounced “bry”, rhyming with the word “cry”)

In the spirit of making a mean Chakalaka that is true to its African roots as well as its spirit of assimilation and innovation, my version is based on a number of recipes found online as well as one that was featured in the Toronto star.


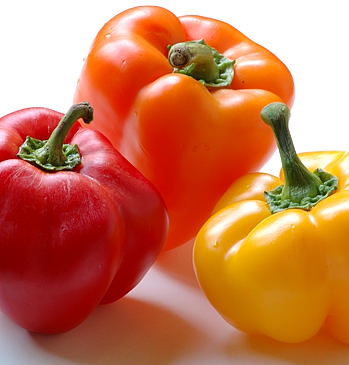
Red, Orange and Yellow ~ Peppers in Autumn Colors

Recipe:
(Makes enough for approx 30 tablespoon servings)

2 tablespoons of sunflower oil
1 inch piece of ginger, peeled and finely diced
2 cloves of garlic, peeled and finely diced
4 fresh green chillies, slit
1 big red onion, finely chopped
A pound (4 to 6) juicy tomatoes, finely chopped
3 bell peppers, chopped into 1cm X 1cm pieces
2 carrots and 2 potatoes chopped into 1cm X 1cm pieces
Curry powder – 1 heaped tablespoon.
Red beans – one cup, pre-soaked and pressure-cooked to tender
Salt – one teaspoon, or to taste
Fresh coriander for garnish

In a saucepan, heat up the oil and saute ginger, garlic, chillies and onions to soft. Add the salt and curry powder. Add the tomatoes and cook till mushy and of sauce consistency. Add peppers, carrots and potatoes. Cook till they are of a desired softness. Add the red beans and cook for 5-10 minutes. Remove from heat and add coriander. Check seasoning levels and serve with rice or breads of your choice.

A small confession. After adding the beans, I tasted it and found the heat was a bit too much. So I caved and added a teaspoon of jaggery at the end. Unsuspecting victims, tasters of the dish said it took them to whole new levels of delayed heat which overwhelmed the palate after the initial deceptive sweetness. But they all agreed they couldn’t get enough of it!

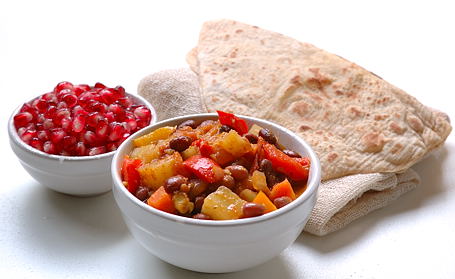
Chakalaka with Chapatis and Pomegranate
Chakalaka with Chapatis and Pomegranate ~ Meal Today

~ Article Contributed by Janani Srinivasan
Photos by Indira Singari.

Kitchen Notes:
Other vegetables can also be added to Chakalaka – cauliflower, zucchini, string beans etc
For curry powder – if you have access to it, I recommend the fiery Sri Lankan Niru brand powder so ubiquitous in Toronto. If not, any other store-bought or homemade will do. The South African recipes recommend a local brand called “leaf masala”.
To be true to the grassroots appeal of this dish, you could use a can of baked beans from the local supermarket. Vegetarians check labels to ensure it’s free of lard or any other animal ingredients. If you can soak your own from scratch, that’s even better.
More on Chakalaka : Chakalaka 101, and Culinary Musings from Cape Town

Posted by Indira©Copyrighted in Bell Pepper,Janani Srinivasan,Peppers,Red Beans (Chori) (Thursday October 11, 2007 at 6:30 pm- permalink)
Comments (26)

The New Home of Mahanandi: www.themahanandi.org

Mooga-Gaathi with Moong Bean Sprouts

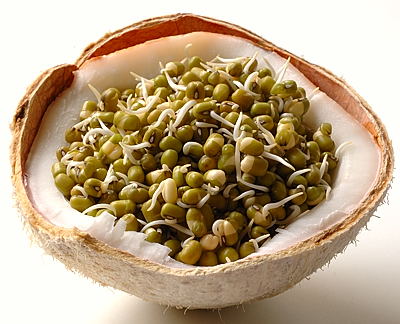
Sprouted Moong Dal and Fresh, Tender Coconut
Fresh, Tender Coconut and Moong Beans, Sprouted at Home

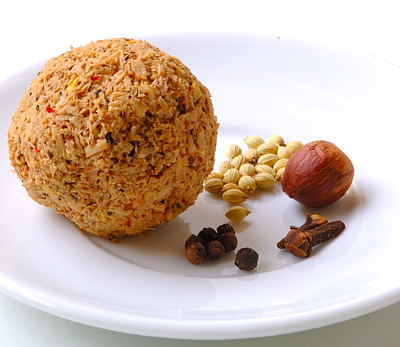
Mooga-Gaathi, a traditional Goan-Konkani recipe with sprouted moong beans and fresh coconut may sound like another unassuming moong dal preparation. But you would be delighted to find out the appetite-arousing attitude of this homey, gentle sounding dish. All thanks to spices – nutmeg, cloves, coriander and peppercorn.

The recipe is from my friend Veena Parrikar‘s kitchen. I made small changes here and there to the original to suit my taste. Easy to prepare, minimum work, no cutting or slicing things, and satisfying results. A perfect autumn recipe and a must try for sprouted moong bean fans. I totally recommend.


a Round of Ground Coconut and Spices – Black Peppercorn, Cloves, Nutmeg and Coriander Seeds

Recipe:
(for two, for two meals)

Sprouted moong(mung) beans – 4 cups
Fresh coconut gratings – 2 tablespoons
Spices:
Nutmeg – a small piece
Cloves – 3
Coriander seeds – 1 teaspoon
Black Peppercorn – ¼ teaspoon
Dried red chillies – 2
Tamarind pulp – 2 teaspoons
Turmeric – ¼ teaspoon
Salt – ½ teaspoon or to taste
For popu or tadka:
1 tablespoon ghee or oil
8 curry leaves
¼ teaspoon each – cumin, mustard seeds and asafoetida

1. Place a wide pot on stove-top and heat.
Add and dry-roast the nutmeg, cloves, coriander seeds, black pepper and dried red chillies to fragrance. Remove them to a mixer. Add fresh coconut and grind to smooth paste. For easy blending, you could also add about half cup water.

2. In the same pot, take sprouted moong beans. Add about 2 to 3 cups of water and stir in salt. Cover and cook. When moong beans reach required level of tenderness, add the ground-spice paste, tamarind and turmeric. (I also added a tablespoon of jaggery.) Mix well and simmer on medium heat.

3. While the moong is simmering, do the popu or tadka. In a small skillet, heat oil until a curry leaf tossed in it sizzles. Add and toast curry leaves to pale gold. Next goes the cumin, mustard seeds and asafoetida. Wait for the mustard seeds to splutter. And, immediately add the skillet contents to simmering moong dal. Mix, reduce heat and simmer for another five to ten minutes to blend the flavors.

Serve or spoon into a small bowl and enjoy with rice or chapatis.


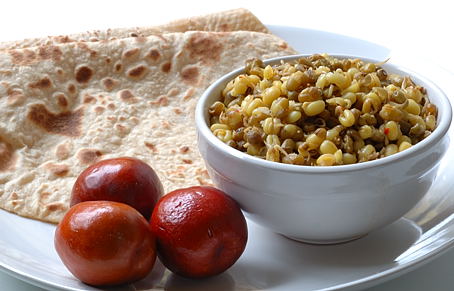
Mooga-Gaathi with Chapatis and Jujebe Fruits (Gangiregi Pandlu) ~ Meal on a Autumn Day

Notes:
The original recipe did not have cumin seeds in tadka/popu. They are not used in gaathi.
How to sprout Moong Beans: Soak moong beans in water overnight. Next morning, drain into a muslin covered colander. Cover the beans with cloth, and keep the colander in a warm area. Sprinke water occasionally to keep the cloth moist. Within a day, you start seeing the sprouts. Wait for next morning. There you go, you have your own homemade sprouts ready for Mooga-Gaathi.

Posted by Indira©Copyrighted in Coconut (Fresh),Moong Dal (whole),Sprouts (Molakalu) (Monday October 8, 2007 at 9:28 pm- permalink)
Comments (20)

The New Home of Mahanandi: www.themahanandi.org

Sambars for Supper~ Beetroot Sambar

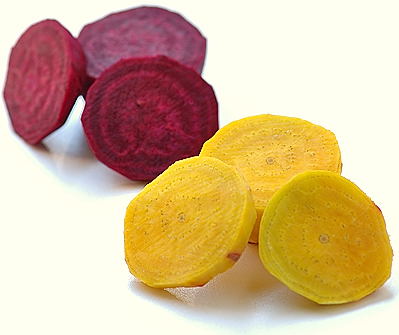
Red and Gold Beets
Beets ~ Gold and Ruby

The flavor and the color of beets are unique. Their sweetness is more like saccharine than sugarcane. One thing is for sure, they do brighten up any meal with that bold, ruby-red color. But the new variety, the golden beets that I see at farmers markets in recent years is little bit different. They taste more like carrots than beets and they do not stain or bleed like red beets. I personally feel that golden beets taste much better than red beets. But, they are still in designer, fancy stage and I look forward to the days when they become more affordable.

After the yesterday’s curry, I had three each, red and golden beets left from Sunday’s farmers market purchase. I have added few carrot pieces to the bunch and made a hearty sambar with toor dal. The sweet beets and carrots, creamy rich toor dal and spicy sambar masala, together with rice and papads ~ it was a good supper today.

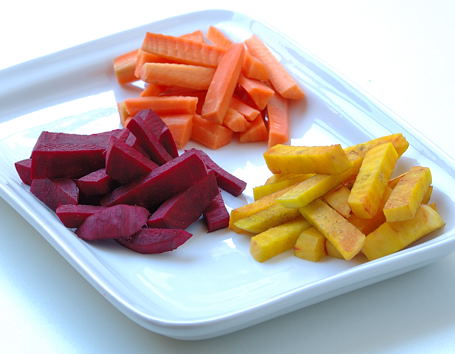
Red Beets, Gold Beets and Carrots ~ for Sambar

Recipe:

Pressure-cook the dal:
Take one cup toor dal and two cups water in a pressure-cooker. Cook the dal to very soft and mash to smooth with an immersion blender or wood masher.

Prepare the vegetables:
Carrots, red and golden beets, 3 each – peel, cut to thin, two-inch length pieces
tomato and onion – one each, finely sliced

Do the Popu and Simmer:
In a heavy pot, heat a teaspoon of oil until a curry leaf tossed in it sizzles. Keep the heat to medium. Add a sprig of curry leaves and toast to pale gold color. Then, add a pinch each cumin and mustard seeds. When seeds start to pop, add the onions. Saute to soft. Next goes tomatoes, carrots and beets. Saute for about ten minutes.

Then, stir in half teaspoon each – turmeric, salt, red chilli powder and a tablespoon each –sambar masala powder and tamarind pulp. Also the cooked and mashed toor dal along with three cups of water. Mix everything thoroughly and bring to a boil. Reduce the heat, partially cover the pot and simmer until the vegetables are soft. Stir frequently and well, as the toor dal tend to sink to the bottom and stick. Garnish with few sprigs of finely chopped coriander leaves if you wish and serve warm. Tastes great mixed with rice.

Beetroot Sambar
Beetroot Sambar ~ Under the Golden Sun Rays

Posted by Indira©Copyrighted in Amma & Authentic Andhra,Beetroot,Toor Dal (Wednesday August 22, 2007 at 11:00 pm- permalink)
Comments (16)

The New Home of Mahanandi: www.themahanandi.org

Vegetarian Beet Borscht

Vegetarian Beet Borscht

This vegetarian version of Russian Borscht is a delight to make during summer time, when fresh beets, carrots and potatoes are in abundance at local farmers markets. I also add the cabbage and fresh dill to the pile, following the traditional borscht recipe. The attractive fire-red color is from beets but thanks for the success of this dish must go to the Indian spice-blend and the modest amount of powdered cashews that I usually add. They help to create a rich, flavorful sauce that binds all the ingredients in an endearing way.

Although I have enjoyed the beet borscht as a light soup at restaurants, I usually make it as the main meal of the day at home, by adding big bulky style pasta. Daring liberties are taken with good intentions, so I would like to think the darling people of eastern Europe would approve of my beet borscht.


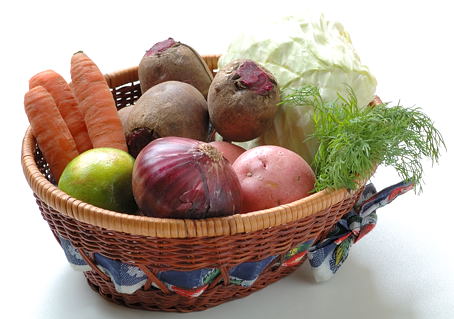
Red Onion, Lime, Carrots, Beets, Cabbage, Fresh Dill and Red Potatoes ~ From Ritu Bazar for Borscht

Recipe:
(for two adults with a healthy appetite, for two meals)

Beets, carrots and red potatoes – peeled and cubed, 2 cups each
Cabbage – coarsely cut to pieces, about two cups
Red onion – finely sliced, about a cup
4 cloves of garlic – finely sliced
Seasoning:
Quarter cup – roasted cashews, powdered to fine
Quarter cup – fresh dill, finely chopped
Quarter cup – lime juice
1 tablespoon – cumin:clove:cinnamon:coriander powder
½ teaspoon – chilli powder, salt and turmeric (or to taste)
1 tablespoon – ghee or butter
Pasta:
1 cup ( I chose the Trottole pasta for this recipe.)

In a sturdy big pot, heat the ghee or butter. Add and saute garlic and onions to soft. Add potatoes, beets and carrots. Saute for about ten minutes, stirring in-between. Next in line would be the delicate cabbage. When cabbage starts to wilt, add the seasoning – cashew powder, fresh dill, spice blend, lime juice, chilli powder, salt and turmeric. Mix and cook for couple of minutes.

Add in about 6 cups of water. Cover the pot with lid and simmer the ingredients on medium heat for about 15 to 20 minutes. By this time the potatoes, beets will be turning to tender. Have a taste and adjust the salt and pepper to your liking.

Add in the pasta. Cook until the pasta is al dente. Turn off the heat and let stand for 5 minutes. Ladle the pasta-beet borscht into serving bowls and enjoy!


Beet Borscht with Pasta and Kiwi Fruit ~ Our Meal Today

Posted by Indira©Copyrighted in Beetroot,Cabbage,Potato,Suwa (Dill) (Wednesday August 8, 2007 at 7:23 pm- permalink)
Comments (21)

The New Home of Mahanandi: www.themahanandi.org

Previous Page »