Mahanandi

Living in Consciousness ~ Indi(r)a’s Food and Garden Weblog

Sesame Buns

Yay… spring has definitely sprung here! Plenty of sunshine days have arrived finally. Even the yeast is ready for some action. When I mixed a packet of yeast with warm water, zoom… it rose to the sky as if it was trying to kiss the sunshine. See.

Yeast in action
Yeast in Action

Recipes that need good fermentation like preparing bread, idlies, dosas and yogurt, are going to be easy from now on. Last weekend, I tried a recipe for sesame buns from my recipe book. I used to note down the western bread and cake recipes that caught my fancy in a notebook. That was before I knew about the foodblogs. I wasn’t even aware of copyrights etc., at that time, so I’m not sure where I got this recipe from, but definitely from a cookbook, or might be from TV. I am not sure. Whatever the origin, I am very fond of this recipe. Adding a bundle of sesame, gives the bread that nutty taste I like and the buns are great with soups, salads or for homemade simple sandwiches.

Recipe:
(Makes about 8 to 10 medium sized buns)

3 cups whole-wheat flour
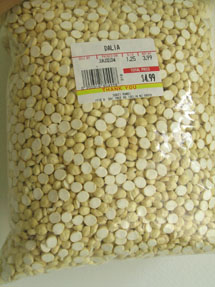
1 cup sesame seeds
1 cup quick oats
½ cup watermelon seeds (My addition)
1 tsp of salt and honey to your taste or ½ cup
Warm milk or water for mixing the dough into a ball
Yeast:
¼ ounce packet of active, dry ‘quick rise’ yeast or 2 tsp
Take 2 tablespoons of water in a cup, stir in a pinch of sugar. Pour the contents of yeast packet and stir. Keep it in a warm place and wait for it to turn bubbly, usually 5 to 10 minutes.

The dough at '0' hour The dough after one hour

The dough is shaped into buns is ready to go into the oven

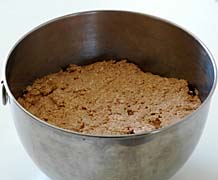
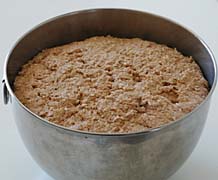
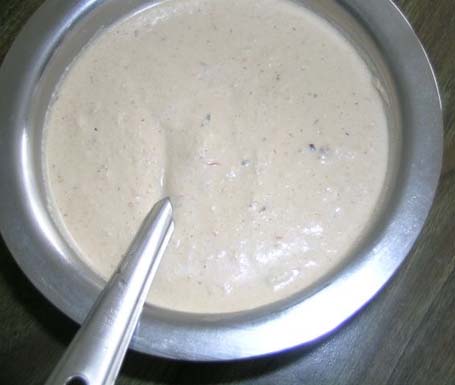
Method: Take all the above ingredients in a big bowl and mix them thoroughly. Knead the dough for at least 5 to 10 minutes. Cover and let it rise. Takes about at least one hour. I’ve kept it for about 3 hours.

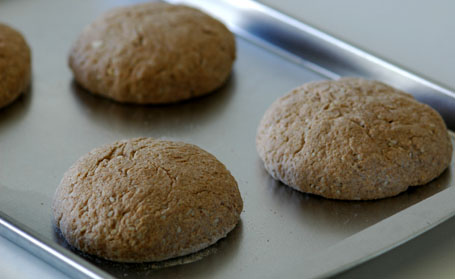
Take the dough out and on a clean board, sprinkle in some flour, and deflate and knead the dough again. Do it for at least 2 to 5 minutes. Divide the dough into small balls, shape them into buns. Place them on a greased baking pan; leave space for them to expand. Wait for another 30 minutes for them to rise.

While the shaped buns are rising, preheat the oven to 350 F. Place the baking pans with buns in the oven and bake at 350 F for about 30 minutes or until golden brown. Remove and let cool.

Sesame Bun Sandwich
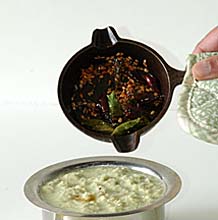
Sesame bun and dried soya chunks-eggs omelet sandwich.

Posted by Indira©Copyrighted in Sesame Seeds,Whole Wheat Flour (Monday April 17, 2006 at 9:34 am- permalink)
Comments (26)

The New Home of Mahanandi: www.themahanandi.org

Ponganalu (Gunta Pongadalu)

Raayalaseema, Konaseema and Telengaana, these are the three regions in Andhra Pradesh, my home state.

Each region has its own way of cooking things and special recipes. In case of breakfast/brunch worth getting up early for, ‘Konaseema’ is famous for their ‘Pesarattuupmacombination (beautifully put together by Sailu). I’m not that familiar with ‘Telengaana’ cuisine and ‘Raayalaseema’, where I’m from, has few special breakfast dishes unique to our region. One is “buggani” – prepared with puffed rice(murmura), I blogged already, and the other is “ponganalu” – rice lentil batter is seasoned with shallots, green chillies etc., then cooked in round impressions in an iron skillet until golden. These small pretty, dome shaped rounds are usually served with peanut chutney or coconut chutney.

In our homes, whenever relatives from other regions of Andhra or from other states visit us for holidays, out comes the “ponganala Pennam”(ponganala skillet). Round, golden colored ponganalu, hot off from the skillet, always elicits oohh… aahh… from our relatives and from their weird offspring (are there any other kind? :)). Because they are unique to our region, preparing them is our showoff kind of thing, to out of staters who were related to us by marriages etc.,:)

Preparing ponganalu, it’s all in the skillet. Right kind of skillet delivers or breaks a ‘ponganam’. Nothing can beat an old world style, well seasoned iron skillet. They are the best and the place where you can buy is of course India. I’ve seen some non-stick skillets here in US in some Indian shops lately. They are also fine, if you don’t mind the non-stick coating.

Recipe:
For 3 to 4 batches of Ponganalu

Ponganala batter:
1 cup rice
½ cup urad dal

Soak them in water for about 6 hours. Drain (reserve the water) and grind them into smooth batter adding just enough water (add the reserve one, we kept aside). The consistency of the batter must be thick like idli batter or like condensed milk (commercial kind). Take the batter into a big vessel, cover and let it sit overnight for fermentation.
Sour and leftover dosa batter is perfect to prepare ponganalu. If you have some, try ponganalu with it, for a change.

Ingredients to prepare ponganalu

Seasoning (Add to the overnight fermented batter):
1 big red onion or 6 shallots – finely chopped
(Because we mix them in the batter raw, avoid yellow onion for its smell & awful rawtaste)
4 green chillies – finely chopped
Few springs of cilantro – finely chopped
A fistful of chana dal (soaked overnight)
1 teaspoon of cumin
½ teaspoon of turmeric and salt
Add all these ingredients to the batter and mix thoroughly.
Also prepare peanut or coconut chutney.

Cooking: Place the ponganala skillet on medium heat. Add few drops of peanut oil into each impression. With a spoon or with a piece of paper towel, rub oil around, to season the skillet. When the skillet is hot and ready, proceed like this, following the images.


Pour a ladleful of batter into each impression.


Once all impressions are filled, cover the skillet with a lid and cook on medium heat for about 5 minutes undisturbed.


Remove the lid; The batter will be set by now. Gently lift the ponganalu with a “ponganala lifter” or with a spoon. If properly cooked, they should come out easily without sticking to the skillet. If not, cook them for few more minutes.


Turn each one to opposite side to cook.


Cook them another 5 minutes on medium heat undisturbed. Gently lift them from out of the skillet. When properly cooked they should come out easily without sticking to the skillet. If not, cook them for few more minutes. Remove them all onto a plate. Season the skillet with oil, again repeat the steps to cook another batch. Medium heat is the key.(Cooking them on high heat in a hurry or on too low heat won’t work- usually the outcome will be messy ponganalu.)


Ponganalu with peanut chutney – Breakfast worth getting up early for.

Recipe Source & Origin: Amma and Rayalaseema (Andhra, India)
Also checkout ‘Ponganalu’ by Santhi, friendly, fellow Raayalaseema vaasi.

Posted by Indira©Copyrighted in Amma & Authentic Andhra,Sona Masuri Rice,Urad Dal (Washed) (Monday March 20, 2006 at 9:08 am- permalink)
Comments (81)

The New Home of Mahanandi: www.themahanandi.org

Coconut Chutney (Kobbari Pacchadi)

Coconut chutney is an example of how good a raw food can taste when prepared with right ingredients. Whoever came up with this recipe, my salute to them! People remember and replicate a good recipe; no wonder, this age old recipe continues to be popular and beloved by all who tried it.

Breakfast is not a proper breakfast without coconut chutney in Southern states of India (Andhra, Tamilnadu, Karnataka and Kerala). Perfect blend of different flavors and the ease with which it can be made – coconut chutney is a great example of traditional, health conscious South Indian food and a showcase recipe for raw cuisine. See the photo below, if you find coconut chutney looking similar in an Indian restaurant along with your dosas, idlies, that’s a sure sign that you are getting a proper south Indian food.

Fresh Coconut, Cilantro, Red onion, Ginger, Dalia(pappulu) and green chillies

Recipe:

1 cup of thinly sliced fresh coconut
¼ cup of pappulu(dalia, roasted chickpeas)
6 Indian small green chillies, chopped
1 tiny red onion or shallot, sliced into chunks
6 sprigs of fresh cilantro and 1/2 inch of ginger
½ tablespoon of tamarind extract
¼ tsp of salt
for popu or tadka
1 tsp each of mustard seeds, cumin, urad dal, fresh curry leaves and few pieces of dried red chilli.
extras(optional)
1 tablespoon of yogurt and one lime

Tadka/popu is done and ready to add to the coconut chutney Final step- adding the tadka/popu to coconut chutney

Preparation:
Preparation means grinding. Taste of coconut chutney varies with grinding method. Believe it or not, different grinding tools give different taste. The best taste comes out of using a stone mortar. Closest is the machine, which grinds with a stone. Last is the food processor or the blender etc., The taste is inversely proportionate to how easily you can grind it.

In a mortar or blender, combine all the ingredients (coconut, pappulu, onion, green chillies, cilantro, ginger, tamarind extract and salt). Add half to one cup of water and grind them until the ingredients are pureed. Transfer the mixture to a cup.

In a small pan, add half teaspoon of peanut oil, add the popu ingredients, sauté them until they start to splutter. Remove the pan from heat and add this popu to the pureed coconut mixture in the cup. Stir in little bit of yogurt now (our family variation). The chutney is ready. Just before serving, squeeze few drops of limejuice.

Traditionally coconut chutney is served with dosa, idly, vada, upma, utappam, pesarattu and pongal, as a part of morning breakfast.

Coconut chutney with popu/tadka just added
Coconut Chutney ~ South Indian Style

Note to reader: I use, tiny red onion or shallot (Indian onion, small baby onion) for this chutney. Either one is preferable than white/yellow onions (US). Red onion/shallots are less harsh in flavor when raw and don’t overpower the chutney with their bitterness.

Recipe source: Family- Amma & Attamma(mother and mil)
For several variations of this recipe, read the comments.

Posted by Indira©Copyrighted in Amma & Authentic Andhra,Chana Dal-Roasted (Dalia),Coconut (Fresh) (Thursday February 16, 2006 at 8:13 pm- permalink)
Comments (54)

The New Home of Mahanandi: www.themahanandi.org

This Year I Dare (Food Wise)

Ilva of Lucullian Delights who started the meme “2006 Food Challenges” (or “This year I dare”), and Winslow of Seven kinds of Soy Sauce, they both tagged me, to share 5 things I want to do for 2006, food wise. So here they are…

Blogwise:
1 Blog about Idly, Dosa and Vada, the delicious breakfasts of India, before my blogs one-year anniversary, in beautiful images.
2 Prepare and blog about traditional Indian sweets like ‘laddu’, ‘jangiri’ etc.,
3 I so want to prepare and blog about my favorite cake “German Chocolate Fudge Cake” and also, I don’t know why, but I’m very drawn to this American style, artery clogging, disgustingly decadent sweet “Krispy Crème Donut Pudding”. First, I’ve to find people to feed it. 🙂

Personally:
4 Going minimal on every Wednesday – Reducing the food consumption gradually to a full day fasting. I call it, my ‘Yogi diet on Wednesdays’. I was doing this before I went to India last year, started it again last week; it takes some time to get along with the hunger pains.:)
5 Continue food blogging to improve my skills and knowledge.

Thanks Ilva and Winslow for tagging me to share my ideas for 2006. I’d like to tag Priya of Sugar and Spice, to share her food ideas for 2006 with us.

Posted by Indira©Copyrighted in Zen (Personal) (Thursday February 2, 2006 at 10:33 am- permalink)
Comments (12)

The New Home of Mahanandi: www.themahanandi.org

Toronto

All last week, we were in Toronto. This was our first visit to this Canadian city and we also found that it is very tourist friendly. We stayed at a hotel in downtown. One of the things we liked about the city is its public transport system. Trams and subway system were excellent and we never had to use our car, it just sat in the hotel garage.

In addition to regular tourist attractions, we also visited India Bazaar on Gerrard street. Dined at a south Indian vegetarian restaurant on Gerrard Street called Udipi Palace. We enjoyed having hot masala Dosa, Idli and Vada. There is also a new grocery shop, Sabji Mandi, opened in Brampton. They had an outrageous opening sale going and I went nuts. Bought about 150 dollars worth of groceries there. The prices for items like rice, dals and vegetables were unbelievable. Two 10 pound Basmathi rice bags for $8.99, 8 pound dal bag $2.99! I think with the purchases I did, I am set for this winter.

Photos of Toronto in December winter weather:

Lake Ontario, on a very cloudy, wintry day
Lake Ontario- view from the top of CN Tower

CN Tower, Toronto
CN Tower, Toronto

Financial District, Downtown, Toronto
Financial District, Downtown-Toronto

For this week in Indian Kitchen:

Indian Sugar Purchased at Subji Mandi, Toronto
Indian Sugar (Large Crystal Type) Purchased at Subji Mandi, Toronto

Posted by Indira©Copyrighted in Zen (Personal) (Sunday December 25, 2005 at 10:53 am- permalink)
Comments (10)

The New Home of Mahanandi: www.themahanandi.org

Coocnut Scraper & Kuzhi Paniyaram

Swarna from Chennai, sent me via email, these two beautiful images of her kitchen gadgets for my Indian Kitchen series.

She wrote to me…
“Both of these given to me by my mother from Madras. The first one is a hand held coconut grater or scraper would be more apt and the second one is what we call “kuzhi paniyaram” vessel. Kuzhi means hole (literally) in tamil and paniyaram I suppose is the name of the dish. It can be made sweet or savoury. mostly we do the left over idli/dosa batter, chop a few onions, green chillies do the tadka and pour the batter into these moulds. The types of batter we can do is endless really, rava(sooji) combination, maida/jaggery/mashed banana- for a sweet paniyaram.”

Hand Held Coconut Scraper Used for grating the fresh coconut - Sent by  Swarna, reader of this blog,  from UK kuzhi paniyaram or Ponganaala Pennam - Sent by Swarna, a reader of this blog, from UK
Hand held coconut scraper/grater and Kuzhi Paniyaram (Ponganaala Pennam)

Thanks Swarna!

Posted by Indira©Copyrighted in Indian Kitchen,Indian Utensils (Sunday December 4, 2005 at 1:52 am- permalink)
Comments (7)

The New Home of Mahanandi: www.themahanandi.org

Stuffed Green Chilli Bajjis (Mirapakaya Bajjilu)

Stuffed green chilli bajjis – whole green chillies are filled with different kinds of mixtures then dipped in gram flour batter and deep fried in oil. They are often served as accompaniment to a main meal in South India, but they are delicious as an appetizer/first course with a cup of yogurt on the side or with a glass of water:)-.

Besan Batter, Slit and deseeded green chillies floating in salted water, 3 different stuffings and green chillies filled with stuffing

Recipe:
(For 10 to 15 green chillies)

Green chillies – Special type of green chillies are used to make stuffed bajjis. You can find them usually in Indian grocery shops. Select straight green chillies, wash and dry them first. Take a green chilli, make a slit lengthwise in the middle, keeping the ends intact. With a knife or a spoon remove the seeds, clean the insides and make space for stuffing. Put these slit, cleaned green chillies in bowl of salted water. If you are sensitive to green chillies, it’s better to wear gloves, take heed of Mrs D and Chopper Dave advise.

Stuffing: I’ve prepared three different kinds of stuffing. (I’ve had them already in my kitchen, what I did was just put them together).

First one is my favorite, traditional Raayala Seema fare that my mother prepares at home:

Half cup of roasted chana dal(dalia), 2 tablespoons of dry coconut powder and tamarind juice, 1 tsp of cumin, 1/4 tsp of salt – powder them together.

The second type of stuffing is what one can find in bajjis from street side stalls in Hyderabad. Very famous and long lines in front of these stalls for bajjis, particularly during monsoon season.

Half cup of sesame seeds, 1 tsp each of coriander seeds and cumin (all three roasted), 3 tablespoons of coconut powder and tamarind juice – mixed and made into thick paste.

The third variety is more of a North Indian fare, learned from a friend.

I had some leftover potato curry – (Fried potato and onions seasoned with garam masala powder) – I reheated the curry in microwave and mashed the potatoes into thick paste.

Batter: One cup of gram flour (besan), quarter cup of rice flour, pinch of baking soda, salt to taste and half to one glass of water – mix them all thoroughly into thick batter (more like dosa/pancake batter consistency).

Oil – Peanut oil for deep-frying.

green chillies filled with different types of stuffing - all ready for a dip in the batter and fry in hot oil
Green chillies filled with 3 different kinds of stuffing

Fill up the gap with stuffing of all the green chillies one by one and keep them on a plate. Again, one by one, dip them into the batter, drop them gently into hot oil, deep-fry them until golden, turning frequently. Remove them with a slotted spoon and drain well on absorbent paper towels.

If you want your bajjis more like street stall bajjis, what you have to do is, first dip each green chilli into batter fully, slide the side opposite of slit side onto edge of vessel, so that side of green chilli has no batter covering it and will be in direct contact with the hot oil, when deep fried. That exposed green chilli will taste crunchy.

But for an authentic taste of street food, double dip and fry again. (Dip the fried green chillibajjis in batter, this time coating them all around and deep fry in hot oil till golden. You can see both varieties in the picture below.)

Stuffed Green Chilli Bajjis (Mirchi Bajjis)
Stuffed green chilli bajjis – both, single and double dipped and fried.

Posted by Indira©Copyrighted in Amma & Authentic Andhra,Gram Flour (Besan),Green Chillies,Peppers,Rice Flour (Wednesday November 2, 2005 at 8:44 pm- permalink)
Comments (35)

The New Home of Mahanandi: www.themahanandi.org

Article and Recipe Index

Mahanandi is easy to navigate, and recipes are archived in four ways.

Browse by Ingredients: Ingredients are listed in alphabetical order in category section on the sidebar of Mahanandi.

Browse by Date or Month: Recipe name appears by hovering the mouse on the calendar. Clicking on the dates in the calendar will take you to the recipe that is blogged on that day. Or click on the month in archives section and then on the date in calendar.

Browse by Title: Recipes are listed in types of meal, courses and cuisines on this page.

Browse for Indian Sweets: Sweets List

double_curve.gif

About Culinary Experience and Recipe Inspiration

My culinary life in few words:

I started out as a burper and spitter (aren’t we all?), taste tester, picky eater, ruthless critiquer (1 to 12 years age), trained under my mother’s guidance to dish washer, prep cook, line cook, sous-chef (12 to 25 years) at home. I was a partner and assistant chef, immensely benefited from my other half’s culinary wisdom and wit (25 to 30 years). I am the chief home-chef and kitchen manager at this time.
My culinary experience is a process of progression and I will always be an eager student at Mother Annapoorna’s culinary school.

Recipe Inspiration:

The main portion, about 60 percent of the blogged recipes at Mahanandi listed below, are from my homeNandyala in India.

The remaining 40 percent, inspired by my imagination and the time I spent visiting and browsing famiy, friends and fellow food bloggers real and virtual kitchens.

Index Layout

As a reader, cook, taster and enthusiast I fashioned the index page following the strict Indic culinary wisdom, on how we serve the meal in a traditional setting. This page is laid out in a way, that if you cook a recipe from each category, you would have sampled the complete “Morning to Night” meal experience of my home. The combinations and possibilities are endless. It’s very much possible to re-create the varied and myriad hues of Indian cooking – a different flavor and texture for each of its hundred thousand villages.

“Real Knowledge is to know the extent of one’s ignorance”, the old Sanskrit proverb says. I hope you find here some information and recipes which you recognise, and others which surprise and delight you enough to try them out. Enjoy!

double_curve.gif

A Daily Record: Articles, Recipes and Photos from My Home
(From March 26th, 2005 to December 30th, 2009)

Morning Meal:

Dosa, Pesarattu, and Utappam:

Idly:

Minimalism for Morning:

Ponganalu (Paniyaram)

Upma:

Refreshing Paniyam:

Vindu Bhojanam for Mid-day or Night:

(The recipe index is laid out in the traditional serving ritual of Vindu Bhojanam (feast). Water first, then salt, pachadi, podi, uragaya, teepi (sweet), kaaram (snack), festival rice, rice, pappu, kura, pulusu, sambar, rasam, perugu, and the meal ends with sweet taste of Mother Earth, the seasonal fruits like banana, mango etc.)

Pacchadi, Podi and Uragaya:

Pacchadi (using Rolu or Mortar & Pestle):

Pacchadi or Chutney (Made in a Mixer, Blender or Food Processor):

Podi (Spicy Powder):

Uragaya (Pickles of India):

Teepu (Sweets, Bharath- 101):

Festival Sweets:

Mithai:

Karalu or Snacks (Bharath):

Deep Fried in Peanut Oil

Pan-Fried:

Oven Baked:

Traditional Sun~Dried Snacks of Bharath:
(Vadiyam, Papadam, Appadam etc)

Annam & Dhanyam (Rice and Grains):

Festival Rice:

Pulao (Masala Annam, Pilaf, Fried Rice):

Ganji, Kanji or Congee

Articles on Rice and Grains from India:

Chapati, Naan, Paratha, Puri and Roti:

Pappu (Dal, Daal, Dahl):

Pappu With Kandi Pappu (Toor, Tuvar Dal):
(Pappu with Kandi pappu and vegetabels is prepared for daily meals at my home and at Nandyala.)

Pappu With Pesara Pappu (Moong, Mung Dal):

Pappu With With Masoor Dal (Red Lentils):

Pappu with Split Peas – Green and Yellow:
(Split peas are neither toor dal nor chana dal. It’s the truth!)

Chaaru, Pappuchaaru, Pacchi Pulusu, Rasam and Sambar:

Pappuchaaru, Pacchi Pulusu, Rasam:

Sambar: The South Indian Soopa
(Difference between Soup and Sambar – No vegetables are harmed (mashed) in sambar.)

Kura, Vepudu, Poriyal, or Thoran:
(Indian Salads With Minimum Saute)

Cooking cut-up vegetables briskly in a small amount of oil, stir-frying or sauteing is the most popular tenchnique that I use in my cooking. The resulting dish is called “Kura” or “Vepudu” in Telugu.

Kura, Kurma, Pulusu or Subji:

Home Classics with Fresh Vegetables

Home Classics With Beans and Legumes:

Home Classics With Paneer:

Home Classics with Egg:

Home Classics for a Potluck Party of 25:

Restaurant Popular, but to My Palate:

Adapting World’s Classics to My Palate:

Perugu, Dahi, Curd or Yogurt (Raita)

Refreshing Ice (Granita, Icecream, Sherbet):

How to Prepare? The Essentials:

Yogi Diet (Food of Fasting Days):

Vitamins for Everyday: Herbs and Spices with Recipes
(by Anjali Damerla)

double_curve.gif ***double_curve.gif

Occidental Food:

Occidental grub happens at my home occasionally. This is a record of such accidents.

Bread, Burger, Pasta and Pizza:

Bread:

Burger (Cutlet) and Sandwich:

Pizza:

Pasta or Noodles – Wheat and Rice:

Sugary Desserts Sans Western Whimsy:

Cakes and Scones Filled with Fruit and Nuts:

Clafouti, Pies and Tarts:

Cookies and Such:

Jams and Such:

double_curve.gif ***double_curve.gif

Discoveries and Divine Prasadams:

New Traditions:

Bhakti~Bhukti (Devotion Mixed with Dining):

double_curve.gif ***double_curve.gif

Cookery: Books, Food Art, Pots and Pans

Cookbook Reviews and Interviews:

Food Art:

Food Articles:

Pots and Utensils:

double_curve.gif ***double_curve.gif

The Joy of Effort ~ Personal and Team:

double_curve.gif

Posted by Indira©Copyrighted in  (Sunday July 24, 2005 at 1:47 pm- permalink)
Comments (107)

The New Home of Mahanandi: www.themahanandi.org

Pappula Podi (Putnala/Bhuna Chana Powder) (Spicy Roasted Chickpea Powder)

Roasted Chickpeas, Pappulu, Putnala Pappulu, Dalia - 4 pounds for $4.99, purchased at Subji Mandi, NJ

Pappulu, Putnala pappulu or Dalia are prepared from chickpeas. Not the regular, white chickpeas but from a special variety of chickpeas specific to India and commonly sold under the name “Kala Chana or Black Chickpeas”.

The preparation of pappulu (dalia) is a fascinating process. First, the black chickpeas get soaked in water for several hours, and then after draining, chickpeas are roasted in big caldrons under controlled low fire for several hours. Until the chickpeas turn to crisp. Once the roasting process is completed, the hulls of chickpeas will be removed and each chickpea will be split into two equal pieces. This whole soaking-roasting process intensifies the chickpea flavor, and also changes them to light yellow, mildly sweet pappulu or Dalia. This process is done in special places called Bhattis. Almost every town in Andhra Pradesh would have a bhatti. People go there to buy the freshly prepared pappulu and also the puffed rice There were couple of bhattis near our home in Nandyala and we were used to buy them fresh and hot from those places.

Among all the lentil types available in an Indian store, pappulu are the only one which you can just open the packet and pop them into mouth. As kids and even now, we love to eat them as they are or mixed with murmura. They are a snack item for us, like popcorn. If you are from South India, I assume you already know the pappula taste. For those of you who don’t, you must try them at least once. They are usually sold in Indian grocery shops under the label “Dalia” in lentil section. They are really great tasting, guilt free snack.

Pappulu, Dry Red chillies, Cumin, Salt and Dry Coconut

Pappula Podi is a famous Andhra preparation. In some parts of Andhra this is also called gunpowder. We add it to season the curries and also to prepare chutneys and to spread on dosas, idly, pongali and upma. Pappula Podi not only spices but also adds a mild sweetness to the preparation. This following recipe is from my mother’s and my most valued one. If you are used to besan (gram flour) preparations, try this one instead. You will be delighted, I promise.

Pappula Podi:

1 cup – Pappulu
6 to 8 – dried red chillies, Indian variety
2 tablespoons – grated coconut or dried coconut pieces
1 tablespoon – cumin
½ teaspoon – salt or to taste
4 garlic cloves (this is optional, even without garlic this powder tastes great.)

Take pappulu, chillies, coconut, cumin, garlic and salt in a clean and dry mixer jar or food processor. Grind to fine powder. This is a dry preparation and do not add water. Store the powder in a clean, dry, airtight container. This will stay fresh as long as it remains dry.

The following are the most common ways I enjoy the Pappula Podi:

1. Add a tablespoon of Podi to fistful of cooked rice. Add a teaspoon of ghee. Mix and make small rounds. Eat.

2. Add a tablespoon of Podi to cooked rice and dal (tomato or spinach etc). Add a teaspoon of ghee. Mix and eat.

3. Prepare dosas and spread the pappula Podi on the dosa for Masala Dosa. Yum!

4. Dunk and coat the Idly, Upma and pongal morsels in Pappula Podi, and eat. My new favorite is Pappula Podi and oatmeal upma combination.

5. I also add pappula Podi to vegetable curries. Cabbage, bell pepper, green beans and Indian variety broad beans (Chikkudu kaya), the sauté style curries with these vegetables taste great spiced with pappula Podi. I usually sprinkle one tablespoon of this powder before turning off the heat.)

6. Add roasted onion, garlic and few branches of fresh cilantro to Pappula Podi, along with about half glass of water. Grind to smooth to make an instant chutney.

Pappula Podi (Spicy Roasted Chickpea powder, Putnala pappula powder, Dalia Powder)
Pappula Podi

Posted by Indira©Copyrighted in Amma & Authentic Andhra,Chana Dal-Roasted (Dalia),Dried Red Chillies (Thursday July 7, 2005 at 5:53 pm- permalink)
Comments (47)

The New Home of Mahanandi: www.themahanandi.org

Kitchen Gadgets

Sam of Beck & Posh came up with “Utensibility” meme, a chance to talk about our kitchen gadgets. Who can resist this meme, certainly not me. It’s a chance to show off my precious few, ‘I could live without them but I don’t want to’ type of kitchen gadgets.

My most expensive purchase is a Wet Grinder for about $100 from a friend. The actual price is about $250. She gave this item to me just before she moved back to India. I wanted a wet grinder for so long and when she offered, I couldn’t resist (Thanks Jyothi).

My Wet Grinder

I regularly prepare dosa, idly, vada and also different kinds of chutneys using this wet grinder. It has two parts – a steel drum and two roller stones connected with each other through a plastic rod in-between. Not only perfect in shape and size but also using and cleaning is hassle free.

Inside Wet Grinder Wet Grinder Parts

Advantage of this wet grinder over regular mixie/blender is that stone grinding do not generate heat/overheat the contents like the mixie/blender blade does, and so in a way this preserves the micronutrients of the contents. This is really true, you can taste the difference and the stone grind batter and chutneys are always taste so much better. My mother’s generation prepared different types of batters and chutneys using a big mortar and pestle and their hands. My generation, with this kind of appliances can get the same taste but without the hard work.

Cheap but most valuable one is the mortar and pestle I purchased at Ikea 3 years ago for about 3 dollars, I think. I can flavor my tea with cardamom or prepare fresh ginger-garlic paste in a jiff and also it’s so pretty to look at too.

My favorite bargain basement item is a Sawa 2000 cookie gun/press, I purchased in Houston at a garage sale for one dollar. It’s a brand new item and has all discs, tips etc., and inside the box, the owners even kept the original receipt from William-Sonoma for 19 dollars. Perhaps a wedding gift, I don’t know but I too keep the receipt inside the box and whenever I use this item I always look at the receipt and feel very happy about how good a deal I got.

I never used cookie gun for its intended purpose but I use it to prepare murukulu or chakri, my favorite snack food, same kind of operation only the dough I use is not cookie dough but different. Various discs and tips that came along with cookie gun are very useful to make murukulu in shapes. I didn’t bring muruku maker from India with me, so I decided to use cookie gun for muruku making and it worked.

Mortar and Pestle My Murukulu Maker

That’s all for now, I hope you enjoyed reading about my favorites.

Posted by Indira©Copyrighted in Indian Kitchen,Indian Utensils (Friday July 1, 2005 at 12:02 pm- permalink)
Comments (32)

The New Home of Mahanandi: www.themahanandi.org

Peanut Chutney (Groundnut Chutney)

Buddala Pacchadi:

Peanut chutney is the usual accompaniment to breakfast dishes like upma, pongal, pesarattu, dosa, and vada at my home so I prepare peanut chutney quite often. Also it makes a decent substitute to coconut chutney. Fresh coconut is a premium thing here at Ohio, because of that whenever a chutney recipe is called for I usually go with home classic, a crowd pleaser and an Andhra delight ~ peanut chutney (Buddala pachadi in Telugu language).

Peanut chutney ingredients
Peanut Chutney Ingredients

Recipe:

1 cup – peanuts
5 dried red chillies
1 small onion and 1 garlic clove – sliced to big chunks
2 teaspoons – tamarind pulp or to taste
½ tsp salt or to taste
For popu or tadka – 1 tsp each – cumin, mustard seeds, urad dal and six curry leaves

First step is roasting the peanuts.

If I have some time to kill, I usually go for stove-top method.
Place an iron skillet on stove top and on medium heat, slowly roast the peanuts to golden brown color. Cool and rub the skins off. I love the roasted peanut taste produced in this slow-cooking method.

In a rush, needs to prepare quickly, then I go for microwave method.
Pick a wide and big microwave safe bowl. Place peanuts and microwave them for 2-4 minutes, uncovered. How fast the roasting process is done depends on how powerful the microwave is and the quantity of peanuts. After each minute of microwaving, remove the bowl and mix or turn the peanuts with a spoon for even cooking. Microwave again for another one minute and repeat the process. Do this until the cream colored peanuts turn to light brown color. I have to warn you though, just like in any roasting process, microwave method is also a delicate one and in a split second perfectly golden peanuts could turn to charcoal black. Please be careful and pay attention to the process, if this is your first time. Once you get the hang of it, it will be really a breeze to roast peanuts in a microwave.

Step Two:
Heat a tablespoon of oil to smoking point in an iron skillet. Add and brown dried red chillies, onion and garlic.

Wait few minutes for them to cool down. This cooling process somehow increases the chutney taste tremendously and saves the motor blade of your mixer from melting.

Take roasted peanuts in a blender/food processor. Grind to fine.
Add other ingredients, plus tamarind, salt and a cup of water.
Grind to fine consistency.
Remove the chutney to a bowl.
Do the popu or tadka (toast popu ingredients listed above, in half teaspoon of oil in a vessel), add them to the chutney. This is always the final seasoning thing we do.
Mix and serve.

For breakfast dishes like upma, dosas, idlies etc, I always make the chutney little bit watery (see the chutney photo below). If the chutney is for rice (yes, it tastes quite good with rice also) I’d make the chutney little bit tight with as little amount of water as possible. (In the first case we have to dunk the breakfast item in chutney and in second case we have to mix it with rice and shape it into a round.)

Peanut chutney
Peanut Chutney

Posted by Indira©Copyrighted in Amma & Authentic Andhra,Dry Fruits, Nuts & Seeds,Peanuts (Friday May 13, 2005 at 1:50 pm- permalink)
Comments (54)

The New Home of Mahanandi: www.themahanandi.org

« Next Page