Mahanandi

Living in Consciousness ~ Indi(r)a’s Food and Garden Weblog

Tuning into Mandoline

My Mandoline
My 8-year old Mandoline

I tune into the radio when I am in the kitchen. The relaxing talk and tunes from radio help to make the routine job of cutting and cleaning go easy.

Just like music, mandoline is a nice thing to have in a kitchen. It makes it a breeze to prepare vegetables for salads, curries and raitas. And also for chips and bajjis. The replaceable inserts that come with mandoline are extremely useful for different styles of fine and uniform chopping. I use mandoline regularly to cut vegetables like carrots, potatoes, karela and cabbage. Also beetroot, cucumber, plantain and radish. Time saved on cabbage cutting alone makes the mandoline a must have in the kitchen, if you ask me.

Cooking can be a satisfying and enjoyable activity when we have right tools and happy vegetables. For me, a sharp mandoline with its quick and clean cutting blades is the right tool that will make chopping vegetables a happy job.

How about you? Are you a fan of Mandoline? Here are some mandoline tunes from Amazon.com (plastic and stainless steel).


Tools and Utensils from My Kitchen:

Grain Mill (Tiragali)
Sumeet Mixer and Grinder
Skillet to Preapre Pancake Puffs and Ponganalu

Posted by Indira©Copyrighted in Indian Utensils,Mahanandi Selections (Sunday May 25, 2008 at 8:31 pm- permalink)
Comments (19)

The New Home of Mahanandi: www.themahanandi.org

Maamidi Thurumu Pacchadi

Grated, Green Mango Pacchadi

Ugadi is just around the corner. So, it’s mango time at my home and I made thurumu pacchadi in advance for festival day meal on Ugadi. The preparation took about 20 minutes. Very easy, a delight to the senses, I like this pacchadi very much.

Mango Thurumu (Grated Unripe Mango)
Maamidi Thurumu (Maamidi = Mango, Thurumu = Grate)

Preparation:
(makes about two cups of pacchadi)

Green, Unripe Mango:
Take one extremely firm, unripe mango of medium size. Wash. Lightly peel and remove the skin. Using a grater, grate the mango until you reach the seed on all sides, like shown in the photo above. Mango gratings came about two cups for me.

MethiMustard Seasoning:
Heat a cast-iron skillet. Add and dry-roast without oil:
one teaspoon each – methi seeds and mustard seeds to two minutes.
4 Indian variety, dried red chillies to pale brown.
Take them all in a mixer or spice grinder. Add half-teaspoon salt. Grind to fine powder.

Popu or Tadka:
In a tiny pan, heat a teaspoon of peanut oil. When oil is hot, add and toast in this order, constantly stirring:
6 half-inch pieces of dried red chillies to pale brown
8 curry leaves to golden
¼ teaspoon of urad dal to red color,
A pinch each – cumin and mustard seeds
When seeds start to pop, add a pinch of asafetida (hing, inguva)

Putting Together the Mango Turumu Pacchadi:

1. Take mango gratings in a vessel. Add the methimustard seasoning. Combine well.

2. Add the toasted tadka ingredients to the mango gratings. Mix thoroughly.

3. Store the pacchadi in a clean jar. Stays fresh for two to three days upto a week, and traditionally we do not refrigerate. Just don’t use wet spoons.

Mango turumu pacchadi tastes wonderful when mixed and eaten with rice and dal or sambar.

Mango Pacchadi
Mango Thurumu Pacchadi for Ugadi

Recipe Labels:
Amma, Traditional India-Vegan, Vitamin and Mineral Rich food

Posted by Indira©Copyrighted in Amma & Authentic Andhra,Mamidikaya (Green Mango),Methi, Kasuri Methi,Mustard Seeds (Aavalu) (Friday April 4, 2008 at 4:30 pm- permalink)
Comments (11)

The New Home of Mahanandi: www.themahanandi.org

Vine Sweet Mini Peppers

Photo Purchase Keywords: Capsicum, Curry
(It takes money, time, effort and energy for food photography. Please don’t photosteal. Click on the links and purchase the photos legally to digital download and to print. Thanks.)

Mini Peppers

They look like peppers and they are named peppers.

They are not what you might expect. Certainly not the fiery peppers that spice up the curries, nor the bloated bell peppers that would collapse on cooking.

No, these peppers are the stuff of dreams. Like the botox-faced on-air talent, they glisten and also need PIN codes to access their emotions. A product of calculated hybrid breeding, they do not shrivel, sweat and the seeds inside rarely reproduce on Design. Other charming features – delicate skin, cooks in minutes and doesn’t become saggy on cooling. A perfect, plastic produce, alive with cloying sweetness. These are the “Vine Sweet Mini Peppers“, the 21st century vegetables.

Not knowing what they were, I brought them home. Dolts they are, taste buds seem to accept them without any hesitation.

Peppers for Figure 8
Pepper in Figure 8

Recipe:

1 tablespoon peanut oil
Pinch each – cumin and mustard seeds
20 to 25 mini peppers – ends removed and sliced to thin rings

Heat oil in a wide skillet. Add and toast cumin and mustard seeds. When seeds start to pop, add the peppers. Mix. Keep the heat on medium, cover the skillet and cook for about five minutes.

While peppers are cooking, prepare the pappula (dalia) podi.

3 tablespoons pappulu (dalia, bhuna chana)
1 tablespoon grated coconut
1 teaspoon cumin
¼ teaspoon salt
2 dried red chillies, Indian variety
Take them all in a spice grinder, blend to fine powder.

Remove the lid and sprinkle this powder on peppers. Also add quarter teaspoon each – turmeric and salt. Mix. Cook, uncovered for another five minutes. Serve at once. Tastes good with chapati, roti, rice or pasta.

Mini Peppers Curry with Chapati
Mini Pepper Kura with Corn Rotis, Carrot-Okra Sambar and Pear ~ Meal Today

~ Indira

Posted by Indira©Copyrighted in Chana Dal-Roasted (Dalia),Peppers (Tuesday February 19, 2008 at 4:48 pm- permalink)
Comments (5)

The New Home of Mahanandi: www.themahanandi.org

Cookery, Indic ~ A Series by Veena Parrikar

Cookbook Collection

Last year, in anticipation of a long stay in India, I began organizing my collection of food-related books into a catalogue. As far as collections go, my cooking library is fairly modest with around 200 books. The catalogue, however, reveals a pattern that is, by and large, a reflection of my culinary inclinations.

  • 95 percent of the collection relates to the food of India.
  • Of these, only four or five cookbooks are published outside India.
  • Hardly two of the cookbooks describe themselves as Indian cookbooks.
  • There are zero books on fusion food. Before someone reiterates the profundity that all Indian food is ultimately fusion food because chillies and tomatoes were brought to India by foreigners, let me hasten to add that I am referring to fusion as we know it today.
  • None of the books are written by professional chefs or owners of restaurants serving “authentic Indian” cuisine; a miniscule number are written by serial cookbook authors; and none of them promise a meal with three ingredients in less than 20 minutes.

Infer what you will from these facts, but one thing has become amply clear to me over the last fifteen years since I began collecting these books. There is a vast body of English and regional-language cookbooks published in India by small publishers or the authors themselves. Most of these modest cookbooks never make it to the shelves of the large mainstream bookstores even in India. They have to be ferreted out of small local bookshops, from publishers’ offices, or directly from the authors. It is, however, here that the best Indian cookbooks are to be found, for they are authored by individuals who cook for their families, love their subject and are willing and able to communicate their knowledge.

For a number of reasons, these books lie largely below the radar of the traditional media, the internet, and the large chain bookstores. First and foremost, cookbooks in regional languages rarely gain a readership outside the geographical state or community that is literate in those respective languages. Even among the books written in English, which have the potential for wider demand, the authors often lack the means, inclination, or savvy to grease the media and marketing machinery into their service. Therefore, most of these books do not get the benefit of newspaper and magazine reviews or grand releases with a celebrity cutting the ribbon. Last and least, as is true of most things these days, medicrity abounds here too. Some of these books probably deserve their share of oblivion for their poorly written recipes, terrible photos, and quite simply, bad food.

So what makes a good cookbook?

Culinary enthusiasts have long debated this in forums, blogs, conferences, and articles. The answers vary depending on whom you ask. A publisher will tell you that it must reach out to a large readership base. Young men who “also cook” love books with pictures of female chefs bending over the pot and licking the spoon. Twenty-and-thirty-something women want to see, above all, lovely photographs of the food. The inexperienced want clear instructions that leave nothing to culinary imagination or wisdom. The reluctant cooks wait for books that will fire their dormant enthusiasm and catapult them from couch to kitchen. The ignorant want books that “comprehensively” cover the “ethnic” cuisine that catches their latest fancy. The purists look for authenticity; the apologists throw up their hands in the air and ask, “what is authenticity”?

Notwithstanding my somewhat flippant tone above, this is a serious question with no easy answers, which is why I have never understood the rationale behind lists such as “Five Best Indian Cookbooks”. Perhaps they serve a purpose in guiding those who are completely new to Indian cuisines. As someone who has grown up on home-cooked Indian food and now cooks it almost everyday, there really is no one (or even ten) great Indian cookbook. My culinary needs vary at different times: on some days, I want to spend three hours making a biryani in 20 difficult steps; on other days, I want to quickly find a new way to use up the five drumsticks and two brinjals sitting expectantly on the kitchen counter. There are days when I would rather lie on the couch and read about the old days when Indian kitchens did not have pressure cookers and mixer-grinders. I might be curious about how Kolhapuri mutton rassa is made although I am vegetarian and would not eat the dish except under extreme duress. Above all, I need Indian food books to keep feeding my interest in the subject almost daily for the more you explore it, the more acute the realization of how little you actually know. Therefore, I will not attempt to define my criteria for a good Indian cookbook.

In this series, I will highlight some selected books from my personal collection. These books are not likely to win awards or cookbook contests and they are not without their faults, but each one has some trait that I value in a cookery book. The series is also a small way of putting the spotlight on cookbooks that deserve more attention than they have received in the media. Since my literacy is limited to English, Marathi, Konkani, and Hindi, my collection is entirely comprised of books in these languages. I would love to hear from readers about their favourite lesser-known cookbooks in these and other regional languages.

Veena Parrikar

(Mahanandi will feature a column by Sreemathi Veena Parrikar, a culinary enthusiast and an excellent writer, on first Monday of every month. – Indira)

Posted by Indira©Copyrighted in Reviews: Cookbooks,Veena Parrikar,Zenith(Family&Friends) (Sunday January 6, 2008 at 12:17 am- permalink)
Comments (13)

The New Home of Mahanandi: www.themahanandi.org

Of Being and Becoming~ Ragi Idlis

by Janani Srinivasan

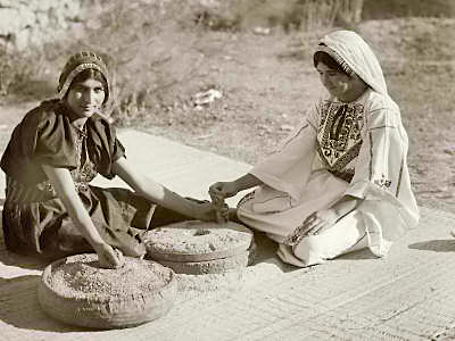
Students and Rasikas of Karnatic classical music who fondly (or not 🙂 ) recall their first tentative forays into “Sarali” and “Janta Varisais” might also remember that the credit for a creating a pedagogy of Karnatic classical music goes to Sri. Purandaradasa. And if your mother was a particularly determined woman, you may even have dutifully trotted out works from his corpus to bored admiring relatives come socio-religious occasions like Navarathri and Varamahalakshmi Vratha gatherings.

Whether it is Ratnakara the bandit turned into the Adikavi Sri.Valmiki Muni, or Angulimala the grisly finger-slicing highway terrorist turned Buddhist monk, tales of what can fairly be called instantaneous and extreme spiritual makeovers have captured the imaginations of generations of Indian story tellers and their listeners for centuries. The narrative arc usually progresses along the lines of hopelessly-and-diabolically-evil-person reaches the apogee of his (supported usually by a silently long-suffering her) evilness when a chance encounter; usually in the form of divine grace; completely awakens and transforms said individual. They then attain a sort of mythic stature and are held up as role models for future generations to emulate. Indeed, the story of the rapaciously greedy miser-turned musician-mystic Sri Purandaradasa is a familiar and inspiring one to many of us who grew up listening to these tales. Wiki weighs in with a more complete history of Sri Purandaradasa.

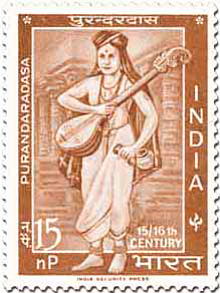
Stamp Commemorating Sri Purandaradasa

In our family, one of our all-time personal favourites from his oeuvre remains the haunting “Ragi Tandira”. Kannada speakers will identify with the clever punning on the word “Ragi”. Much like a Zen koan, the lyrics here have layers of meaning couched in seemingly quotidian references.

Indeed it is not hard to surmise that Purandhara dasa, once he became a wandering minstrel after giving up his former materialistic life, must have still been intimately familiar with the kind of people that once made up his close family and friends circle. Hence, his desire to show them the path to a more richer inner life must have been tempered with the practical consideration that they might reject his message if he was too heavy handed or preachy.

This composition opens with the poet singing, “Have you brought Ragi for alms?” He then goes on to describe Ragi in glowing adjectives “Yogyaragi , Bhogyaragi” and so on… While in one sense, it can be read as an extolling of Ragi, the staple local grain, the sustainer of life itself with various adjectives: Yogya (worthy) + Ragi, Bhogya (enjoyable) + Ragi ; on another level, it is a veiled injunction to the householders themselves to become “worthy”, “Yogyaragi” as one word.

Here the notion of “Yogyatha” like many words in the vernacular, defies simplistic translation. It is a conflation of many shades of meaning conveying a sense of worthiness, deservingness, etc. The rest of the song progress in the same vein exhorting us to various acts of goodness like offering food to the needy (anna chatrava nittavarAgi), attaining fame for the right reasons (kyathiyali migilAdavarAgi) and cautioning us to stay away from inethical practices (anya varthegaLa bittavarAgi) and so on.

So as homage to Sri Purandharadasa, his beloved Vittala and the ancient grain sustaining generations of his people; here is my mother’s recipe for Ragi Idlis. What a song and dance over a simple grain you say? Well, just try these. Like a mother’s love, these are earthy and wholesome. In a word, Perfect!

Ragi Grains Ragi Batter for Idlies
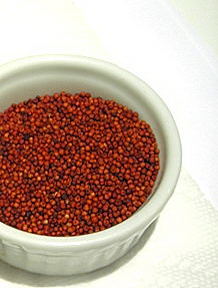
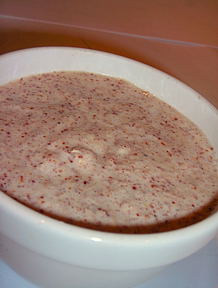
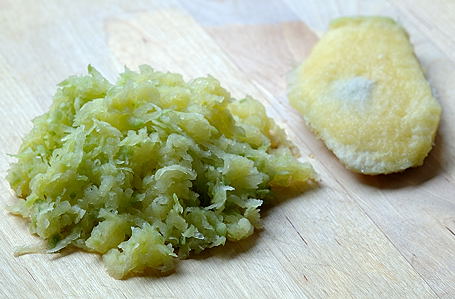
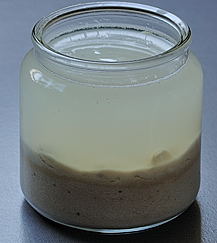
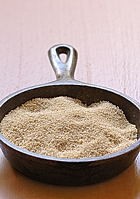
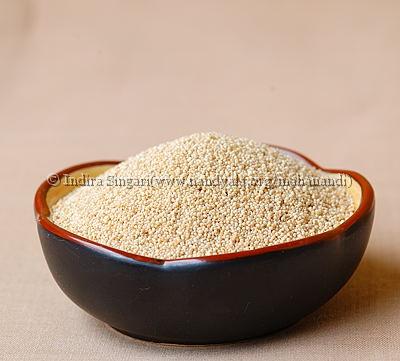
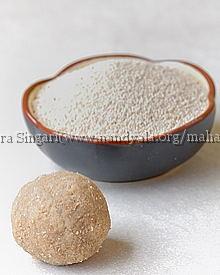
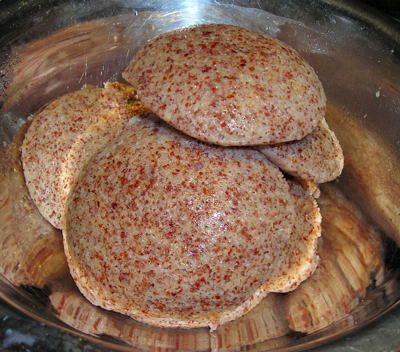
Ragi Grains ……………………. Sprouted Ragi and Rice Batter for Idlies

Recipe:
(Makes atleast 2 dozen of the standard sized Idlis- but quantity yielded depends on the Idli mould size.)

Whole Ragi Grain- 1 cup
(I sprouted these for added nutritional benefits. But it’s not strictly necessary)
Idli rice (parboiled) – 1 cup
Whole skinned Urad dal – ¾ cup
Methi seeds -1 tablespoon
Salt to taste
Sesame oil- to grease idli moulds (I used “Idhayam” brand)

After multiple washes, soak the Ragi for a day. Drain and let it rest for another day till you see tiny white sprouts. Alternatively, you can skip the sprouting and just soak the ragi for 3-4 hours longer than you soak the rice. Soak rice, whole urad and methi seeds in separate containers for 4-6 hours or overnight.

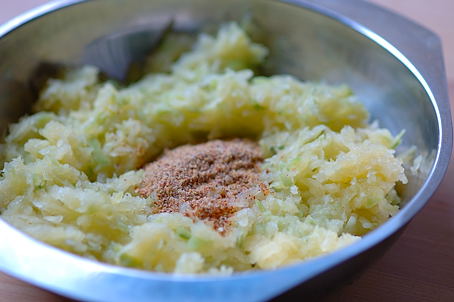
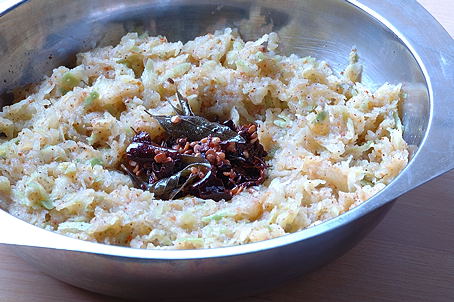
In a wet grinder or a mixie /blender, grind the urad dal till light and fluffy. A test for fluffiness is to keep a bowl of water and drop a tiny pinch of batter. If it floats, it is light enough. Then add and grind the Ragi grains and Methi and finally the rice. Take care that the rice should not be ground too smooth. It should be of rice Rava consistency. Alternatively, you can use rice Rava instead. Take the batter in a vessel, fold in some salt to taste and leave it overnight to ferment. I found that the dough fermented really well, doubling up and overflowing the vessel. So take adequate precautions.

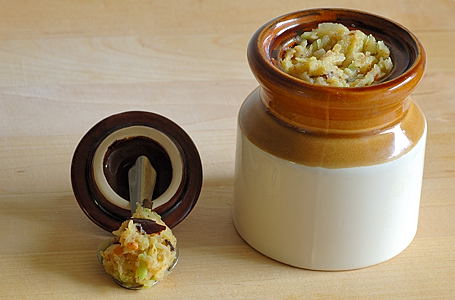
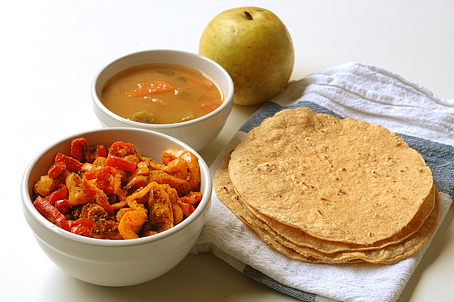
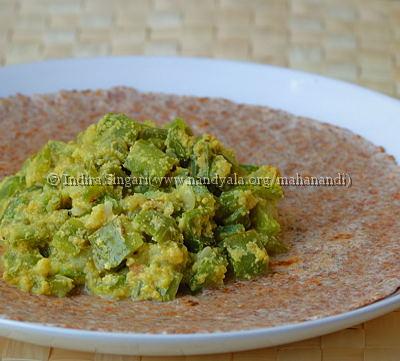
Next morning, lightly stir the well fermented batter. Grease Idli moulds and steam in a pressure cooker for 12-15 minutes till done. Ragi idlis can be served with a dollop of butter or ghee on top, along with the usual fixings on the side: sambar, coconut chutney and/or Milagai Podi.

~ Article by Janani Srinivasan


Light and Soft Ragi Idlies

Notes:
Audio of Ragi Tandira sung by the late Sri. Maharajapuram Santhanam in Raga Kalyanavasantham – Link.
Ragi pronounced with “Ra” as “raa”, “G” as in God not as in gentle, “i” pronounced “ee”.
Tandira pronounced Thundheera with the “h” NOT aspirated. “T” and “d” sounds softened not sharp as in the common American/English usage and the “an” is pronounced “un”.
Janani Srinivasan’s articles on Mahanandi: It’s Chakalaka, Baby!, The Arisiupma Trilogy.

Posted by Indira©Copyrighted in Biyyamu (Rice),Janani Srinivasan,Millet,Ragi,Sprouts (Molakalu) (Thursday November 1, 2007 at 4:44 pm- permalink)
Comments (32)

The New Home of Mahanandi: www.themahanandi.org

Homemade Rice Milk (Horchata)

Homemade Rice Milk
Homemade Rice Milk

Simple, inexpensive and adaptable to many flavors, rice milk is like glacial water. Thick, creamy and sweet. My recipe is loosely based on the Horchata that they serve at mom and pop style Mexican restaurants. Rice and almonds ground together and I flavored the milk with cardamom and jaggery. This is my first try and we both, Vijay and I, liked the result very much. Here is how I prepared it:

Ingredient list:
(Fills 4 small glasses)

3/4 cup – brown basmati rice
1/3 cup – almonds
6 cardamom pods- seeds coarsely crushed
6 cups – water
1/4 cup – jaggery (or sugar)

Wet grinder or blender


Brown Basmati Rice and Almonds

1: Soak almonds in warm water for about 30 minutes and then peel the skins.
Grind rice to fine, using a blender or spice grinder, until a semolina like texture is achieved.

Pulverized Brown Basmati Rice and Almonds without skins

2: Combine the rice powder, almonds and cardamom. Add about 4 cups of water and mix. Keep the mixture covered overnight.

Rice, Almonds and Cardamom covered with water for overnight soak Rice, Almonds and Cardamom covered with water for about 12 hours
Rice, Almonds and Cardamom ~ Before and After Overnight Soak

3: Next morning, place the mixture and jaggery in a stone grinder or blender. Gradually adding two cups of water, blend to smooth. Pour the rice milk through cheesecloth or filter into a bowl. Gently squeezing/stirring, extract the milk. Refrigerate the rice milk for about 15 minutes. Serve and enjoy.

If you wish, add lemon or orange juice and bananas to the milk and blend to make a great tasting rice milk smoothie.

Horchata, Rice milk for JFI:Rice Food blog event
Refreshing Rice Milk ~ for JFI: Rice, hosted by Sharmi of Neivedyam

Kitchen Notes:
The idea here is to use unpolished, unmilled rice. If you think for a minute, it’s easy to see that nutrient-rich brown rice makes a great tasting milk than the one prepared with polished, white rice. And, brown rice goodness and basmati’s sweetness make brown basmati, a perfect choice to prepare rice milk.

Recipe idea for leftover rice-almond sediment: Vennai Puttu (Sweet from Tamilnadu, India)

Posted by Indira©Copyrighted in Almonds,Biyyamu (Rice),Brown Basmati,Jihva For Ingredients (Saturday September 1, 2007 at 9:42 pm- permalink)
Comments (29)

The New Home of Mahanandi: www.themahanandi.org

Gasagasalu ~ Bendakaaya

Okra ~ Poppy Seed Curry:

When people think of Andhra kuralu (curries), they think of chana dal, chilli and coconut podi flavored ones. Although these are very commonly added to spice-up the vegetables, in our homes in Nandyala, Kurnool regions, along with peanuts and sesame, poppy seeds also make frequent appearance. Alone or together with coconut, both in dry style curries like the one I prepared today with okra and in sauce form like the one blogged here.

I realize that poppy seeds are not a familiar ingredient to many of you fellow Bharatiya. Their creamy-nut like flavor is really worth getting to know. You won’t regret trying, I assure you.

Poppy Seeds (Khus Khus, Gasagasalu)Poppy Seed PowderOkra (Bendakaya, Bendi, Ladies Fingers)

Recipe:

20 young and fresh looking okra (Bendakaya, Bendi)
3 tablespoons poppy seeds (Gasagasalu, Khus Khus)
3 dried red chillies – Indian variety
Salt and turmeric – to taste or ½ teaspoon each
Popu or tadka: 1 tablespoon peanut oil,
Pinch each – cumin, mustard seeds and 6 curry leaves

1 Trim the ends and cut the okra to quarter to half inch wide rounds. For a gummy free okra experience, follow the tips outlined here.

2 Roast poppy seeds in a dry, hot iron skillet for about 3 minutes, until they just start to color and release their aromas. Add dried red chillies and a pinch of salt and pound or blend all the ingredients together. Keep working until a nice, moist paste is formed. I usually use a spice grinder or Sumeet small jar for this purpose.

3 In a wide skillet, heat a tablespoon of oil. Add and toast the tadka ingredients first and then add the okra pieces. Mix once and fry the pieces, very rarely stirring, until they are free from moisture. A well seasoned cast-iron skillet charms the okra to a beautiful crispiness. If you have one, use it for this recipe. When okra pieces transform from clinging kids to leave me alone type teenagers, it’s time to introduce the adulthood delights with spices. Add the poppy seed powder, turmeric and salt. Mix gently and saute for few more minutes.

Serve the curry hot with rotis/chapatis or with rice and dal. Okra-poppy seed curry makes a great tasting side dish.

Okra-Poppy Seed Curry
Okra-Poppy Seed Curry with Ragi Roti and Olive Chutney ~ Meal Today

Recipe Source: Amma, Nandyala
Poppy Seed Based Recipes from Archives:
Brinjal-Potato Curry ~ on Oct 25th, 05
Banana Pepper-Baby Potatoes in Poppy Seed Sauce ~ on April 21st, 06
Moong Dal Payasam ~ on June 9th, 06
Ridgegourd (Turai/Beerakaya) in Poppy Seed Sauce ~ on May 22nd, 07
Ratatouille:India Inspired ~ on July 10th, 07

Posted by Indira©Copyrighted in Amma & Authentic Andhra,Benda Kaaya(Okra),Poppy Seeds (Tuesday August 28, 2007 at 9:45 pm- permalink)
Comments (20)

The New Home of Mahanandi: www.themahanandi.org

Mahanandi Selections ~ Grain Mill

I often get asked via comments and email, to recommend cooking utensils and products. I am extremely particular about the products that I buy for my kitchen. I wasn’t sure my taste is your cup of coffee, so I was reluctant all these years. Now, I have decided to take up the challenge. “Mahanandi Selections”, the shopping suggestions series is going to be a new one on Mahanandi and features products that I have at my home or would like to have in my kitchen.

I hope you find this new series interesting and useful.

double_curve.gif

Grain Mill (Issurayyi, Tiragali)


Image courtesy: Life in the Holyland

Back home, my family uses stone-made grain mill, similar to the one shown in the photograph to mill grains. This circular shaped stone mill is called “Issurayyi and Tiragali” in my language Telugu. We use it mainly for making flour for sweets like sunnundalu and attarasalu (adhirsam). The flour fineness matters a lot for these traditional sweets. Too fine powder, the sweet will stick to the roof of the mouth. Too coarse, it would be difficult to shape them. The advantage of stone-made grain mill is we can manually control the milled particle size, which in turn helps to make perfect sweets.

The one at my parent’s home is much smaller in size. The circular stones are about the size of big dinner plates and about the thickness of steroid-fed biceps muscle. It’s quite old and my mother keeps it in good condition. I remember turning the stone mill to help my mother.

This is how the stone grain mill works: A jute cloth will be placed on the flour and the stone mill will be placed on the cloth. The mill is essentially made of two circular stones. The lower circular stone stays stationary and the upper stone moves. It has an upright handle on the corner and this is used to turn the stone. The grain will be poured, a handful at a time, through the hole in the center of upper millstone, while the stone is turned continuously. Friction and weight created by the upper stone mills the grain. And the flour will get gradually pushed to the edge and falls out on to the cloth. Depending on the speed at which it is rotated and by the strength applied, the milled grain consistency varies – from fine, to medium to coarse. It may sound complicated but the whole thing operates on simple friction based principle. Looks wise Issurayyi is a real beauty. Operating wise, it’s a great way to keep the upper hands slender.

After moving to US, I was looking for a grain mill that operates in issurayyi style. I found one few years ago at a shop called Tuesday Morning. It’s a Porkert brand grain mill. A different look and feel but operates on the same principle. A big plus is it is very well made and of quality materials. The one I have has both ceramic and metallic burr plates. Ceramic ones are used for grinding oily nuts etc and metallic burr plates are great for grains and lentils like rice, urad dal etc. We have to assemble the parts and fix the machine to a table and operate it manually by rotating the handle. I have been using it to prepare sunnundalu mainly. This sweet is that important to us and cannot be made of flour from a coffee grinder or Sumeet style mixer-grinder.

If you have a traditional preparation requirement, where the milled grain size matters a lot, then go for this type of grain mill. It’s a hard, sweat inducing upper arm workout but the end result is definitely worth the effort. I have to warn you though, these manually operated machines are not magic abracadabra kind of things. A real zeal and know-how is essential for good experience.

Important:

1. You need to make some trials before you could get the required flour fineness. This could be done by adjusting the gap between the millstones, handle turning speed, and by adjusting the quantity of grains through the hopper.

2. This machine looks and works great. But also consumes considerable amount of time and effort to get the required results.


Machine Details

*****************

PORKERT’s Kitchen Grinding Mill ~ A Kitchen Gadget that I Own
Preparing Sunnundalu Sweet at home with PORKERT’s Kitchen Grinding Mill, Type 150

To purchase:

Porkert’s Manual Grain Mill

Different types of Grain Mills from Amazon.com.

Previously on Mahanandi Selections :
Sumeet Mixer Grinder
Aebleskiver Skillet (Ponganalu/Paniyaram/Uniyappam Pan)

double_curve.gif

Note: The things that I feature at ‘Mahanandi Selections’ (MS), reflects my own cooking style. You may regard a tool that I deem essential as an expendable thing or vice versa. I have absolutely no interest to convince you otherwise. It is good to be realistic about our own capabilties, limitations and what we can afford.
MS Comment Policy: Brand wars and malicious hearsay with intent to damage a brand reputation – comments of this nature will get scrubbed from comment space.

Posted by Indira©Copyrighted in Amma & Authentic Andhra,Indian Kitchen,Indian Utensils,Mahanandi Selections (Friday August 3, 2007 at 1:30 pm- permalink)
Comments (30)

The New Home of Mahanandi: www.themahanandi.org

Mahanandi Selections: Sumeet Mixer

I often get asked via comments and email, to recommend cooking utensils and products. I am extremely particular about the products that I buy for my kitchen. I wasn’t sure my taste is your cup of coffee, so I was reluctant all these years. Now, I have decided to take up the challenge. Mahanandi Selections, the shopping suggestions series is going to be a new one on Mahanandi and features products that I have at my home or would like to have in my kitchen.

I hope you find this new series interesting and useful.

double_curve.gif

SUMEET MIXER GRINDER

Sumeet homepage: Sumeet.net
(I own a Sumeet and I’ve been using it for almost six years. Great Machine!)

Product Features: The Multipurpose Asia Grinder was created specifically to tackle the tough DRY & WET grinding tasks required in the diverse cuisines of India. Yet it is equally at home where grinding is vital to the cuisines from other parts of the world, (Mexican Moles, Thai Green Curry, Harissa, etc). The Asia Grinder effectively grinds Dry or Wet ingredients into fine powder or a smooth thick paste, from as little as 50 grams to as much as 400 Grams in less than 2 minutes. Soaked Lentils, Rice, Coconuts, Chilies, Herbs, Ginger, Garlic to name a few, can be ground without adding a drop of water. A feat only possible using Stone & Pestle. It comes with 4 Interchangeable blades for various tasks such as Blending, Whipping, Mincing, Grating etc. The Small Quantity Grinder Jar is ideal for small amounts of dry and wet grinding, be it fresh coffee powder or quick chutney.

Heavy Duty Indian Mixer/Grinder has Safety Lock System, 110 Volt. 3 Stainless Steel Jars with a “Double Wall Stainless Steel” construction, a redesigned integrated blade and lids with a more user friendly snap-in locking system.

Product Reviews:

From Amazon: “It can take a kitchen aid for breakfast and black dekker for lunch and still have appetite for a couple of sun beams.”

From Food Bloggers: Barbara of Tigers and Strawberries often mentions Sumeet in her well detailed recipe instructions. Her review:

“I am very fond of and use my Sumeet Multi-Grind all the time. It is a really fine piece of equipment that will grind up any wet or dry ingredient that you would have into a very smooth paste (or powder if all the ingredients are dry), including rock hard galangal and chunks of cinnamon stick, without fail. The parts of the machine that come into contact with the food are all dishwasher safe, so they are simple to clean. I have had it for nearly eight years and have used it at least four times a week, and it has never choked, failed me or even considered not running.”

Price Details:
Ships and Sold via Amazon.com
Sale Price: $169.00 ($174.99)

For news and new product information, here is the Sumeet homepage: Sumeet.net

Last week on Mahanandi Selections :
Aebleskiver Skillet (Ponganalu/Paniyaram/Uniyappam Pan)

Posted by Indira©Copyrighted in Mahanandi Selections (Friday July 27, 2007 at 3:34 am- permalink)
Comments (42)

The New Home of Mahanandi: www.themahanandi.org

Tomato Pulusu from Nandyala

During peak tomato season, when tomatoes are at their best and prices are low, my mother, Rajeswaramma would prepare this tomato pulusu. With ripe tomatoes, fresh coconut, and toasted coriander seed seasoning, tomato pulusu is nothing but taste buds tingling tomato love.

While picking tomatoes for tomato pickle, I found this precious looking tiny tomato (shown in the photo). I guess it belongs to one of those heirloom varieties. It looked so pretty and different. I did not put it in the pulusu. I photographed it and ate it like that, adding little sugar. Tasted good!


Tomato, Fresh Coconut, Coriander Seeds

Recipe:

Cut and cook:
Rinse 8 ripe tomatoes and cut them to large pieces.
In a saucepan, heat a teaspoon of ghee. Add and toast the popu or tadka ingredients (cumin, mustard seeds – a pinch each). When seeds start to splutter, add the tomato pieces. Stir in chilli powder, salt and turmeric to taste or quarter teaspoon each. Mix and cover with a lid and cook on medium high for about 10 to 15 minutes, stirring in-between.

Blend and Add:
While the tomatoes are cooking, in a spice grinder, take 3 tablespoons of fresh grated coconut, add a tablespoon of toasted coriander seeds. Also 2 cloves and half inch piece of cinnamon stick. Grind to fine consistency.

Add this paste to the cooking tomatoes. Stir the mixture together and gently press the softened tomatoes with the back of the spoon to mush them. Add about half cup of water. Mix and taste it for spices and adjust the salt and chilli levels to your liking. Cover the pot with a lid and simmer on medium-low for another 10 to 15 minutes. When the pulusu starts to become thick, then turn off the heat.

Serve the tomato pulusu piping hot with chapati, puri or rice with little bit ghee drizzled on.


Tomato Pulusu with Chapati ~ Taste buds Tingling Tomato Love

Posted by Indira©Copyrighted in Amma & Authentic Andhra,Tomato (Thursday July 19, 2007 at 9:22 pm- permalink)
Comments (16)

The New Home of Mahanandi: www.themahanandi.org

Ratatouille ~ India Inspired

Cheeseless and Cheerful, India Inspired Ratatouille
Cheeseless and Cheerful ~ India Inspired Ratatouille

When it comes to international cuisine, French cuisine ranks among our favorites. Then again, we are devotees of Tibetan, Thai, Mexican and Italian … well you get the picture. But back to French food, if we may. So delighted are we of the new Pixar animated movie, we decided to recreate one of our favorite French recipes at home. Cheeseless and cheerful ~ The Ratatouille.

Dictionary defines Ratatouille as “A vegetable stew, usually made with eggplant, tomatoes, zucchini, peppers, and onions, seasoned with herbs and garlic”. Ratatouille, Pulusu, Kurma or Subzi …different names in different languages but the underlying wisdom is the same. Isn’t it? When vibrant and fresh looking vegetables are available, the recipe served will make happy people happier and comforts those who aren’t. Really, we don’t have to do much in order to make a miraculous meal.

The India inspiration is addition of poppy seeds. When added to bobbling vegetables in the pot, the powdered poppy seeds will bring sweet aroma and subtly enriches the ratatouille in a typical Indian way.

Cheeseless and Cheerful, India Inspired Ratatouille
Farm Fresh Vegetables from Pike Place Market for Ratatouille ~ Round Zucchinis, Red and Green Capsicum, Shallots, Purple Garlic, Baby Carrots, Fresh Peas, Tomatoes & Green Brinjals (Total Cost $8).

Recipe:
1 teaspoon peanut oil
¼ tsp each – cumin, mustard seeds and 6 curry leaves
4 garlic cloves and 2 shallots – finely chopped
6 each – tomatoes, brinjals, carrots & 2 each – zucchinis, capsicums ~ cut to chunks
Half cup each – freshly shelled peas and finely chopped coriander leaves
Quarter cup poppy seeds – powdered fine in a spice grinder
¼ tsp red chilli powder, salt and turmeric or to taste
**************
In a big saucepan, heat the oil until a curry leaf tossed in it sizzles. Lower the heat to medium. Add the curry leaves and toast to pale brown. Toss in cumin, mustard seeds. When seeds start to jump, add the garlic and shallots. Stir fry few minutes. Add the remaining vegetables and peas. Cook, covered for about ten minutes. The vegetables start to get tender and you will see lot of water in the pot. At this stage stir in poppy seed paste, chilli powder, salt and turmeric. Sprinkle coriander leaves, mix and simmer another ten minutes, until the sauce becomes thick but pourable.
Serve warm with rice/chapati/bread or pasta.

Posted by Indira©Copyrighted in Bell Pepper,Poppy Seeds,Vankaya (Brinjal),Zucchini (Tuesday July 10, 2007 at 9:06 pm- permalink)
Comments (16)

The New Home of Mahanandi: www.themahanandi.org

Green Brinjals with Cumin

Vankaya with Jeelakarra Karam:

“Let’s consider a situation when you are all alone at home. You are hungry and would like to satisfy your cravings. What will you cook if you want to cook for yourself?”

Asks talented foodblogger Live2Cook.

Just like her, if brinjals are in my vegetable stash, instead of indulging in junk food, I would be motivated enough to prepare a decent meal. I enjoy brinjals that much. Particularly green brinjals which we call Poluru Vankayalu in Telugu. I am one of those people with a passion for green brinjals.

Meal is for myself, so I would go for simple ten-minute preparations like brinjal with ginger or today’s recipe, “Brinjal with Cumin”. This little-known but worth-knowing cumin flavored brinjal curry is a delight to the senses and a must try for green brinjal fans.


Green Brinjals (Poluru Vankayalu)

Recipe:

Aromatic Cumin Powder (Jeelakarra Karam):
Take 1 tablespoon cumin, 1 roughly chopped plump garlic clove, 4 red chillies and a pinch of salt in a grinder. Grind to smooth without adding water.

Green Brinjals (Poluru Vankaya):
Pick 15 young and firm green brinjals. Remove the stem end and wash. Finely slice brinjals lengthwise like shown in the picture above.

Cooking the Curry (Kura):
Heat a wide skillet. Add a teaspoon of peanut oil. When the oil is hot, add a pinch each – cumin, mustard seeds and five each – curry leaves and roughly chopped garlic pieces. When they start to turn to gold, add the brinjal pieces.

Saute on medium-high heat, mixing in-between. Green brinjals cook fast, so be ready with aromatic cumin powder. Sprinkle the cumin powder and also turmeric and salt to taste. Toss to mix well and cook few more minutes, until the brinjal pieces are just tender but still green. Serve hot.

Cumin flavored green brinjal curry tastes great with rice/chapati, toasted bread/bagel or with papad.


Cumin Flavored Green Brinjal Curry on a Papad ~ Meal for Myself
For JFI~Eggplant Event Hosted by Lovely Sangeeta of Ghar Ka Khana

Recipe source: Amma, Nandyala

*******************

How many of you know that green brinjals are cultivated in India and they are named after a village called “Poluru” near Nandyala region, Andhra Pradesh?

More Green Brinjal (Poluru Vankaya) Recipes:
Stuffed Brinjal Curry (Gutti Vankaya Kura)
Brinjal-Potato Curry
Green Brinjal-Fresh Amaranth Curry

Posted by Indira©Copyrighted in Amma & Authentic Andhra,Cumin (Jeelakarra),Jihva For Ingredients,Vankaya (Brinjal) (Sunday July 1, 2007 at 1:00 pm- permalink)
Comments (24)

The New Home of Mahanandi: www.themahanandi.org

Jeelakarra Karam (Cumin and Chillies)

Jeelakarra Karam

Jeelakarra Karam is a type of highly aromatic masala powder with cumin and chillies from Andhra Pradesh, Bharath.

Recipe:

Quarter cup – cumin
10 to 12 red chillies – small round type shown above
2 to 4 garlic cloves – roughly chopped
Quarter teaspoon – salt

Take cumin in a spice grinder and grind to fine powder. Add red chillies, garlic and salt to powdered cumin. Grind to smooth without adding water. Remove and store in a clean jar.

Dry saute style curries with brinjals, potatoes and tindora greatly benefit by the addition of flavorful and smoky Jeelakarra Karam.

Recipe source: Amma, Nandyala.

Posted by Indira©Copyrighted in Amma & Authentic Andhra,Cumin (Jeelakarra),Dried Red Chillies,Herbs and Spices (Friday June 29, 2007 at 9:50 pm- permalink)
Comments (11)

The New Home of Mahanandi: www.themahanandi.org

Matar Paneer with Fresh Summer Peas

Plump and firm, fresh peas of summer are a sight to behold. Bouncing out of pods, with that smooth pearly finish in pleasant green and warm sheen, they seem fit for a necklace rather than that endless pit we call stomach.

After the classic south Indian style Guggullu, the next best recipe with freshly shelled peas is the famous north Indian specialty called “Matar Paneer”. Matar means Peas in Hindi language. There are so many different ways to prepare this recipe. Mass produced for buffet, the much-maligned style with frozen peas is sadly how most people get acquainted with matar paneer. Over-cooked in overtly-spiced sauces, poor peas and paneer would evoke pity instead of poignant piquancy. Even the hardcore buffet connoisseurs can’t help but pass the peas. Thus punished, the curry remains in the pan, to spend the night in refrigerator feeling the onion raita’s aroma, all to face another day of reheating and rejection. The sob story of restaurant style matar paneer is truly pull-at-the-heartstrings, tearjerker of bollywood.

In contrast, the home-style version is an Indian housewife’s summer romance with sweet peas. It’s a joyous celebration of nature’s bounty. Fresh cow or buffalo milk churned to paneer, a cup of peas freshly shelled from the pods, few tomatoes plucked from the vines – if you stop and think for a minute, it’s easy to imagine how the recipe originated and the reason it got so famous. A treat for dulled taste buds as well as a sight for sore eyes, fresh peas of summer make matar paneer a pleasure to savor.


Peas, Paneer, Tomatoes and Cashews ~ Ingredients for Matar Paneer

Recipe:

1 cup fresh shelled peas
½ cup each – paneer cubes and roasted cashews
4 tomatoes and 1 onion – finely sliced
1 tablespoon – ginger, garlic and cilantro (GGC) paste
1 tablespoon – clove,cinnamon,coriander and cumin (CCCC) powder
½ tsp each – salt and turmeric (or to taste)
¼ tsp – chilli powder (or to taste)
1 teaspoon oil

Grind roasted cashews to fine powder in a mixer or spice grinder.

Heat oil in a saucepan. Add and saute finely chopped onions till translucent. Add the GGC paste, cook for few seconds. Next, tomatoes turn. Cook them till they turn to mush when pressed with the back of spoon. After spoon-mushing tomatoe pieces, stir in cashew powder, CCCC powder, salt, turmeric and chilli powder. Also green peas and paneer cubes. Add about a cup of water. Mix and simmer covered for about five to ten minutes, until the sauce thickens.

Enjoy with rice, parathas or chapatis.


Matar Paneer with Parathas and Cucumber Raita ~ Enjoying the Goodness of Seasonal Vegetables

Posted by Indira©Copyrighted in Cashews,Paneer,Peas (Bataani),Tomato (Thursday June 28, 2007 at 9:02 pm- permalink)
Comments (44)

The New Home of Mahanandi: www.themahanandi.org

Beerakaya Gasala Kura

Ridge Gourd in Poppy Seed Sauce:


Poppy Seeds (Gasa Gasalu, Khus Khus)

The tiny, cream colored poppy seeds are a must have thing in many Indian kitchens. In Andhra, in addition to sesame and peanuts, poppy seeds are also used extensively both in sweets and in savory preparations. When added to sweets like payasam, bhakshalu and to laddus etc, they offer a nice, nutty texture and crunchy contrast.

When it comes to savory – poppy seeds are lightly toasted first and ground to prepare creamy sauces for curries. Nut like, with a subtle, soothing flavor and rich taste, it’s impossible not to like poppy seed sauce. Plus it’s low calorie when compared to nut based sauces.

Both vegetables and meat are cooked in spice flavored poppy seed sauce. The most popular being, ridge gourd (beerakaya), green brinjal (Poluru Vankaya) , potato and chicken. My mother prepares a terrific ridge gourd curry in poppy seed sauce called “Beerakaya Gasala Kura”. Here is my mother’s recipe.


………..Poppy Seed Powder Shaped to Round Ball ………………….Ridge Gourd……………..

Recipe:

2 fresh, firm looking ridge gourds
Peel the outer ridges and the skin lightly. Wash, and remove both ends. Cut ridge gourd to small, bite sized pieces. – about 5 cups.

For Poppy Seed Paste:
¼ cup poppy seeds – in a hot skillet, toast them lightly. Remove to a spice grinder. Grind to smooth without adding water. (It takes at least 5 minutes to grind poppy seeds to fine consistency like shown in the above photo.)

Seasoning:
4 green chillies, one garlic clove and one teaspoon of grated ginger – Grind them to smooth in a mortar or in a blender.
¼ tsp each – salt and turmeric
¼ tsp each – cumin, mustard seeds and few curry leaves.

In a wide skillet, heat a teaspoon of peanut oil. Add and toast curry leaves, cumin and mustard seeds. When they start to splutter, add ridge gourd pieces. Stir in the poppy seed powder along with green chilli-garlic-ginger paste, salt and turmeric. Add about quarter cup of water. Mix thoroughly. Cover the pot and cook for about 15 to 20 minutes on medium-high heat, stirring in-between. Ridge gourd cooks fast and when the sauce starts to thicken, turns off the heat. Serve warm with sorghum roti or with chapati.

Apply same method, but replace ridge gourd with banana pepper/ brinjal /potato/chicken to cook terrific tasting poppy seed based curries.


Beerakaya Gasala Kura with Ragi Roti ~ Our Meal Today and My Entry to RCI~Andhra Event

Posted by Indira©Copyrighted in Amma & Authentic Andhra,Beera kaaya(Ridge Gourd),Poppy Seeds (Tuesday May 22, 2007 at 7:38 pm- permalink)
Comments (29)

The New Home of Mahanandi: www.themahanandi.org

Previous Page »