Mahanandi

Living in Consciousness ~ Indi(r)a’s Food and Garden Weblog

Ragi Kudumulu with Garlic Ghee

Ragi kudumulu is an old classic from Andhra Pradesh, India. Dumplings like kudumulu are prepared with ragi flour and steam-cooked in flavorful kura (curry). The main ingredient of kura in which ragi kudumulu are steamed changes with the seasons. Sometimes the kura is prepared with vegetables, sometimes with meat or a combination. Depends on the cook’s mood and the market prices. Popular in agricultural community, this protein powerhouse is a build or nourish the muscle-on-the-bone kind of one-pot meal.

For Mathy’s Jihva, I have been thinking about a new recipe using garlic-ghee. Then I thought, why not incorporate garlic-ghee into ragi dough and make kudumulu with it. When people say developing new things or techniques is like constantly rediscovering the wheel, it’s very true, indeed. Years of nutritional strategies and accumulated wisdom among cooks throughout the world before us are right to benefit us all through good times and hard times.

Ragi kudumulu is one such nutritional strategy, and here it is in a new avatar. An acquired taste, but a delight to an adventurous palate. Give it a try.

Ridge gourd and Ragi Dough
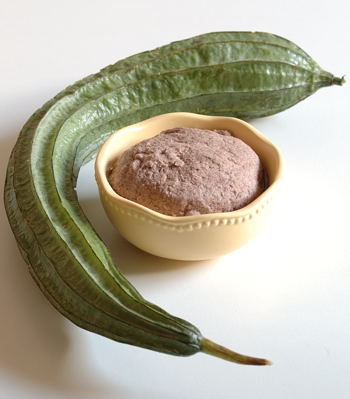
Ridge Gourd and Ragi Dough (Beerakaya mariyu Raagi Mudda)

Recipe:
(for two adults, for two meals)

Recipe happens in three steps. 1. Prepare Ragi dough for Kudumulu.
2. Prepare kura (curry or kurma) for Kudumulu. 3. Prepare kudumulu and steam-cook.

Step 1:

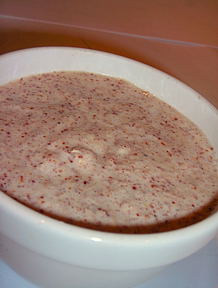
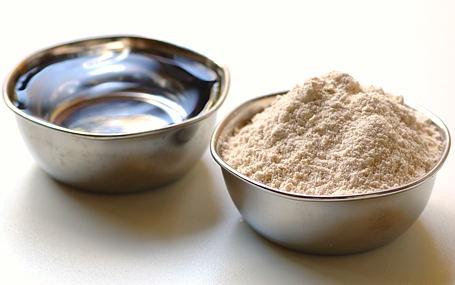
Take one-cup ragi flour in a bowl. Add a tablespoon of garlic-ghee puree and quarter teaspoon salt. Stir in a tablespoon of garlic infused ghee. Sprinkling few tablespoons of hot water, make soft dough. Cover and keep it aside for about 15 to 30 minutes. The dough firms up on resting.

Step 2:

While the ragi dough is resting, prepare kura for ragi kudumulu. It can be with either vegetables, (traditional choice: Indian broad beans, silk squash and ridge gourd), or meat (chicken or mutton). For my meal today, I have prepared Ridge gourd curry (beerakaya kura) for ragi kudumulu.

– – 2 ridge gourds: peel, rinse and cut into ½ inch, big pieces
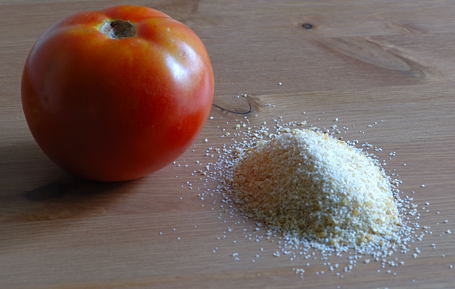
– – 2 tomatoes and one onion – finely chop to small pieces

Heat a tablespoon of garlic infused ghee in a wide, deep-bottomed skillet. Add and toast a pinch each – cumin and mustard seeds. When seeds start to pop, add the onion. Sauté to soft. Then tomatoes. Add about a cup of water and cook the tomatoes to mush on high heat.

While tomatoes are cooking, prepare the kura masala:
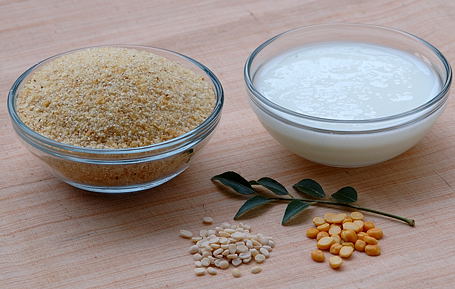
For kura masala: Two tablespoons of grated coconut, 4 green chillies and an inch of peeled ginger, two cloves, one inch cinnamon, a teaspoon each – coriander seeds and cumin. Take them all in a mixer. Add a pinch of salt. Blend to fine consistency.

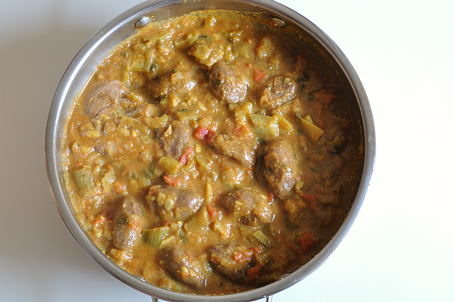
Tomatoes will be cooked to soft by now. Mush them by pressing with a sturdy spoon. Add the ridge gourd pieces and the masala paste to the skillet. Also half teaspoon each- turmeric and salt. Stir in another cup of water. Close the lid and simmer on medium-low heat.

Step 3:

While kura is cooking, quickly prepare Ragi kudumulu.

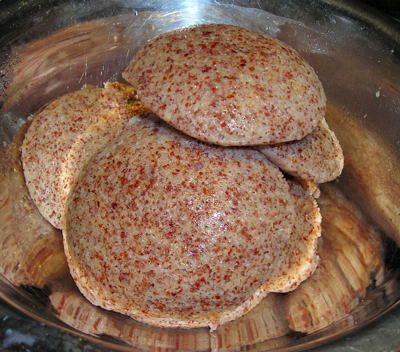
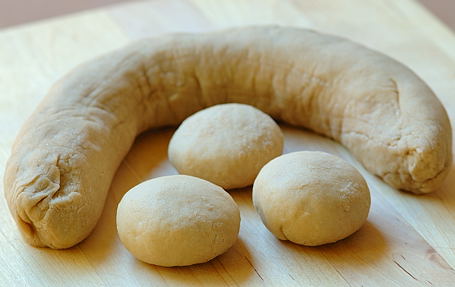
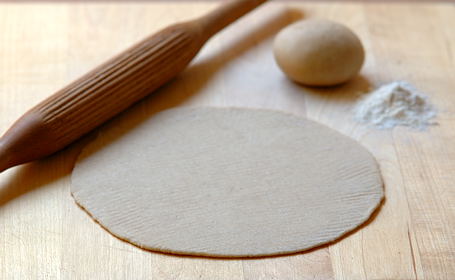
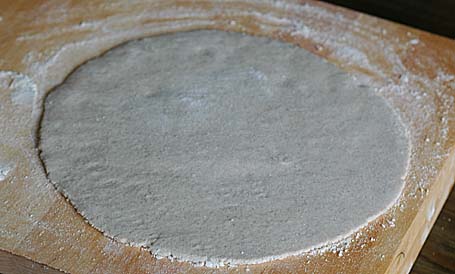
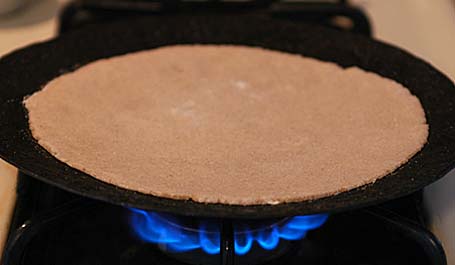
Take the ragi dough out onto a plate. Knead and divide into small, about key lime-sized rounds. The dough came about 16 rounds for me. Take a round on your palm, and close the fingers around the round to make a fist. The shape changes to cylindrical with conical ends. That’s what we call “Kudumu” shape in Telugu. Compared to the round shape, the kudumu shape will have more surface area exposed, and that would facilitates thorough steaming. Prepare all rounds in this way. You have to make them fast in two to three minutes.

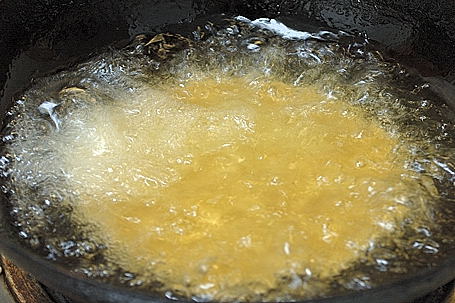
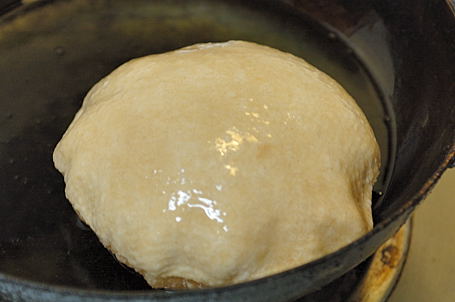
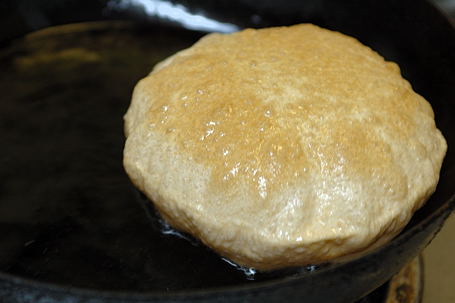
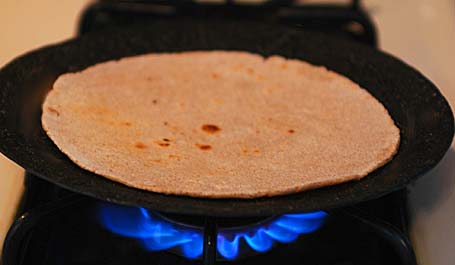
Place them one after another neatly in simmering kura. Close the lid tightly, and steam for about 15 to 20 minutes on medium-low heat. Ragi kudumulu have to be cooked properly inside. To test, take one out and cut into half. A well-steamed one has the color of red soil (erra mannu) that you see in moderate rainfall areas like Telengana, Andhra Pradesh. On taste, they should have the comforting texture of a well-chewed bubblegum.:) Sticky with unique ragi flavor. The size/volume also increases on steaming.

Garnish with fresh coriander leaves and lime juice. Serve hot. Until serving time, cover the skillet with tight lid and keep the kura hot on low heat.

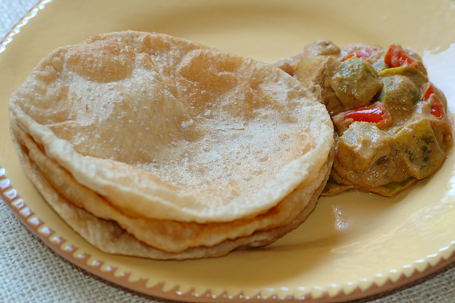
How to serve: Place four ragi kudumulu in a wide bowl or plate along with vegetable or meat pieces. Pour the tomato-masala gravy around.

How to eat: With fingers or spoon, take a portion of ragi kudumu with kura. Blow to cool for once or twice. Eat. Ragi flour has gummy properties and it would stick to the mouth roof. So don’t chew on the kudumu, just swallow. The masala gravy and vegetables or meat pieces, together they make a memorable meal experience.

Why: Ragi is rich in Iron, minerals and protein, gluten-free, and is known for it’s health benefits. Ragi is cultivated from ancient times in many parts of India, and in fact the name Ragi is a Sanskrit word. So, Ragi consumption means nourishment to the body and also nourishing the traditional agricultural practices.

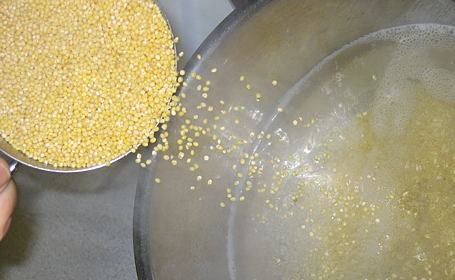
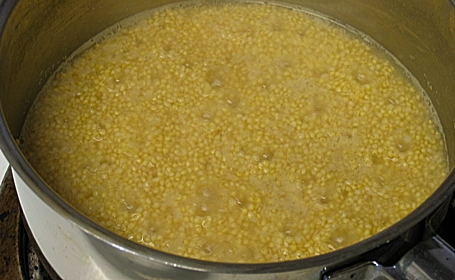
Here is the preparation process in photos:


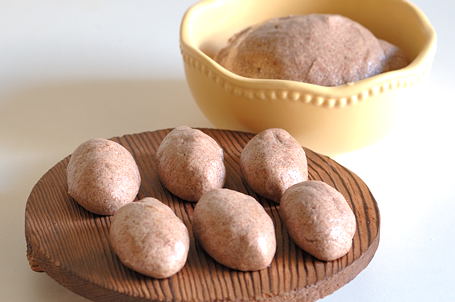
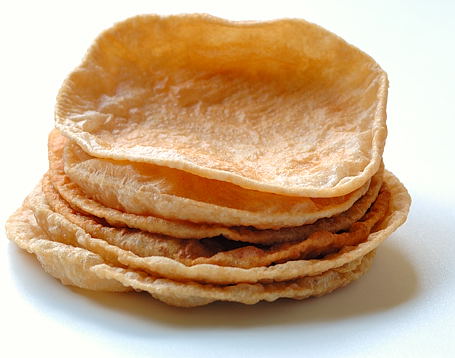
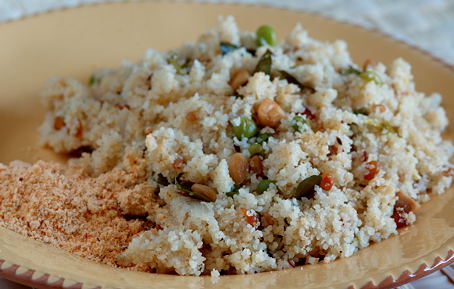
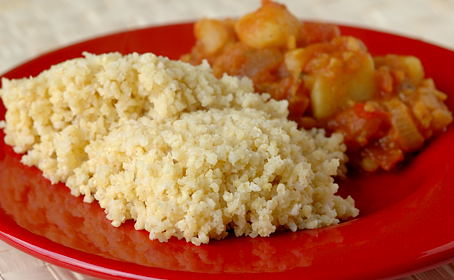
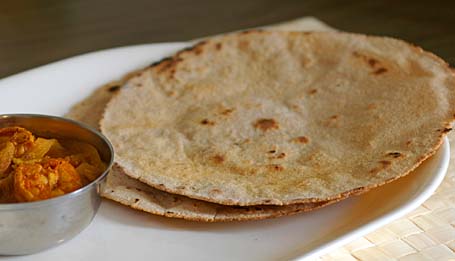
Ragi Kudumulu and Ragi Dough


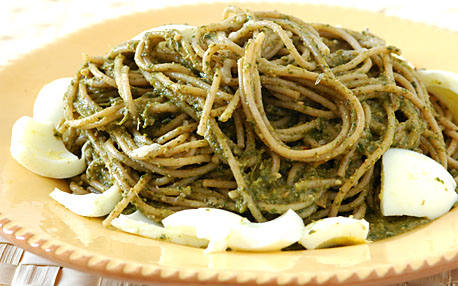
Steamed Ragi Kudumulu in Ridge Gourd Kura


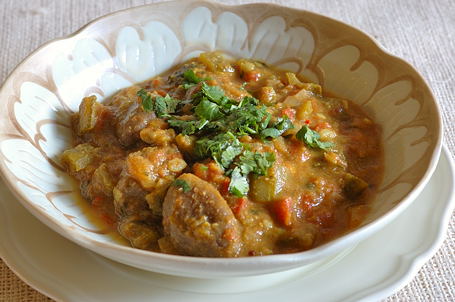
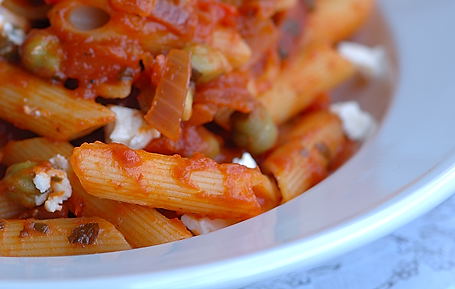
Ragi Kudumulu Flavored with Garlic Ghee in Ridge Gourd Kura ~
Meal today and My Contribution to Mathy’s Garlic-Jihva Event.

Notes:
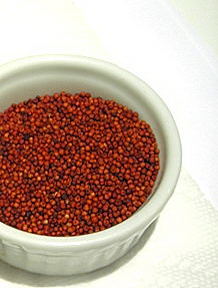
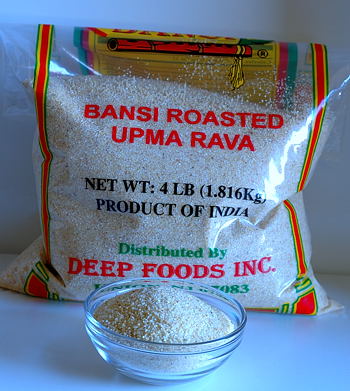
Ragi flour is available in most Indian grocery shops.
Kudumu is singular and kudumulu is plural in Telugu language.
Traditional Kudumulu from other parts of Bharath:
Jonna (Corn) Kudumulu from En Ulagam
Jowar-wheat Kudumulu from My Food Court

Do you have this type of tradition where kudumulu or dumplings are steam-cooked in the stew itself?

Posted by Indira©Copyrighted in Amma & Authentic Andhra,Beera kaaya(Ridge Gourd),Garlic (Vellulli),Ghee,Ragi,Ragi Flour (Tuesday April 1, 2008 at 5:45 pm- permalink)
Comments (26)

The New Home of Mahanandi: www.themahanandi.org

Semiya Payasam

Photo Purchase Keyword: Semiya, Payasam
(Please don’t photosteal. Make a photo purchase to digital download and to print.)

From hearing the Purandaradasa’s spiritual keerthana “Rama nama payasakke“, we will know that the semiya payasam we prepare at home has at least 500+ years of history. The recipe ingredients and the method have remained unchanged all these years. That is the greatness and as well as the simplicity of this recipe. What has changed is our attitude and regard towards such honest and soulful food. But that is a topic for another time. For now, continuing the 500 plus year old tradition, here is how I prepared the semiya payasam at my home for Neivedyam.


Semiya, Sugar, Ghee, Milk, Cashews and Draksha ~ Ingredients for Payasam

Recipe:

4 cups whole milk
½ cup cane sugar, ( or to taste)
Fine semiya, one bunch, about the size that fits baby’s fist (10″ long)
2 tablespoon of ghee, melted
16 cashews and 16 golden raisins
4 cardamom pods, seeds powdered

Heat ghee in a wide pot. Add and toast golden raisins to pink balloons first, and then cashews to pale gold color. Remove them in to a plate.

In the same pot, add and toast the semiya for one to two minutes. (This is to remove the raw wheat smell of semiya and I usually do it, but this is optional.) Take the toasted semiya to a plate and keep aside.

In the same pot, add the milk and stir in sugar. Bring the milk to a rolling boil. Reduce the heat and add the semiya. Also the cashews, golden raisins and cardamom powder. Simmer on slow heat for ten minutes. The fine semiya floats like water lily stems in a pond of sweetened milk. That is the consistency we want in semiya payasam.

Serve warm or cold, and enjoy this fine, honest dessert in the name of tradition.


A Sweet 500+ year old tradition ~ Semiya Payasam

Note:
Semiya, the fine wheat noodles are a speciality of India. They are prepared with durum wheat flour and water. Semiya is egg free, and that is the major difference between western egg-laden vermicelli and Indian semiya. (Semiya is available at Indian grocery shops).

*************

Posted by Indira©Copyrighted in Amma & Authentic Andhra,Indian Sweets 101,Milk,Naivedyam(Festival Sweets),Semiya,Sugar,Traditions (Tuesday January 15, 2008 at 7:13 pm- permalink)
Comments (14)

The New Home of Mahanandi: www.themahanandi.org

A special Recipe for the Ultimate Bliss ~ Semiya Payasam

Bhukthi means nourishment. While nutritious food is needed to sustain us for everyday activities and the maintenance of this physical body, a different kind of Bhukthi is necessary to satisfy our cravings to realize the true happiness in ourselves. Constant indulgence in the name of God (Bhakthi) provides the nourishment to realize the bliss of boundless divinity in the ego-limited humans.

This relation between Bhakthi and Bhukthi thus goes deep and this concept is brought to the people in beautiful poetry and song by many saint musicians of India.

Saint Purandara Dasa, the father of Carnatic music has created song and music the way to achieve the happiness which we all seek. He has composed innumerable songs called keerthana’s, full of wisdom and devotion eternalized in the hearts of people. His message of morals is handed out in easily understandable form, woven together with stories from the epics, along with beautiful expressions and analogies. No wonder his songs have pleased, inspired and guided people since more than four hundred years.

Stamp Commemorating Sri Purandara Dasa

God is the source for infinite happiness and he has infinite names, infinite forms and is ubiquitous. For Purandara Dasa, God is Purandara Vittala in whose form he saw all other manifestations or avatars of God like Rama, Krishna, Shiva and Hanuma.

The spiritual song “Rama nama payasakke” is quite popular and sung by many in their own versions. It was written in the beautiful south Indian language of Kannada which is said to be as enchanting as the fragrance of kasturi. Saint Purandara Dasa elicits the great bliss in chanting the name of the God Vittala in “Rama Nama Payasakke“.

The keerthana explains with an easy analogy on how to obtain the spiritual bliss or Ananda with a recipe to make payasam.

The keerthana goes like this:

Pallavi: rAma nAma pAyasakke krSNa nAma sakkare viTTala nAma tuppava kalasi bAya capparisiro
Charana1: ommAna gOdiya tandu vairAgya kallali bIsi summane sajjige tegadu kammana shAvige hosedu
Charana2: hrdayavembo maDikeyalli bhAvavembo esaraniTTu buddhiyinda pAka mADi harivANake baDisikoNDu
Charana3: Ananda Anandavembo tEgu bandidu kaNIrO Ananda mUruti namma purandara viTTalana neneyiro

Purandara Dasa sings, “O people, indulge in the lip-smacking-good payasam called Rama nama, which is made sweet with the sugar called Krishna nama and is richly folded with the ghee called Vittala nama”.

Then he describes the meticulous details needed to make this special payasam from the scratch.

First obtain wheat flour of honor. Grind it in the mill of detachment. Make the dough called simplicity and draw thin semiya noodles from it.

In the pot called your heart, boil the noodles with the milk of feelings. Cook it then with the wisdom of worship.

Add the sweetness of Krishna’s name as sugar, and the nourishing richness of Vittala’s name as the ghee and lo you have your lip-smacking-delicious payasam.

Purandara Dasa even describes the proper method to enjoy the delicious payasam. He beckons us to serve it on a large platter and enjoy it. When burps emanate out of fulfillment, he asks us to remember the name of God Vittala who is the embodiment of immeasurable happiness and ecstasy.

Through this keerthana, purandara dasa gave us a recipe to live an ideal life. To live our life with honor, come through the grinds of materialistic attachments with austerity, and obtain the raw material for happiness using the simple method of devotion. Allow the feelings of joy and love boil in our heart wisely, and celebrate every moment of our life bit by bit contemplating God’s grace with gratitude. That is the ultimate sweet bliss!

Makara Sankranthi Shubhakankshalu!


Semiya, Sugar, Ghee, Milk, Cashews and Draksha ~ Ingredients for Payasam


Rakthi Raga for Bhukthi ~ Semiya Payasam

Article Contributed by Madhuri Akkenepalli (Friend of Mahanandi)
Photos by Indira Singari
Previously on Rakthi Raga for Bhukthi:
Of Being and Becoming ~ Ragi Idlies by Janani Srinivasan

Links:
Saint Purandara Dasa on Wiki.
Audio Links to “Rama Nama Payasakke”:
by Sreemathi Sudha Raghunathan and Vijayalakshmi Subrahmaniam

Posted by Indira©Copyrighted in Amma & Authentic Andhra,Bhakthi~Bhukthi,Madhuri Akkenepalli,Naivedyam(Festival Sweets),Semiya,Sugar (Monday January 14, 2008 at 1:11 pm- permalink)
Comments (22)

The New Home of Mahanandi: www.themahanandi.org

Cookery, Indic ~ “Salads For All Occasions” by Vijaya Hiremath

Recipe: Sprouted Wheat and Spinach Salad

Salads for all Occasions by Vijaya Hiremath
Published in December 2005 by Jaico Publishing House

Traditionally, salad or koshimbir has formed a small part of main meals in India, taking its place alongside pickles and chutneys. This probably explains why preparing salads has always flummoxed me. Grains, vegetables, and lentils formed a complete meal, and salads were the step-children on my thali. I managed with the usual suspects – chopped tomatoes and onions with a splash of lemon juice and salt; grated cabbage and crushed peanuts with a splash of lemon juice and salt; steamed beetroot and grated carrot with a splash of lemon juice and salt; *yawn* and so on. I did not fare any better at the elaborate salad bars in U.S. restaurants and cafetarias. With the seemingly endless choices, one never quite knows when and where to stop piling one’s bowl. The end result was always a mishmash of ingredients, all of which I savour individually, but were disastrous together. I also have a distaste for the usual dressings, based as they are in oil and vinegar.

I was not interested in the plethora of salad books found in the American bookstores. Since our main meals at home are always Indian, I needed a book that used Indian ingredients, and produced flavours that would not clash with the other parts of our meal. I had purchased Varsha Dandekar’s Salads of India many years ago, and while it is an excellent cookbook in other respects, it is not about salads. Most of the dishes were really sukhi bhaji (dry vegetable preparations without gravy). There are other books on salads published in India, but they usually just reproduced Western salads. Vijaya Hiremath’s book, which I almost ignored at the bookstore due to the rather bland title, has ended my days of salad ennui.

The book is completely vegetarian, with over 50 salad recipes using a wide variety of easily-available ingredients. Sprouts prepared from whole grains and beans play a prominent role in many recipes, a feature which raised the book several notches in my estimation. Hiremath presents several fresh and innovative combinations of vegetables, fruit, greens, nuts, and sprouts. For example, Country Garden Salad, a jaded menu item that evokes images of limp lettuce and cottony tomatoes, appears in an elegant and attractive avtaar in this book. It is made with tender fenugreek leaves, white radish, carrot, cucumber, tomato, onion, and roasted sesame seeds and dressed with lemon juice, minced garlic, fresh grated coconut, cumin powder, and salt. The dressings are sauces prepared from fruit, vegetables, or dahi; chutneys or dry masala powders. The layout of the book is user-friendly: one recipe per page with the nutritive value for each recipe provided at the bottom. There are plenty of photos, which are mercifully devoid of Indian artifacts and fabrics cluttered around the food.

The recipes use a combination of weight and volumetric measurements, which might pose a problem for those readers used to measuring in cups and do not own a kitchen scale. The instructions are terse and lacking in nuances. For example, greens and vegetables being used in salads must be properly rid of excess water after washing them; otherwise, it dilutes the dressing. Novice cooks might not realise this and the recipes do not include such instructions. The book also suffers another deficiency that is common to some cookbooks produced in India: absence of an index, which forces you to scan the entire table of contents if you are pondering over what to prepare with a particular ingredient. Each recipe, with calories ranging from 250 to 350, is supposed to provide one meal for a single person; but, small eaters might find the quantity too large to be consumed in one sitting. All these drawbacks, however, are minor irritations and easily overlooked once you taste the delicious and nutritious salads made from this book.

Veena Parrikar

Sprouted Wheat and Spinach Salad

From: Salads for All Occasions by Vijaya Hiremath

Ingredients
100 gms wheat sprouts
100 gms carrot
100 gms tomato
100 gms cabbage
1 cup spinach leaves

Seasoning
2 flakes minced garlic
1 tsp roasted sesame seeds
150 gms thick curds (dahi)
Salt to taste

Sprouted Wheat
To prepare sprouted wheat, soak them overnight in plenty of water. Next morning, drain the wheat, and place the grains in a clean muslin cloth. Hang the muslin around your kitchen sink tap, and sprinkle the cloth with water. The wheat should sprout in two to three days in mild to warm weather. During this period, sprinkle water occasionaly if the muslin looks dry.

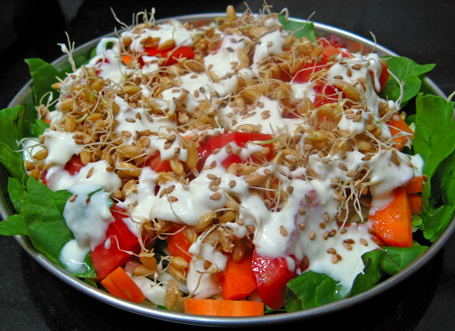
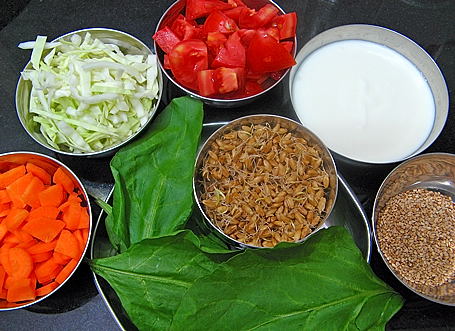
Centre: Spinach and sprouted wheat. Clockwise from left: carrots, cabbage, tomatoes, dahi with minced garlic and salt, roasted sesame seeds.

Method
1. Shred cabbage finely. If spinach is tender, use whole leaves; otherwise chop roughly or break into pieces with your hands.
2. Cut carrot into small pieces.
3. Quarter tomato.
4. Beat curds. Add garlic and salt and mix well.
5. Combine vegetables with sprouts.
6. Arrange spinach leaves on a flat dish.
7. Spread vegetable mixture over the spinach.
8. Pour curd mixture over the vegetables.
9. Sprinke sesame seeds before serving.

Sprouted Wheat and Spinach Salad

Posted by Indira©Copyrighted in Goduma (Wheat),Reviews: Cookbooks,Spinach,Sprouts (Molakalu),Veena Parrikar,Yogurt (Monday January 7, 2008 at 12:24 am- permalink)
Comments (24)

The New Home of Mahanandi: www.themahanandi.org

Of Being and Becoming~ Ragi Idlis

by Janani Srinivasan

Students and Rasikas of Karnatic classical music who fondly (or not 🙂 ) recall their first tentative forays into “Sarali” and “Janta Varisais” might also remember that the credit for a creating a pedagogy of Karnatic classical music goes to Sri. Purandaradasa. And if your mother was a particularly determined woman, you may even have dutifully trotted out works from his corpus to bored admiring relatives come socio-religious occasions like Navarathri and Varamahalakshmi Vratha gatherings.

Whether it is Ratnakara the bandit turned into the Adikavi Sri.Valmiki Muni, or Angulimala the grisly finger-slicing highway terrorist turned Buddhist monk, tales of what can fairly be called instantaneous and extreme spiritual makeovers have captured the imaginations of generations of Indian story tellers and their listeners for centuries. The narrative arc usually progresses along the lines of hopelessly-and-diabolically-evil-person reaches the apogee of his (supported usually by a silently long-suffering her) evilness when a chance encounter; usually in the form of divine grace; completely awakens and transforms said individual. They then attain a sort of mythic stature and are held up as role models for future generations to emulate. Indeed, the story of the rapaciously greedy miser-turned musician-mystic Sri Purandaradasa is a familiar and inspiring one to many of us who grew up listening to these tales. Wiki weighs in with a more complete history of Sri Purandaradasa.

Stamp Commemorating Sri Purandaradasa

In our family, one of our all-time personal favourites from his oeuvre remains the haunting “Ragi Tandira”. Kannada speakers will identify with the clever punning on the word “Ragi”. Much like a Zen koan, the lyrics here have layers of meaning couched in seemingly quotidian references.

Indeed it is not hard to surmise that Purandhara dasa, once he became a wandering minstrel after giving up his former materialistic life, must have still been intimately familiar with the kind of people that once made up his close family and friends circle. Hence, his desire to show them the path to a more richer inner life must have been tempered with the practical consideration that they might reject his message if he was too heavy handed or preachy.

This composition opens with the poet singing, “Have you brought Ragi for alms?” He then goes on to describe Ragi in glowing adjectives “Yogyaragi , Bhogyaragi” and so on… While in one sense, it can be read as an extolling of Ragi, the staple local grain, the sustainer of life itself with various adjectives: Yogya (worthy) + Ragi, Bhogya (enjoyable) + Ragi ; on another level, it is a veiled injunction to the householders themselves to become “worthy”, “Yogyaragi” as one word.

Here the notion of “Yogyatha” like many words in the vernacular, defies simplistic translation. It is a conflation of many shades of meaning conveying a sense of worthiness, deservingness, etc. The rest of the song progress in the same vein exhorting us to various acts of goodness like offering food to the needy (anna chatrava nittavarAgi), attaining fame for the right reasons (kyathiyali migilAdavarAgi) and cautioning us to stay away from inethical practices (anya varthegaLa bittavarAgi) and so on.

So as homage to Sri Purandharadasa, his beloved Vittala and the ancient grain sustaining generations of his people; here is my mother’s recipe for Ragi Idlis. What a song and dance over a simple grain you say? Well, just try these. Like a mother’s love, these are earthy and wholesome. In a word, Perfect!

Ragi Grains Ragi Batter for Idlies
Ragi Grains ……………………. Sprouted Ragi and Rice Batter for Idlies

Recipe:
(Makes atleast 2 dozen of the standard sized Idlis- but quantity yielded depends on the Idli mould size.)

Whole Ragi Grain- 1 cup
(I sprouted these for added nutritional benefits. But it’s not strictly necessary)
Idli rice (parboiled) – 1 cup
Whole skinned Urad dal – ¾ cup
Methi seeds -1 tablespoon
Salt to taste
Sesame oil- to grease idli moulds (I used “Idhayam” brand)

After multiple washes, soak the Ragi for a day. Drain and let it rest for another day till you see tiny white sprouts. Alternatively, you can skip the sprouting and just soak the ragi for 3-4 hours longer than you soak the rice. Soak rice, whole urad and methi seeds in separate containers for 4-6 hours or overnight.

In a wet grinder or a mixie /blender, grind the urad dal till light and fluffy. A test for fluffiness is to keep a bowl of water and drop a tiny pinch of batter. If it floats, it is light enough. Then add and grind the Ragi grains and Methi and finally the rice. Take care that the rice should not be ground too smooth. It should be of rice Rava consistency. Alternatively, you can use rice Rava instead. Take the batter in a vessel, fold in some salt to taste and leave it overnight to ferment. I found that the dough fermented really well, doubling up and overflowing the vessel. So take adequate precautions.

Next morning, lightly stir the well fermented batter. Grease Idli moulds and steam in a pressure cooker for 12-15 minutes till done. Ragi idlis can be served with a dollop of butter or ghee on top, along with the usual fixings on the side: sambar, coconut chutney and/or Milagai Podi.

~ Article by Janani Srinivasan


Light and Soft Ragi Idlies

Notes:
Audio of Ragi Tandira sung by the late Sri. Maharajapuram Santhanam in Raga Kalyanavasantham – Link.
Ragi pronounced with “Ra” as “raa”, “G” as in God not as in gentle, “i” pronounced “ee”.
Tandira pronounced Thundheera with the “h” NOT aspirated. “T” and “d” sounds softened not sharp as in the common American/English usage and the “an” is pronounced “un”.
Janani Srinivasan’s articles on Mahanandi: It’s Chakalaka, Baby!, The Arisiupma Trilogy.

Posted by Indira©Copyrighted in Biyyamu (Rice),Janani Srinivasan,Millet,Ragi,Sprouts (Molakalu) (Thursday November 1, 2007 at 4:44 pm- permalink)
Comments (32)

The New Home of Mahanandi: www.themahanandi.org

Puri Pictorial


Puris ~ The Happy, Lovable Cousins of Chapatis

Made with special wheat flour called atta, rolled out to paper-thin circles and puffed to peach colored balloons, delicate and delectable puris means pure pleasure guaranteed.

I usually prepare puris at home for friends get-togethers or when I host a party, but very rarely for us. It has to be a special occasion and today is one such day for us. To celebrate, a party call was sent out by Anita of A Mad Tea Party, the fabulous food blogger from Delhi. I wanted to join. So, here I am at the party with Nandyala-style puri treats.

Atta
Whole Wheat Flour from India and Tap Water from Seattle:) ~ for Puri Dough

Recipe:
(Makes about 15- 18 small salad-plate sized puris)

For Puri dough:
3 cups atta (Special wheat flour from India)
1½ cups of warm water
1 teaspoon salt

To deep-fry
3 cups peanut oil
sturdy based kadai or wok
A big slotted spoon

In a bowl, combine the flour and salt. Move the flour to the sides of the bowl to make a small well in the center. Pour water into the well. Using fingers combine the ingredients, until the flour comes together to firm dough. (For puris, I make the dough very tight, so that when deep fried they won’t absorb lot of oil and look greasy. Tight dough also helps to balloon the puris.)

Gently knead the dough for a minute or two to remove the creases and until the surface is smooth. Cover the bowl with a plate and set aside for about 30 minutes. Then, follow the puri pictorial.


Roll out the Puri dough to a round coil about the width of baby’s fist.


Divide the dough to equal portions and shape each portion to a round.


Using a rolling pin, press the round to a circle of greeting card thickness


Place the kadai on stovetop. Add and heat the peanut oil to frying hot(375 F). Carefully slip the pressed puri round into hot oil. Gently push-down once with slotted spoon, and let the hot oil work its magic.


The puri comes out of the oil like a balloon. Flip and fry for few seconds


We want not red nor angry-red but peach color for Puri. Remove to a paper covered plate. Serve hot with a curry, dal or chutney.


Puris with Red and Green Capsicum Bhaji ~ for A Mad Tea Party

Posted by Indira©Copyrighted in Amma & Authentic Andhra,Goduma (Wheat),ID Food Parade,Wheat Flour (Durum Atta) (Wednesday August 15, 2007 at 6:51 pm- permalink)
Comments (44)

The New Home of Mahanandi: www.themahanandi.org

Tomato Bath

JFI, an online food blogging event celebrating the natural ingredients is hosted by sweet and talented RP of My Workshop for April. The ingredient she picked for JFI is Tomatoes. What a fine choice it is to celebrate the spring season with beautiful colors and flavors of tomatoes!

The sheer number of tomato based recipes can be overwhelming and sometimes it is reassuring to go back to an old favorite. So I picked a recipe. A Tiffin box favorite from my childhood called tomato bath. Yes, you read it right. The recipe has bath in its name. In this traditional south Indian recipe, toasted semolina is generously bathed and simmered in tomato juice. Not one or two tomatoes, but a lot of tomatoes are used to prepare tomato bath. This is the main difference between regular upma and tomato bath. Because of generous tomato addition, pale wheat colored semolina changes to bright orange color and the tomato dominates the flavor profile. It’s easy to prepare and even easier to enjoy. A must try for tomato fans.


Tomato and Semolina

Recipe:

2 cups semolina or suji
4 ripe tomatoes – finely chopped (about 2 cups)
6 green chillies – finely chopped
1 small red onion – finely chopped
1 inch piece of ginger – grated
¼ cup each – fresh green peas and charoli nuts (or your choice)

Seasoning: (added to bring crunchy bite and fragrance to tomato bath)
1 tablespoon oil or ghee
6 fresh curry leaves and a tablespoon of finely chopped fresh cilantro
½ tsp each – urad dal, chana dal, cumin and mustard seeds

Place an iron skillet on stove top. On medium heat, add and roast semolina/suji to pale gold color, stirring in-between.

Meanwhile, proceed with tomato bath preparation. In a wide pan, add and heat oil/ghee. Toast the ingredients listed in seasoning in the order mentioned. When mustard seeds start to jump around, add green chillies, onion and ginger. Cook for few minutes until the onions soften. Stir in chopped tomatoes and fresh green peas. Cook until tomatoes become mush.

Add about 4 cups of water along with half teaspoon of salt. Cover and bring the water to a boil. At this stage, pour in the roasted semolina/suji at a constant flow/speed, continuously stirrng. Take care not to form semolina lumps. Stir, stir and stir. Sprinkle charoli nuts. Reduce the heat to medium-low and cook until the whole thing comes together to a moist firm mass.

Serve hot with coconut/peanut chutney or with a cup of yogurt.


Tomato Bath with Yogurt and Cucumber Slices ~ Our Weekend Brunch and
My entry to JFI: Tomatoes hosted by RP of My Work Shop

JFI Notes:
I’ve planned to invite hosts for Jihva (June 07- April 08) on April 2nd. If you are interested to host the event, please visit tomorrow to read the guidelines and pickup your time slot. Thanks.

Posted by Indira©Copyrighted in Amma & Authentic Andhra,Jihva For Ingredients,Suji/Semolina,Tomato (Sunday April 1, 2007 at 11:45 am- permalink)
Comments (23)

The New Home of Mahanandi: www.themahanandi.org

Buttermilk Upma

Roasted upma rava combines especially well with buttermilk and tadka seasoning in this sensational upma breakfast of summer months. Almost any type or combination of upma ravas -like suji, semolina, broken wheat and rice rava can be used for this recipe, but the roasted varieties like this special upma rava from India provides the best texture for the dish. Silky, tangy and tasty – buttermilk upma is an acquired delight.

Roasted Upma Rava, Homemade Buttermilk, Urad Dal, Chana Dal and Curry Leaves
Roasted upma rava, Homemade Buttermilk, Urad Dal, Chana Dal and Curry Leaves

Recipe:

Take in a cup and mix:
Roasted Upma Rava – one cup
Buttermilk – one and half cups (homemade from Indian yogurt suits this recipe)
Water – one and half cups
Roasted cashews or peanuts – quarter cup
Salt – quarter teaspoon or to taste

In a wide skillet, heat and toast:
One tablespoon of ghee or oil
Add a teaspoon each – chana dal, urad dal, , broken red chilli pieces and curry leaves, in the order mentioned. Toast to golden color. Dals add crunchy bite and curry leaves bring an unforgettable aroma to the upma. I usually add one finely chopped green chilli along with curry leaves etc. Adds more flavor.

Add and cook:
Reduce the heat to medium low and add the upma rava-buttermilk-water mixture to the skillet, continuously stirring. Cover and cook until the water is absorbed and the rava becomes fluffy. Serve warm with chutney/spicy powders, or with a teaspoon of honey/sugar sprinkled on the top for that delightful sweet, tangy taste.

Buttermilk Upma with Cashews and Pappula Podi


Roasted Upma Rava: Purchased from Indian grocery Shops
If you are going to prepare this buttermilk upma with other varieties of rice/wheat ravas – first roast them to golden color – for easy mixing, cooking and for great taste.

Posted by Indira©Copyrighted in Goduma (Wheat),Suji/Semolina,Yogurt (Monday March 26, 2007 at 9:46 pm- permalink)
Comments (24)

The New Home of Mahanandi: www.themahanandi.org

Roasted Upma Rava


Roasted Upma Rava from India for this Week’s Indian Kitchen

Different from broken wheat, suji and semolina, – in method of preparation, in size and taste, roasted upma rava is a special wheat product from India specifically used to prepare a flavorful Upma breakfast.


Roasted Upma Rava and Broken Wheat in the background


Samba Upma Rava at Daily Musings
Special note:
Is this your photo? – Find more details at Yahoo-Parade.

Posted by Indira©Copyrighted in Goduma (Wheat),Indian Ingredients (Sunday March 25, 2007 at 9:51 pm- permalink)
Comments (17)

The New Home of Mahanandi: www.themahanandi.org

Oatmeal with Old~Fashioned Oats

Old-Fashioned Oats
Old-Fashioned Oats

Oatmeal tests convictions. Its taste, appearance, origins, the varieties available, and the uberhype surrounding its health benefits – oatmeal was a big challenge to this Indian palate. To like or not to like? I wanted to like it.

First, I had problems with its blandness and gooey texture. Overcoming these two traits was the biggest hurdle for me in appreciating oatmeal. Next I had to make a choice. Instant, old-fashioned or steel cut. Steel cut definitely tasted better but it made a steep cut in my budget and the instant tasted too artificial. Finally I settled on old-fashioned oatmeal. The type which takes at least 10 to 15 minutes to cook. I experimented in several ways while trying out the different versions of oatmeal. I tried adding cinnamon, cardamom, apples, nuts, raisins etc. The wisdom I gained was that trying to jazz up oatmeal is like putting makeup on a pig. Oatmeal is oatmeal. No amount of flavorings can change the basic texture and blandness of oatmeal.

Somehow over the years this gooey gruel grew on us. The rest of our day may be filled with flavors and spiciness but we start the day plainly. Oatmeal now forms our breakfast for at least four mornings of the week. Wake up in the morning, put two pots filled with water on the stove. One for oatmeal and one for tea. Brush teeth, get the newspaper. By this time the water will be boiling. Add oatmeal and tea powder. Let them simmer for five to ten minutes. Have them while reading the paper. Vijay likes it plain and I usually add a teaspoon of honey. All of this may sound unglamorous, but comfort is in the ritual of routine, said our elders. I am used to things changing frequently around me and my way of dealing with change is to practise a comforting routine in militant fashion. Even though oatmeal is still a classic case of food I do not eat for the taste, I am glad I choose to like oatmeal and to make it a part of my daily routine.

Steaming Cup of Oatmeal
Steaming Cup of Oatmeal ~ Our Morning Mini Meal

Recipe
(For two)
Bring three cups of water to a rolling boil on high heat. Add a cup of old-fashioned oats. Simmer for about five minutes on medium heat. Turn off the heat and cover the pot. Let it sit for another five minutes. Serve to a cup and stir in honey to taste.

Posted by Indira©Copyrighted in Oats (Wednesday February 21, 2007 at 11:29 pm- permalink)
Comments (71)

The New Home of Mahanandi: www.themahanandi.org

Millet Rice (Korra Buvva, Korra Annam)

Korralu (Millet, Foxtail Millet)

Korralu (Millet/Foxtail Millet/Kauni/Varagu)

Birds and bees like it. The hard working farmers in rural India like it. I liked it too. I am talking about the grain – millet or korralu as we call it in Telugu. The foxtail millet is often food of people who can’t afford rice in Andhra. And here in America, one more choice the market place provides us to achieve the never attainable mirage of “perfect health”.

I vaguely remember tasting this grain with egg pulusu at my grand parents home when I was an itsy bitsy baby. Today I tried it again.

Millet + water + salt = a revelation!

Wholesome and great, no wonder, intelligent hard working beings on the earth like this grain. For comparison sake, it almost tasted like middle-eastern couscous but nuttier, almost similar to broken rice, you know the kind, we use to prepare ganji or kanji. Do you know the type? Similar to that one. That’s why the millet preparation is called “korra annam” (korra=millet, annam=rice) in Andhra Pradesh.

Yesterday, I was talking to my mother-in-law on phone about this millet preparation. She mentioned that Korra annam is traditionally served with watery pulusu curries (kurmas/stews) like potato or egg pulusu and also with spicy chutneys like gongura chutney etc. I went with her suggestion and prepared potato kurma for millet rice. Good combination. My Mother-in-law is right.


Adding Millet to Boiling Water


Millet Rice (Korra Annam) after 10 minutes of cooking

Recipe:

1 cup millet (korralu, foxtail millet)
2 cups water
¼ teaspoon of salt or to taste

In a saucepan bring the water to a rolling boil on high heat. Continuously stirring, add the millet along with salt, to the water. Reduce the heat to medium. Cover the pot with a lid and cook for about 15 to 20 minutes, stirring in between. The hard grain will loose its punch and get softened within 15 minutes. If this is your first time, taste the grain to test the doneness for every 5 minutes. When it loses its biting resistance and become soft supple like cooked rice, turn off the heat. Cover and let it sit for another 5 to 10 minutes.

Serve hot with a kurma curry like potato/brinjal/drumstick/egg and little bit of ghee.


Korra Annam with Potato Kurma ~ Our Afternoon Meal Today

Kitchen notes:
Recipe source: My Mother-in-law (Attamma)
Korralu (millet) is purchased from US grocery shop called ‘Whole Foods’ – bulk bins (labelled ‘Millet’).
More about foxtail millet and nutritional profile – Organic Uttaranchal, from Gramene Project, here.
About Millet and farming in Andhra Pradesh – diaries from hard working farmers.
How to prepare different types of millets – photo demonstrations (good info)

Posted by Indira©Copyrighted in Amma & Authentic Andhra,Millet,Millet (Korralu) (Thursday January 4, 2007 at 3:25 pm- permalink)
Comments (20)

The New Home of Mahanandi: www.themahanandi.org

Penne Marinara With Fresh Goat Cheese

Penne in Tomato-Basil Sauce with Goat Cheese

Penne pasta tossed in tomato-basil sauce and garnished with red chilli flavored goat cheese – this classic pasta recipe is easy to prepare and deeply satisfying on a basic, no-nonsense way. Good food to have on a rainy day like today.

I am under the impression that goat cheese is the purest cheese available in the market right now. I am hoping that I won’t find any information that would shatter my belief and prove how naive I am. Again and again, from sugar to table salt to enriched flour, everything I thought decent were proved otherwise here in US. More and more, the ingredient shopping here is becoming like a sightseeing trip to Las Vegas. (I see gondola ride, is this Venice? Nope, it’s not.) Which is genuine and which is maya (fake) – one has to dig deep to discern the difference.

For now, I am going to enjoy goat cheese – my all time favorite cheese.

Goat cheese with red chilli flakes and Penne
Goat cheese with red chilli flakes and Penne Pasta

Recipe:

Penne (a type of pasta) – 2 cups
Tomato-basil sauce (marinara) – Homemade or storebought – 3 cups
Goat cheese – ½ cup
Fresh garbanzo beans – ½ cup
Red onion and red bell pepper, 1 each – thinly sliced lengthwise
Red chilli powder, salt and turmeric – ½ tsp each or to taste.

Cook pasta to tender following instructions on the packet. Meanwhile, in a large skillet, heat a tablespoon of oil. Add and saut? red onions and red bell pepper to soft. Add the fresh garbanzo beans and tomato-basil sauce. Stir in red chilli powder, salt, turmeric and about a cup of water. On medium-high heat, cook for about 10 to 15 minutes stirring in-between. When the sauce starts to come together, switch off the heat. Add the cooked pasta to the sauce. Toss to mix and sprinkle in crumbled goat cheese. Serve hot.

Kitchen Notes:
Fresh Goat Cheese type and source: Peppadew Chevre from ‘Trader Joe’s’ (US grocery shop)

Posted by Indira©Copyrighted in Cheese,Goduma (Wheat),Hara Chana(Green Chickpeas),Pasta (Tuesday November 21, 2006 at 3:01 pm- permalink)
Comments (25)

The New Home of Mahanandi: www.themahanandi.org

Basil Spinach Pasta

Basil at My Kitchen Window Sill
Basil on My Kitchen Windowsill

We would have been broke if we had used herbs from the local grocery shops for our daily cooking. 🙂 The herbs in these stores are that much expensive. 10 tiny finger-length branches in a cute little box would usually sell for 2 dollars and some change. The more upscale the grocery chain is, the pricier the herbs are. First few years here, I mostly cancelled the herbs from my shopping list. Later, I started growing them myself. A must to grow would be mint, and some summers I also grow basil and cilantro.

For this summer, I have planted basil in a small container. Kept it on my kitchen windowsill, where it gets plenty of sunlight, and watered it regularly. After a month, the container is full of well grown and overflowing basil. So, the time has come for the first harvest and for a flavorful meal. With trimmed branches of basil, some spinach and cashews cooked together, I prepared a special sauce for pasta for lunch. A different taste from routine tomato sauced pasta. If you like pasta in pesto, then this recipe is for you and the sauce is as good as it looks.:)

Basil, Spinach, Cashews, Green Chillies, Garlic, Tomato and Pasta

Recipe:

1 cup of basil and 1 small bunch of spinach
Medium red onion and tomato – one each, cut into big pieces
6 to 8 green chillies and 4 garlic cloves – sliced into big chunks
Half cup of cashews
Salt and peanut/olive oil to your liking
Pasta of your choice

1. In a skillet, heat a tablespoon of oil. Saut? onion, garlic, green chillies and tomato to golden brown. Remove and keep them aside.

2. Saut? spinach, basil until they wilt in the same skillet. Remove and keep them aside. Wipe the skillet clean, add and dry roast cashews to golden color.

3. When they are all cool to touch, take them all in a blender, add a teaspoon of salt and puree them into smooth mixture.

4. Heat a teaspoon of oil and pour in the pureed mixture. Stir in half to one cup of water. Have a taste, add salt if needed and simmer for about 15 to 20 minutes, until the sauce reaches the thickness you desire.

5. Meanwhile bring water to a boil in a large pot. Add and cook pasta until aldente usually for about 5 to 10 minutes. Drain and add the pasta to the sauce. Stir to combine and serve piping hot.

Basil-Spinach Pasta with Hard Boiled Eggs
Pasta in Basil-Spinach-Cashew Sauce with Hard Boiled Eggs
From Pot to Plate for L.G’s Green Blog Project

Posted by Indira©Copyrighted in Basil,Cashews,Pasta,Spinach (Tuesday June 13, 2006 at 3:52 pm- permalink)
Comments (29)

The New Home of Mahanandi: www.themahanandi.org

Sorghum Roti (Jonna Rotte, Jowar Roti)

 Jonna rotte with curry (Sorghum roti with curry)

Very popular in villages and small towns as an accompaniment to meat and vegetable gravy curries, sorghum roti is one of the traditional recipes of India. As the name suggests, the rotis are prepared from sorghum flour. Instead of rolling pin, hands are used to shape the sorghum dough into a round, flat, thin circle. Because sorghum flour is gluten-free flour, it’s very tough to spread the dough without breaking the shape, and one really needs hands-on experience and many failed attempts to get the skill.

I am very sad to say that it is becoming one of those ‘dying’ kind of recipes. My mother and grandmother generations perfected the sorghum roti preparation. But coming to my generation, the ‘educated’, the ‘sophisticated’ ones, who can talk about baguettes and brie’s for hours and goes to great lengths to prepare and showoff knowledge of foreign cuisines, have no interest and can’t give the time of the day to learn or master the technique of this classic Indian recipe. It is not that we don’t like the taste. We love it! Imagine the warm paratha taste, multiply by 10 times, that’s how a good, well made sorghum roti tastes. In artisan hands, it puffs like puri – all on its own. No leavening agents and oil or ghee are added. Just fresh sorghum flour, warm water and touch of fire – pure grain power in its glory.

Making a prefect sorghum roti is a skill that I wanted to master with all my heart. For me, it is not just a recipe, but an Indian tradition that I wished to be a part of. The process is difficult to explain in written words and pretty much useless. Again this is one of those recipes, where one must be in the kitchen next to the cook, to know what they are talking about. One really needs a visual experience to understand the recipe. Well that’s how I feel anyway, so I’m going to keep the recipe directions simple for a change, and instead show the process in images.

Spreading the dough into thin round shape using hands

Prepare dough by gradually adding and mixing hot water. After a rest period of 10 to 15 minutes, the dough is kneaded and divided into lemon sized balls. Then, using palm of the right hand, on a flat board, the dough is spread into flat, thin round.

Cooking the roti

The doughspread is carefully lifted and placed on a hot iron tava (griddle). We use a separate tava just for making these rotis. On medium-high heat, roti is roasted slowly. Water is applied with a cotton cloth on the surface of roti, before turning it to the other side.

Roti is turned to otherside

After two to three minutes of cooking, roti is turned to the other side and cooked until done.


Sorghum roti (Jonna Rotte, Jowar roti) with curry
Jonna Rotte (Sorghum Roti) with curry ~ our meal today.

Recipe origin and source: Rayalaseema(Andhra, India) and Amma.

Posted by Indira©Copyrighted in Amma & Authentic Andhra,Bajri/Jowar Flour,Jowar (Jonnalu),Millet (Tuesday April 4, 2006 at 10:49 pm- permalink)
Comments (72)

The New Home of Mahanandi: www.themahanandi.org

Spaghetti in Spicy Cherry Tomato Sauce

(Imitating Rachel Ray’s 30-minute meal episode narration
for this month’s IMBB-Make it in 30 minutes)

Hi I’m Indira Singari, I’m going to prepare a 30 minute meal today. Spaghetti in spicy cherry tomato sauce. Who said we couldn’t have pasta in a spicy sauce? You know, I’ve tried commercial pasta sauces but my tastebuds, once you are used to spicy stuff, it’s tough to go back to that kind of childhood bland, flat taste. giggle… ok enough of chit chat…

Going to the pantry area… Grabbing 2 pints of cherry tomatoes. You know, I like cherry tomatoes. They have a very thin skin and have more zing than the romas. I bought two of these boxes for 99 cents each from the local grocery shop. What a deal, you know. gigggle…

Next thing on the list is, pasta – I’m in the mood for thin spaghetti. So thin spaghetti it is then. Also to add to the tomatoes… here is a teaspoon of cumin, 5 dried red chillies and 4 big garlic cloves. I see some nuts in my cupboard, ya…grabbing those…hmm…Quarter cup of watermelon seeds and a tablespoon of chironji(sara pappu), just to give that extra nutty sweetness to the tomato sauce. It’s going to be one Yum O sauce… giggle… I’m also going to add boiled and sliced eggs to the pasta as a side dish. 4 eggs are enough…

Garbage bowl is a handy one, I can carry all these in this big bowl and later when I am chopping I can dump all the waste like eggshells etc in the bowl. Believe me, it’s one handy thing to have by side. … giggle

Ok… first cooking the pasta: place the big saucepan on the burner. Fill two thirds of pot with water. Nothing is wrong with tap water, so fill it up. Drop 2 teaspoons of salt into water and cover with a lid. Bring to a boil. Also in other saucepan, take pot full of water, add eggs and pinch of salt, cover and cook them.

Prepping the cherry tomato sauce: It takes at least 5 minutes for water to come to a boil, so in the meantime, we prepare tomato sauce. Let’s go…Separate 10 cherry tomatoes from the box and keep them aside. You are going to see what I’m going to do with them later. Ok, back to tomatoes. Take the remaining cherry tomatoes in a blender; add cumin, garlic, dried red chillies and a teaspoon of salt. Blend them finely. This is going to be our spicy sauce… it took less than one minute, the time it takes to open a can of tomato sauce. giggle…

Now cooking the sauce: heat a teaspoon of EVOO.. that means extra virgin olive oil giggle…and drop one or two finely minced garlic. Also watermelon seeds and chironji (sara pappu). Sauté them till golden, then add the pureed spicy tomato sauce and one cup of water. Close the lid. Hmmm that starts smelling good. Cook this mixture on medium heat for at least 15 minutes, stirring in between.

Checking on the water — the water is boiling ready now. Add the pasta, you know, some people like to break the pasta to half before adding to the water. But I like them long, so here they go into the boiling water. I’ll wait for 5 minutes then I remove them. Checking the other pot…the eggs are cooked perfectly. I’m going to take them out of water with a big spoon.

Now getting ready to plate the meal: everything is coming together perfectly, ahh… the smell… I wish you could smell the tomato sauce… all that cumin, garlic… it’s like heaven in here. giggle… Ok, slice the cherry tomatoes we kept aside, to halves. Place them on a round plate to the edges. Peel and slice the boiled eggs into thin strips.

Pasta is cooked perfectly… slurping one spaghettial dente, just perfect. Pour the whole thing into a colander to drain the water. Add the spaghetti to the spicy tomato sauce and stir. Look how beautiful it looks… Wheaty white spaghetti in ruby red tomato sauce… Gorgeous!

Plating: Grab a couple of forkfuls of pasta and place them on the plate. Arrange some more sliced cherry tomatoes and some egg slices around the pasta to give that pretty look. Our 30-minute meal is ready. For dessert I’m going to have one of those muffin sized Mango Halwa pieces, I prepared yesterday. Just perfect to end the meal.

Tasting: Yum O…not only appealing to the eyes, this super simple meal has everything going on for it. It has carbos, nutty fat, eggy protein and veggies in the form of cherry tomatoes. Even more its spicy…taking a bite…hmm… loving it.. giggles

Hey I’m Indira Singari, you can prepare a great, satisfying meal in just 30 minutes. See… Signing off…(Camera focuses on the meal.)

Spaghetti In Spicy Tomato Sauce
30 minute meal – Spaghetti in Spicy Tomato Sauce served with cherry tomatoes and boiled egg slices

Ingredients
2 fistfuls of thin spaghetti
2 pints of cherry tomatoes
4 garlic cloves
5 dried red chillies
1 teaspoon of cumin
¼ cup of watermelon seeds and chironji (sara pappu, charoli)
Olive oil and salt to taste
Additions: 4 boiled eggs- yellows removed and sliced thin

Thanks “Too Many Chefs” for hosting this month’s IMBB event.
Tagged with: +

Posted by Indira©Copyrighted in Pasta,Tomato (Friday March 24, 2006 at 2:56 pm- permalink)
Comments (34)

The New Home of Mahanandi: www.themahanandi.org

Previous Page »