Mahanandi

Living in Consciousness ~ Indi(r)a’s Food and Garden Weblog

Beerakaya Bajji (Turai Bajji)

Beerakaya Bajji (Turai Bajji)

Beerakaya (turai or ridge gourd if you prefer) is among my all-time favorite vegetables, so when it is in season I like to incorporate it into all sorts of dishes.

In this traditional bajji recipe, coated with thick besan batter and deep fried, delicate beerakaya slices take on a luscious, sponge-like character. The ajwan (carom seeds) and cumin addition to the besan batter bring a special aroma to the beerakaya bajji, making them absolutely the best.

Beerakaya, Turai, Ridge Gourd
Beerakaya (Turai, Dodka, Ridge Gourd)

Recipe:
(for two, makes about 20 bajjis)

Prepare the Beerakaya:
Pick an arm-length, young and fresh looking beerakaya (turai, ridge gourd)
Scrape the protruded ridges with a peeler. Wash and slice the beerakaya into thin rounds, using a mandoline.

Prepare the Besan Batter:
In a big bowl, take one-cup besan, quarter-cup rice flour. Add ½ teaspoon each – ajwan, cumin and salt. Also ¼ teaspoon each – chilli powder and baking soda. Mix. Adding half-cup water, whisk together all the ingredients, until well-combined and smooth. (Prepare the batter thick like condensed milk.)

Bajji Time:
In a deep-bottomed kadai or wok, add about 2-cups peanut oil. On medium-high, heat the oil suitable to deep-frying. Once the oil is hot and ready, begin frying. Dip the beerakaya rounds, one by one into besan batter so that they are generously coated. Gently drop in as many pieces as will float freely in the oil. Do not crowd. Fry both sides to gold color and remove the pieces with a slotted spoon and transfer them to a paper-covered plate. Serve hot with chutney or ketchup and with a cup of coffee.

Beerakaya Bajji (Turai Bajji)
Beerakaya Bajji and Jilebi ~ warming up on a Crisp Autumn Day

Also see:
Monsoon Magic~Turai (Dodka) Bhajji : from Madhuli’s My Food Court

Posted by Indira©Copyrighted in Amma & Authentic Andhra,Beera kaaya(Ridge Gourd),Gram Flour (Besan) (Friday September 7, 2007 at 2:35 pm- permalink)
Comments (13)

The New Home of Mahanandi: www.themahanandi.org

Beerakaya~Pesara Pappu Kootu

Ridge gourd and Moong Dal :

I see the world around me. There is a deep tantric style worship of all-purpose flour and its endless avatars. All-purpose flour, butter, eggs and sugar: the central content is the same but by just changing the vessel and the decorations, several different avatars are possible. Like the prayers to the Gods, the all-purpose flour mantram resonates like this: cakes… yum, cookies… yum, cupcakes… yum, muffins… yum, bread… yum, biscotti… yum, pizzas, pies, scones… yum … yum … yum … the mantram goes on. The sugar bliss and the atma content follow… yum!

I am amazed by this boundless fascination all-purpose flour attracts. The Maya intensity of all-purpose flour is so great that each of its avatars is perceived as its own creation. I too use the flour mantram, but the avatars are limited to chapati… yum, puri… yum, paratha… yum. I’m just talking out loud.

Anyway, cakes and cookies could be divinely delicious, but vegetables are what inspire me to cook and write. Vegetables keep me happy in a world which is insanely flour-sugar coated. So here it is, another sane vegetable recipe from an all-purpose flour atheist. A hearty, dense, satisfying dal recipe with ridge gourd and moong dal, called Kootu.

Attempt this kootu recipe only when you have asafetida in your kitchen. Because the tiny amount of asafetida is what makes the recipe come alive. Onions and garlic are a big no but potatoes are a must. Ridge gourd, drumsticks and brinjal separately or together in combination are added to cooked, watery moong dal. And the whole thing gets simmered until a thick, honey like consistency is achieved. This is a good dal recipe for people who have low tolerance levels for onions and garlic, and also during early pregnancy times. Mild and soothing, this moong dal Kootu is a favorite for moong fans like me.


Ridge gourd, Red Potato, Lime and Yellow Moong Dal ~ Ingredients for Pesara pappu Kootu

Recipe:

Step 1: 1 cup yellow moong dal – Roast the yellow moong dal to pale red color in an iron skillet. Take the roasted dal in a pressure-cooker, add about 4 cups of water and pressure-cook to soft. Then, lightly mash the dal to smooth consistency.

Meanwhile blend six green chillies, two tablespoons of grated fresh coconut and a pinch of salt to smooth paste.

Step 2: In a saucepan – add a teaspoon of oil. Add and saute two cups of cubed potatoes first. Once the potatoes are half cooked, add 2 cups of finely chopped ridge gourd pieces and saute to tender. (3 potatoes and 1 ridge gourd.)

To the vegetables, add the mashed moong dal, green chilli-coconut paste, ½ tsp each -turmeric and salt, plus a quarter cup of lime/lemon juice, along with two cups of water. Mix, have a taste and adjust the spice, salt to your liking. Simmer for about 10 to 15 minutes.

Step 3: In the end, do the popu or tadka. Add and toast few curry leaves, dried red chilli pieces, cumin and mustard seeds and quarter teaspoon of asafetida in an iron skillet in a small amount of oil or ghee. Add the toasted contents to simmering dal. Mix and serve hot with chapatis. A state of bliss will surely follow.


Beerakaya Pesara Pappu Kootu ~ for a Light Meal

Posted by Indira©Copyrighted in Amma & Authentic Andhra,Beera kaaya(Ridge Gourd),Moong Dal (Washed) (Wednesday August 29, 2007 at 10:19 pm- permalink)
Comments (33)

The New Home of Mahanandi: www.themahanandi.org

Gasagasalu ~ Bendakaaya

Okra ~ Poppy Seed Curry:

When people think of Andhra kuralu (curries), they think of chana dal, chilli and coconut podi flavored ones. Although these are very commonly added to spice-up the vegetables, in our homes in Nandyala, Kurnool regions, along with peanuts and sesame, poppy seeds also make frequent appearance. Alone or together with coconut, both in dry style curries like the one I prepared today with okra and in sauce form like the one blogged here.

I realize that poppy seeds are not a familiar ingredient to many of you fellow Bharatiya. Their creamy-nut like flavor is really worth getting to know. You won’t regret trying, I assure you.

Poppy Seeds (Khus Khus, Gasagasalu)Poppy Seed PowderOkra (Bendakaya, Bendi, Ladies Fingers)

Recipe:

20 young and fresh looking okra (Bendakaya, Bendi)
3 tablespoons poppy seeds (Gasagasalu, Khus Khus)
3 dried red chillies – Indian variety
Salt and turmeric – to taste or ½ teaspoon each
Popu or tadka: 1 tablespoon peanut oil,
Pinch each – cumin, mustard seeds and 6 curry leaves

1 Trim the ends and cut the okra to quarter to half inch wide rounds. For a gummy free okra experience, follow the tips outlined here.

2 Roast poppy seeds in a dry, hot iron skillet for about 3 minutes, until they just start to color and release their aromas. Add dried red chillies and a pinch of salt and pound or blend all the ingredients together. Keep working until a nice, moist paste is formed. I usually use a spice grinder or Sumeet small jar for this purpose.

3 In a wide skillet, heat a tablespoon of oil. Add and toast the tadka ingredients first and then add the okra pieces. Mix once and fry the pieces, very rarely stirring, until they are free from moisture. A well seasoned cast-iron skillet charms the okra to a beautiful crispiness. If you have one, use it for this recipe. When okra pieces transform from clinging kids to leave me alone type teenagers, it’s time to introduce the adulthood delights with spices. Add the poppy seed powder, turmeric and salt. Mix gently and saute for few more minutes.

Serve the curry hot with rotis/chapatis or with rice and dal. Okra-poppy seed curry makes a great tasting side dish.

Okra-Poppy Seed Curry
Okra-Poppy Seed Curry with Ragi Roti and Olive Chutney ~ Meal Today

Recipe Source: Amma, Nandyala
Poppy Seed Based Recipes from Archives:
Brinjal-Potato Curry ~ on Oct 25th, 05
Banana Pepper-Baby Potatoes in Poppy Seed Sauce ~ on April 21st, 06
Moong Dal Payasam ~ on June 9th, 06
Ridgegourd (Turai/Beerakaya) in Poppy Seed Sauce ~ on May 22nd, 07
Ratatouille:India Inspired ~ on July 10th, 07

Posted by Indira©Copyrighted in Amma & Authentic Andhra,Benda Kaaya(Okra),Poppy Seeds (Tuesday August 28, 2007 at 9:45 pm- permalink)
Comments (20)

The New Home of Mahanandi: www.themahanandi.org

Naivedyam and Thambulam

Naivedyam

Naivedyam for Lakshmi Devi (Peace and Prosperity) and
Thambulam for You, My Dear Family and Friends

Thambulam (Vayanam)
వరలక్ష్మి పూజ శుభాకాంక్షలు!
Have a Lovely Weekend Everyone!

Posted by Indira©Copyrighted in Amma & Authentic Andhra,Naivedyam(Festival Sweets),Zen (Personal) (Friday August 24, 2007 at 3:20 pm- permalink)
Comments (28)

The New Home of Mahanandi: www.themahanandi.org

Coconut for Pooja

Coconut for Pooja
Pooja Coconut

The festival season officially will begin tomorrow for us. Last year in moving hungama, I totally missed the pooja, but this year I have planned to celebrate all festivals.

For Varalakshmi vratham:

Shopping – done
House cleaning – done
Pooja mandir decoration – done

Can’t wait for tomorrow.

Varalakshmi Vratha Shubhakankshalu!
వరలక్ష్మి పూజ శుభాకాంక్షలు!

Posted by Indira©Copyrighted in Amma & Authentic Andhra,Coconut (Fresh),Indian Ingredients,Zen (Personal) (Thursday August 23, 2007 at 10:10 pm- permalink)
Comments (13)

The New Home of Mahanandi: www.themahanandi.org

Sambars for Supper~ Beetroot Sambar

Red and Gold Beets
Beets ~ Gold and Ruby

The flavor and the color of beets are unique. Their sweetness is more like saccharine than sugarcane. One thing is for sure, they do brighten up any meal with that bold, ruby-red color. But the new variety, the golden beets that I see at farmers markets in recent years is little bit different. They taste more like carrots than beets and they do not stain or bleed like red beets. I personally feel that golden beets taste much better than red beets. But, they are still in designer, fancy stage and I look forward to the days when they become more affordable.

After the yesterday’s curry, I had three each, red and golden beets left from Sunday’s farmers market purchase. I have added few carrot pieces to the bunch and made a hearty sambar with toor dal. The sweet beets and carrots, creamy rich toor dal and spicy sambar masala, together with rice and papads ~ it was a good supper today.

Red Beets, Gold Beets and Carrots ~ for Sambar

Recipe:

Pressure-cook the dal:
Take one cup toor dal and two cups water in a pressure-cooker. Cook the dal to very soft and mash to smooth with an immersion blender or wood masher.

Prepare the vegetables:
Carrots, red and golden beets, 3 each – peel, cut to thin, two-inch length pieces
tomato and onion – one each, finely sliced

Do the Popu and Simmer:
In a heavy pot, heat a teaspoon of oil until a curry leaf tossed in it sizzles. Keep the heat to medium. Add a sprig of curry leaves and toast to pale gold color. Then, add a pinch each cumin and mustard seeds. When seeds start to pop, add the onions. Saute to soft. Next goes tomatoes, carrots and beets. Saute for about ten minutes.

Then, stir in half teaspoon each – turmeric, salt, red chilli powder and a tablespoon each –sambar masala powder and tamarind pulp. Also the cooked and mashed toor dal along with three cups of water. Mix everything thoroughly and bring to a boil. Reduce the heat, partially cover the pot and simmer until the vegetables are soft. Stir frequently and well, as the toor dal tend to sink to the bottom and stick. Garnish with few sprigs of finely chopped coriander leaves if you wish and serve warm. Tastes great mixed with rice.

Beetroot Sambar
Beetroot Sambar ~ Under the Golden Sun Rays

Posted by Indira©Copyrighted in Amma & Authentic Andhra,Beetroot,Toor Dal (Wednesday August 22, 2007 at 11:00 pm- permalink)
Comments (16)

The New Home of Mahanandi: www.themahanandi.org

Baby Brinjals and Potatoes

Vankaya~Urlagadda Vepudu:


Brinjals and Red Potatoes ~ Babies Dressed up in Kobbari Kaaram

Last weekend, I purchased these baby brinjals and tiny red potatoes at an Asian grocery shop. Tender and cute, they are about one to one and half inches in size, like small night bulbs. I pressure-cooked the potatoes but for brinjals, following my mother’s philosophy of “less we do, the more the brinjal’s delicate flavor comes through”, I just made two small slits in plus shape and steam-sautéed them. Within ten minutes, the lavender colored brinjals turned to beige and fork-tender. Once the brinjals were done, I just added the potatoes and the kobbari kaaram podi. That’s it, a nice side dish was ready for our meal today.


Small Night-bulb Sized Baby Brinjals and Baby Red Potatoes

Recipe:

Peanut oil – 1 tablespoon
Curry leaves 6, cumin and mustard seeds – Pinch each
Onion, thinly sliced lengthwise – half cup
Baby brinjals (1-2 inches long) – 10, cut in plus shape
Baby red potatoes – 10, pressure-cook or boil to fork-tender
Kobbari kaaram podi – 4 tablespoons
Turmeric and salt – ½ teaspoon each or to taste

In a wide skillet, heat peanut oil. Add and toast curry leaves, cumin and mustard seeds. Add onion and fry to soft.

Add the brinjals. Sprinkle about two tablespoons of water. Cover the skillet and steam-saute the brinjals to tender, stirring in-between. The young brinjals turn to fork-tender quickly, in about 10-15 minutes.

Add baby potatoes. Sprinkle kobbari kaaram podi, turmeric and salt. Gently mix and cook another 5-10 minutes on low heat. Serve hot. It’s a good side dish to have with rice and sambar or pappu chaaru.


Brinjal-Potato Saute with Kobbari Kaaram and Tomato Pappucharu mixed with Rice ~ Brunch today

Posted by Indira©Copyrighted in Amma & Authentic Andhra,Baby Potatoes,Potato,Vankaya (Brinjal) (Monday August 20, 2007 at 11:38 am- permalink)
Comments (12)

The New Home of Mahanandi: www.themahanandi.org

Puri Pictorial


Puris ~ The Happy, Lovable Cousins of Chapatis

Made with special wheat flour called atta, rolled out to paper-thin circles and puffed to peach colored balloons, delicate and delectable puris means pure pleasure guaranteed.

I usually prepare puris at home for friends get-togethers or when I host a party, but very rarely for us. It has to be a special occasion and today is one such day for us. To celebrate, a party call was sent out by Anita of A Mad Tea Party, the fabulous food blogger from Delhi. I wanted to join. So, here I am at the party with Nandyala-style puri treats.

Atta
Whole Wheat Flour from India and Tap Water from Seattle:) ~ for Puri Dough

Recipe:
(Makes about 15- 18 small salad-plate sized puris)

For Puri dough:
3 cups atta (Special wheat flour from India)
1½ cups of warm water
1 teaspoon salt

To deep-fry
3 cups peanut oil
sturdy based kadai or wok
A big slotted spoon

In a bowl, combine the flour and salt. Move the flour to the sides of the bowl to make a small well in the center. Pour water into the well. Using fingers combine the ingredients, until the flour comes together to firm dough. (For puris, I make the dough very tight, so that when deep fried they won’t absorb lot of oil and look greasy. Tight dough also helps to balloon the puris.)

Gently knead the dough for a minute or two to remove the creases and until the surface is smooth. Cover the bowl with a plate and set aside for about 30 minutes. Then, follow the puri pictorial.


Roll out the Puri dough to a round coil about the width of baby’s fist.


Divide the dough to equal portions and shape each portion to a round.


Using a rolling pin, press the round to a circle of greeting card thickness


Place the kadai on stovetop. Add and heat the peanut oil to frying hot(375 F). Carefully slip the pressed puri round into hot oil. Gently push-down once with slotted spoon, and let the hot oil work its magic.


The puri comes out of the oil like a balloon. Flip and fry for few seconds


We want not red nor angry-red but peach color for Puri. Remove to a paper covered plate. Serve hot with a curry, dal or chutney.


Puris with Red and Green Capsicum Bhaji ~ for A Mad Tea Party

Posted by Indira©Copyrighted in Amma & Authentic Andhra,Goduma (Wheat),ID Food Parade,Wheat Flour (Durum Atta) (Wednesday August 15, 2007 at 6:51 pm- permalink)
Comments (44)

The New Home of Mahanandi: www.themahanandi.org

Kobbari Kaaram


Coconut sweetness
Curry leaves aroma
Chillies divine spiciness
Chana dal and Urad dal nutty crunchiness

That is kobbari kaaram. The traditional, famous spice powder from Andhra Pradesh, India. The secret to success of this spicy powder lies in slow-roasting of ingredients to seductive gold color. As you can see, there is a lot going on in this deceptively simple spicy powder.

Some recipes make us feel defeated while also stirring in the feelings of joy. Kobbari Kaaram is one such recipe for me. It has too much amma (mother) association and attached memories to it. While standing in front of the stove, waiting for the ingredients to reach that perfect gold color, the deep longing for gentle landscape of my childhood days was too much to feel. But once I finished the preparation and started to dip the warm gheelious rice-ravva upma rounds in kobbari kaaram, I rolled back to my routine content self and began to make happy cooking plans.


Oven-Dried Coconut, Toasted Curry Leaves, Roasted Dried Chillies, Chana dal and Urad dal

Recipe:
2 cups – thinly sliced dried coconut pieces
Quarter cup each – chana dal and urad dal
20 fresh curry leaves
15 dried red chillies – Indian variety
1 teaspoon – sea salt

Break a fresh coconut. Remove the coconut from shell. Thinly slice and spread the pieces on a baking pan and bake/ovendry to pale brown color at 200 F. Or simply sun-dry the coconut pieces to golden brown, like we used to do at Nandyala.
Place an iron skillet on stove-top, on medium heat. Once the skillet is hot, reduce the heat to low and one after another, add and roast chana dal, next urad dal and finally red chillies to pale brown color. Mix frequently and take care not to black the ingredients. Remove each one to a plate. In the end, coat the skillet with a teaspoon of peanut oil. When the oil is hot, add and toast curry leaves to gold color. Remove to a plate.

Let the ingredients come down to room temperature. Both texture-wise and taste-wise, this is important. Go sit down and wait.

When they are cool enough to touch, take the coconut pieces, roasted ingredients in a Sumeet style mixie jar. Add salt and grind to fine powder. Store the kobbari kaaram in a clean glass jar. Kobbari kaaram tastes great with all types of breakfast items like upma, pongal, dosa, idly and also on stir-fried vegetables like bell peppers, potatoes, brinjals, ridge gourd and okra etc. It’s a good thing to have in the kitchen.

Kitchen Notes:
I prefer either Ballari coconut or fresh coconut for this recipe because of their superior taste.
(From Telugu to English : Kobbari=coconut, Kaaram=Chilli)

Posted by Indira©Copyrighted in Amma & Authentic Andhra,Coconut (Dry),Dried Red Chillies,The Essentials (Monday August 13, 2007 at 5:57 pm- permalink)
Comments (22)

The New Home of Mahanandi: www.themahanandi.org

Mahanandi Selections ~ Grain Mill

I often get asked via comments and email, to recommend cooking utensils and products. I am extremely particular about the products that I buy for my kitchen. I wasn’t sure my taste is your cup of coffee, so I was reluctant all these years. Now, I have decided to take up the challenge. “Mahanandi Selections”, the shopping suggestions series is going to be a new one on Mahanandi and features products that I have at my home or would like to have in my kitchen.

I hope you find this new series interesting and useful.

double_curve.gif

Grain Mill (Issurayyi, Tiragali)


Image courtesy: Life in the Holyland

Back home, my family uses stone-made grain mill, similar to the one shown in the photograph to mill grains. This circular shaped stone mill is called “Issurayyi and Tiragali” in my language Telugu. We use it mainly for making flour for sweets like sunnundalu and attarasalu (adhirsam). The flour fineness matters a lot for these traditional sweets. Too fine powder, the sweet will stick to the roof of the mouth. Too coarse, it would be difficult to shape them. The advantage of stone-made grain mill is we can manually control the milled particle size, which in turn helps to make perfect sweets.

The one at my parent’s home is much smaller in size. The circular stones are about the size of big dinner plates and about the thickness of steroid-fed biceps muscle. It’s quite old and my mother keeps it in good condition. I remember turning the stone mill to help my mother.

This is how the stone grain mill works: A jute cloth will be placed on the flour and the stone mill will be placed on the cloth. The mill is essentially made of two circular stones. The lower circular stone stays stationary and the upper stone moves. It has an upright handle on the corner and this is used to turn the stone. The grain will be poured, a handful at a time, through the hole in the center of upper millstone, while the stone is turned continuously. Friction and weight created by the upper stone mills the grain. And the flour will get gradually pushed to the edge and falls out on to the cloth. Depending on the speed at which it is rotated and by the strength applied, the milled grain consistency varies – from fine, to medium to coarse. It may sound complicated but the whole thing operates on simple friction based principle. Looks wise Issurayyi is a real beauty. Operating wise, it’s a great way to keep the upper hands slender.

After moving to US, I was looking for a grain mill that operates in issurayyi style. I found one few years ago at a shop called Tuesday Morning. It’s a Porkert brand grain mill. A different look and feel but operates on the same principle. A big plus is it is very well made and of quality materials. The one I have has both ceramic and metallic burr plates. Ceramic ones are used for grinding oily nuts etc and metallic burr plates are great for grains and lentils like rice, urad dal etc. We have to assemble the parts and fix the machine to a table and operate it manually by rotating the handle. I have been using it to prepare sunnundalu mainly. This sweet is that important to us and cannot be made of flour from a coffee grinder or Sumeet style mixer-grinder.

If you have a traditional preparation requirement, where the milled grain size matters a lot, then go for this type of grain mill. It’s a hard, sweat inducing upper arm workout but the end result is definitely worth the effort. I have to warn you though, these manually operated machines are not magic abracadabra kind of things. A real zeal and know-how is essential for good experience.

Important:

1. You need to make some trials before you could get the required flour fineness. This could be done by adjusting the gap between the millstones, handle turning speed, and by adjusting the quantity of grains through the hopper.

2. This machine looks and works great. But also consumes considerable amount of time and effort to get the required results.


Machine Details

*****************

PORKERT’s Kitchen Grinding Mill ~ A Kitchen Gadget that I Own
Preparing Sunnundalu Sweet at home with PORKERT’s Kitchen Grinding Mill, Type 150

To purchase:

Porkert’s Manual Grain Mill

Different types of Grain Mills from Amazon.com.

Previously on Mahanandi Selections :
Sumeet Mixer Grinder
Aebleskiver Skillet (Ponganalu/Paniyaram/Uniyappam Pan)

double_curve.gif

Note: The things that I feature at ‘Mahanandi Selections’ (MS), reflects my own cooking style. You may regard a tool that I deem essential as an expendable thing or vice versa. I have absolutely no interest to convince you otherwise. It is good to be realistic about our own capabilties, limitations and what we can afford.
MS Comment Policy: Brand wars and malicious hearsay with intent to damage a brand reputation – comments of this nature will get scrubbed from comment space.

Posted by Indira©Copyrighted in Amma & Authentic Andhra,Indian Kitchen,Indian Utensils,Mahanandi Selections (Friday August 3, 2007 at 1:30 pm- permalink)
Comments (30)

The New Home of Mahanandi: www.themahanandi.org

Tomato Pulusu from Nandyala

During peak tomato season, when tomatoes are at their best and prices are low, my mother, Rajeswaramma would prepare this tomato pulusu. With ripe tomatoes, fresh coconut, and toasted coriander seed seasoning, tomato pulusu is nothing but taste buds tingling tomato love.

While picking tomatoes for tomato pickle, I found this precious looking tiny tomato (shown in the photo). I guess it belongs to one of those heirloom varieties. It looked so pretty and different. I did not put it in the pulusu. I photographed it and ate it like that, adding little sugar. Tasted good!


Tomato, Fresh Coconut, Coriander Seeds

Recipe:

Cut and cook:
Rinse 8 ripe tomatoes and cut them to large pieces.
In a saucepan, heat a teaspoon of ghee. Add and toast the popu or tadka ingredients (cumin, mustard seeds – a pinch each). When seeds start to splutter, add the tomato pieces. Stir in chilli powder, salt and turmeric to taste or quarter teaspoon each. Mix and cover with a lid and cook on medium high for about 10 to 15 minutes, stirring in-between.

Blend and Add:
While the tomatoes are cooking, in a spice grinder, take 3 tablespoons of fresh grated coconut, add a tablespoon of toasted coriander seeds. Also 2 cloves and half inch piece of cinnamon stick. Grind to fine consistency.

Add this paste to the cooking tomatoes. Stir the mixture together and gently press the softened tomatoes with the back of the spoon to mush them. Add about half cup of water. Mix and taste it for spices and adjust the salt and chilli levels to your liking. Cover the pot with a lid and simmer on medium-low for another 10 to 15 minutes. When the pulusu starts to become thick, then turn off the heat.

Serve the tomato pulusu piping hot with chapati, puri or rice with little bit ghee drizzled on.


Tomato Pulusu with Chapati ~ Taste buds Tingling Tomato Love

Posted by Indira©Copyrighted in Amma & Authentic Andhra,Tomato (Thursday July 19, 2007 at 9:22 pm- permalink)
Comments (16)

The New Home of Mahanandi: www.themahanandi.org

Tomato Pacchadi (Tomato Pickle)


Tomato Pacchadi (Tomato Pickle)

A new grocery shop has opened in the neighborhood recently and they had a grand opening sale on some items. Good looking tomatoes, still on the vine were advertised for 49 cents a pound. The deal was irresistible and I bought 20 pounds thinking of making tomato pickle.

There are mainly two ways of tomato pickle preparation that I am familiar with. The sun-dried method and the stove-top simmering method. Both produce excellent tasting pickles of different personalities. The first one needs super bright sunshine. It’s hot here in Seattle since last week, but it is no way near Nandyala hot. So, I decided on stove-top simmering method. Mainly, it’s fail-proof and produces tomato pickle of high quality that’s ready to eat as soon as it’s done simmering.

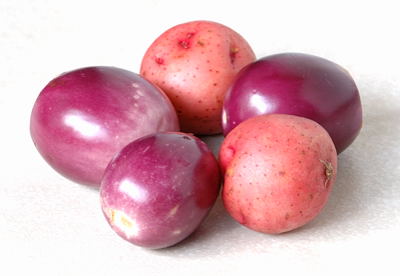
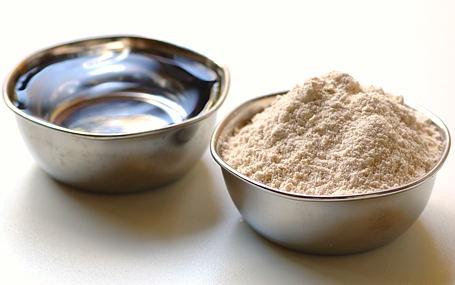
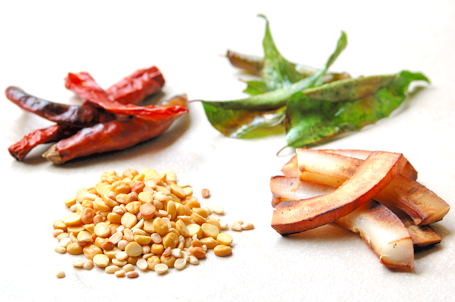
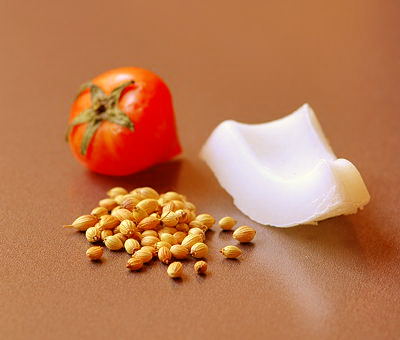
Like in any pickle preparation, the ingredients quality matters a lot for tomato pickle also. Tomatoes that actually taste like tomatoes with thin skin and little bit under-ripe are the best. Traditionally, tomato seeds and skin are included in pickle for that special texture and extra something they bring to the end experience. Sesame oil, tamarind, fenugreek, red chilli powder, iodine-free salt, asafetida, garlic, and fresh curry leaves – total eight ingredients are needed, which can be purchased at Indian grocery shops for low prices.

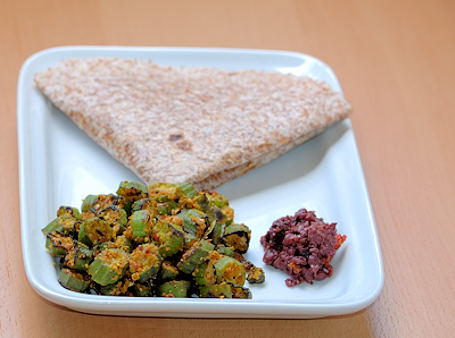
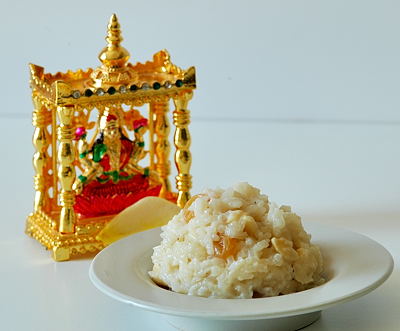
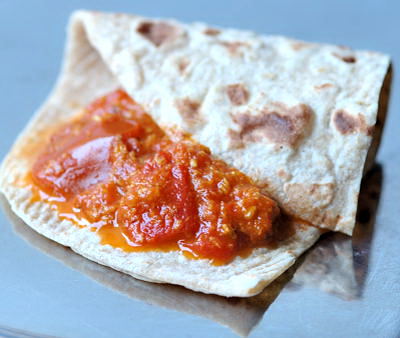
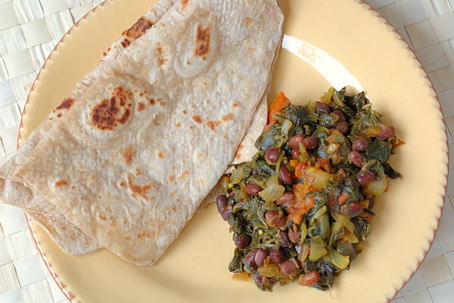
Surrounded by all natural ingredients, simmered tomatoes in tomato pickle sure make a bold, declamatory statement on taste buds. Sweet, sour, salty and spicy, the rich taste of tomato pickle is an addictive one. We particularly like it with upma, pongal, and yogurt rice. Also as a spread on chapatis and on toasted bread.
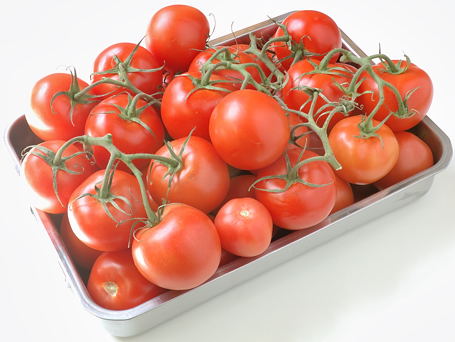
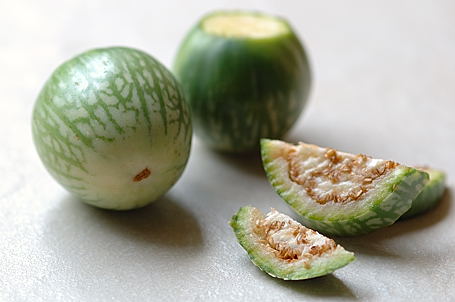

Tomatoes for Pickle

Recipe:

Tomatoes: 25 tomatoes rinsed and wiped dry with a clean towel. Coarsely chopped – about 15 cups.
Tamarind: 3 index finger-length tamarind pods soaked in half cup hot water and juice extracted. Or about ¼ cup thick tamarind pulp (added to enhance the tomato’s sweet-sourness quality).
Sesame oil (non-toasted variety from India, not the Chinese type) – ¼ cup
Red chilli powder – ¼ cup
Iodine-free salt – ½ cup
Fenugreek powder – 1 tablespoon

For Popu or Tadka:
2 tablespoons sesame oil
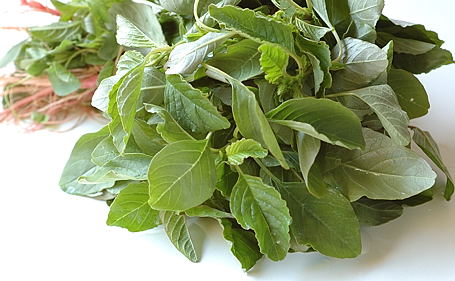
2 sprigs curry leaves, about 15 fresh curry leaves
10 garlic cloves – thinly sliced lengthwise, (like sliced almonds)
¼ teaspoon asafetida (inguva)
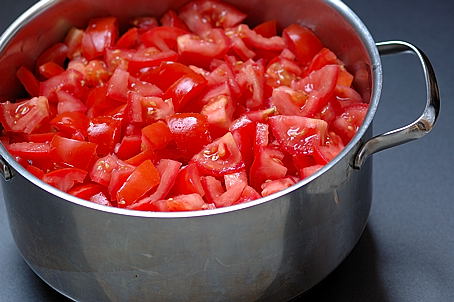
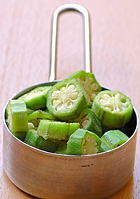

Sliced to Chunks

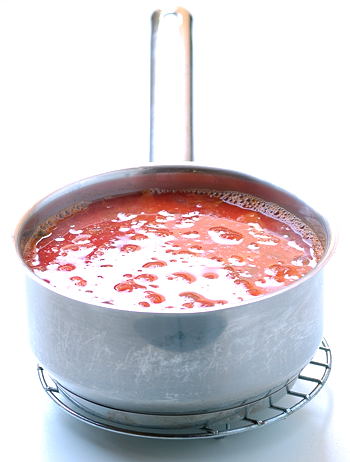
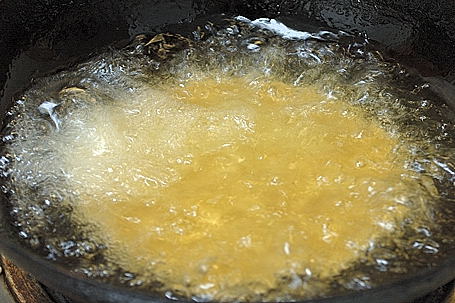
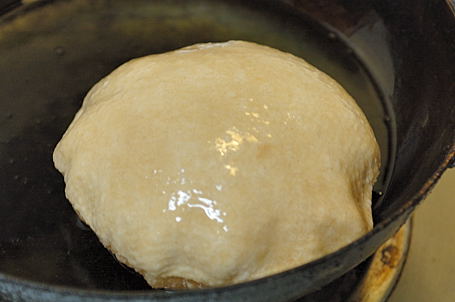
In a big, non-reactive pan, add and heat sesame oil (¼ cup). Add the tomatoes to hot oil. Also the red chilli powder, salt and tamarind pulp. Mix and cover the pot. Cook on high heat, stirring in-between for about 30 minutes. Tomatoes will be mushed down and you will be seeing lot of tomato juice trying to lift the pot lid and splash the counter-tops.

At this stage, add the fenugreek powder. Reduce the heat to medium, partially cover the pot and simmer until the tomatoes become thick but spreadable like jam. It takes easily an hour. Fine-tune the balance and adjust salt and chilli levels to your liking. The next step will be adding the toasted popu or tadka ingredients.

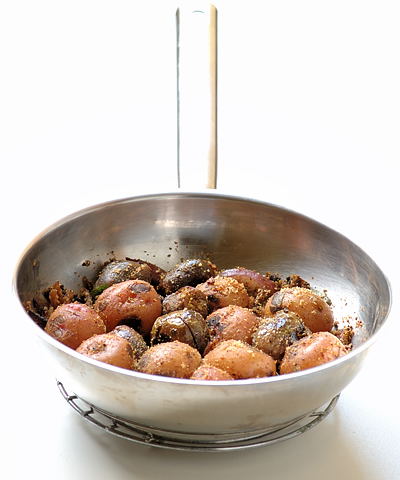
In a skillet, heat the sesame oil (2 tbs) until a garlic piece tossed in it sizzles. Lower the heat to medium. Add the garlic first and then the curry leaves. Toast to pale gold color. Turn off the heat. Stir in asafetida. Mix and immediately add the toasted skillet contents to the tomato pickle.

Stir so that everything gets well combined. Simmer, uncovered for about ten minutes, gently mixing. Turn off the heat and let the pickle cool. (Do not cover the pot.)

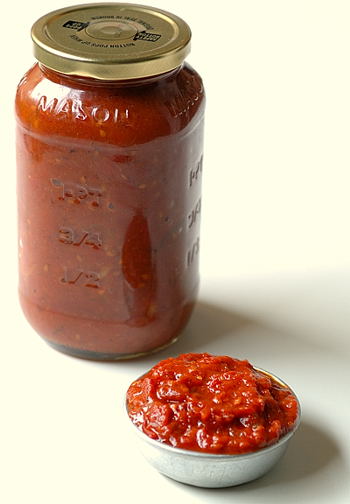
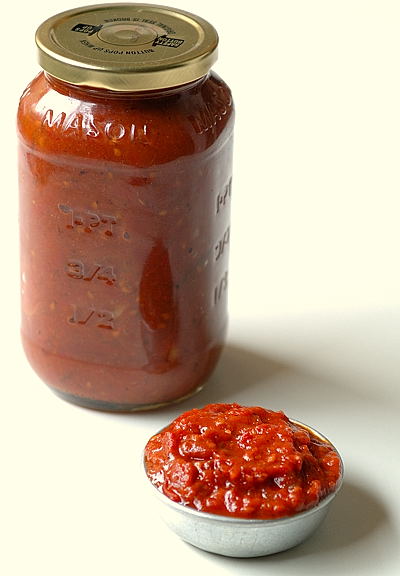
Fill the completely cooled tomato pickle in a clean glass jar with a tight lid. It stays fresh for a month, and stores very well even without refrigeration.

Enjoy!


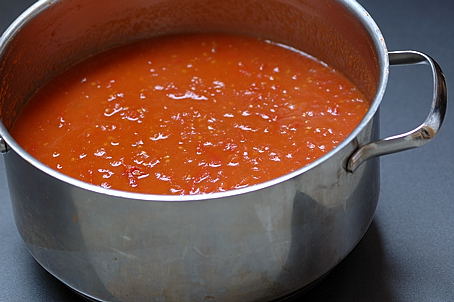
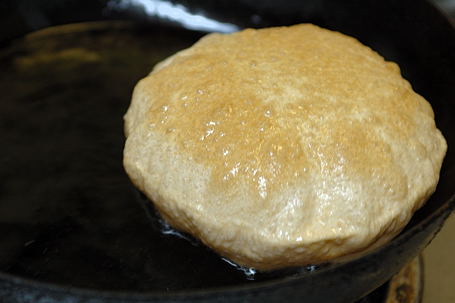
After one hour of simmering


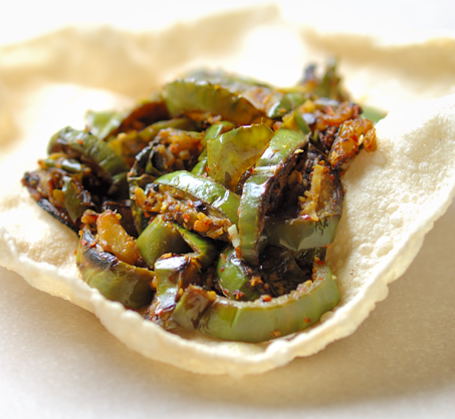
Tomato Pickle ready to be placed in a jar

Tomato Pickle
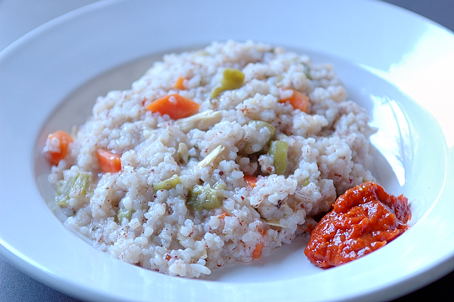
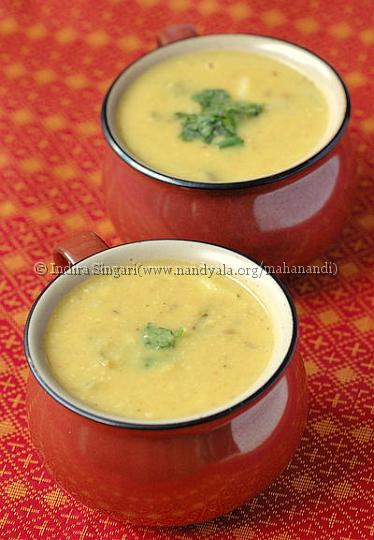
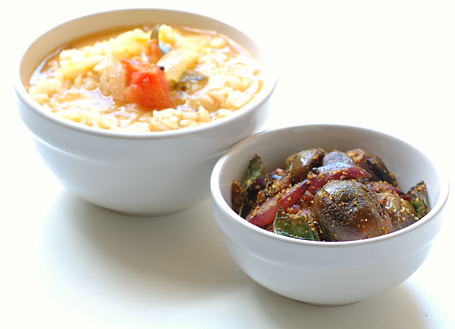
Rosematta and Yuba Vegetable Congee with Tomato Pacchadi

Recipe Source: Amma, Nandyala
If you are planning to make it with regular salt, reduce the quantity by couple of teaspoons, also adjust the salt level to your taste.

Posted by Indira©Copyrighted in Amma & Authentic Andhra,Tomato (Monday July 16, 2007 at 9:10 pm- permalink)
Comments (47)

The New Home of Mahanandi: www.themahanandi.org

The art of Tomato Pacchadi


Sun~Kissed Tomatoes of Summer


Sliced to Chunks


Simmering with Spices


Reduced and Ready to Bottle


Tomato Pacchadi (Tomato Pickle)

*********************

Thanks all for your interest in tomato pickle. Here is the Recipe:
The Art of Making Tomato Pacchadi

If you think you have benefited in some way, by using any of Mahanandi’s recipes and you want to show your appreciation by donating some money, here is Mahanandi’s Cause.
“Provide the Seeds to Sow”. Spread the word and donate.

Posted by Indira©Copyrighted in Amma & Authentic Andhra,Tomato (Thursday July 12, 2007 at 9:09 pm- permalink)
Comments (30)

The New Home of Mahanandi: www.themahanandi.org

Chinese Spinach Curry (Thotakura)

Thotakura Palakura Tomato Kura:

The summer season for vegetables is coming into full swing here in Seattle. It’s overwhelming to see so many American as well as Asian vegetable varieties and it is getting impossible not to lose mind and money. The choice is endless and I love to be greedy. But, how many and how much one can buy, cook and eat? So, I am trying very hard to keep my cool at farmers’ markets and pick only the ingredients I’ve known from my childhood days that speak to my heart.

One fresh vegetable that I am enjoying to the fullest along with green brinjals is fresh amaranth. (Thotakura in Telugu). The label at the local farmers’ market says Chinese spinach or red spinach and one bunch is usually priced at one dollar. I have been buying this vegetable almost every week since May simply because I love the fresh amaranth taste. It is one of those “looks simple and yet yields results far outweighing the effort” kind of vegetable. In today’s recipe, another Nandyala classic, the fresh amaranth is paired with spinach and tomatoes. A stellar combination and a scrumptious curry!

Chinese Spinach, Red Spinach, Fresh Amaranth, Thotakura
Bunch of Fresh Chinese Spinach/Red Spinach/Amaranth/Thotakura ~ From Local Farmers Market

Recipe:

1 teaspoon peanut oil
¼ teaspoon each -cumin, mustard seeds and curry leaves
1 big onion – finely sliced, about one cup
2 tomatoes – finely chopped, about one cup
5 green chillies -finely chopped
1 teaspoon – ginger garlic paste
½ tsp each- turmeric and salt
1 bunch fresh amaranth (leaves and tender stems) – finely chopped, about 5 cups
1 bunch fresh spinach – finely chopped, about 5 cups
I have also added about ½ cup chori/adzuki beans (pre soaked in water overnight). This is my choice and optional. Chickpeas, kala chana etc also taste good.

Heat peanut oil in a wide skillet. Add cumin, mustard seeds and curry leaves and let them sizzle a moment before adding the sliced onion, tomato, green chillies and red beans. Also stir in the ginger-garlic paste, turmeric and salt.

Let everything stew together for about 10 to 15 minutes, stirring occasionally, until the whole thing comes together into cooked soft mass with tender chori (adzuki) beans.

Now add the fresh amaranth and spinach. Stir to mix and cook covered on medium-high for about five minutes until the leaves wilt. Remove the lid and cook another five minutes. Turn off the heat. Let the curry sit for few minutes so that the flavors could mix well.

Serve the curry warm with chapatis or sorghum roti and a cup of yogurt plus fresh fruit for a complete meal.


Chapatis with Fresh Amaranth-Spinach-Tomato Curry

Posted by Indira©Copyrighted in Amma & Authentic Andhra,Red Beans (Chori),Spinach,Thotakura (Amaranth) (Monday July 2, 2007 at 9:12 pm- permalink)
Comments (16)

The New Home of Mahanandi: www.themahanandi.org

Green Brinjals with Cumin

Vankaya with Jeelakarra Karam:

“Let’s consider a situation when you are all alone at home. You are hungry and would like to satisfy your cravings. What will you cook if you want to cook for yourself?”

Asks talented foodblogger Live2Cook.

Just like her, if brinjals are in my vegetable stash, instead of indulging in junk food, I would be motivated enough to prepare a decent meal. I enjoy brinjals that much. Particularly green brinjals which we call Poluru Vankayalu in Telugu. I am one of those people with a passion for green brinjals.

Meal is for myself, so I would go for simple ten-minute preparations like brinjal with ginger or today’s recipe, “Brinjal with Cumin”. This little-known but worth-knowing cumin flavored brinjal curry is a delight to the senses and a must try for green brinjal fans.


Green Brinjals (Poluru Vankayalu)

Recipe:

Aromatic Cumin Powder (Jeelakarra Karam):
Take 1 tablespoon cumin, 1 roughly chopped plump garlic clove, 4 red chillies and a pinch of salt in a grinder. Grind to smooth without adding water.

Green Brinjals (Poluru Vankaya):
Pick 15 young and firm green brinjals. Remove the stem end and wash. Finely slice brinjals lengthwise like shown in the picture above.

Cooking the Curry (Kura):
Heat a wide skillet. Add a teaspoon of peanut oil. When the oil is hot, add a pinch each – cumin, mustard seeds and five each – curry leaves and roughly chopped garlic pieces. When they start to turn to gold, add the brinjal pieces.

Saute on medium-high heat, mixing in-between. Green brinjals cook fast, so be ready with aromatic cumin powder. Sprinkle the cumin powder and also turmeric and salt to taste. Toss to mix well and cook few more minutes, until the brinjal pieces are just tender but still green. Serve hot.

Cumin flavored green brinjal curry tastes great with rice/chapati, toasted bread/bagel or with papad.


Cumin Flavored Green Brinjal Curry on a Papad ~ Meal for Myself
For JFI~Eggplant Event Hosted by Lovely Sangeeta of Ghar Ka Khana

Recipe source: Amma, Nandyala

*******************

How many of you know that green brinjals are cultivated in India and they are named after a village called “Poluru” near Nandyala region, Andhra Pradesh?

More Green Brinjal (Poluru Vankaya) Recipes:
Stuffed Brinjal Curry (Gutti Vankaya Kura)
Brinjal-Potato Curry
Green Brinjal-Fresh Amaranth Curry

Posted by Indira©Copyrighted in Amma & Authentic Andhra,Cumin (Jeelakarra),Jihva For Ingredients,Vankaya (Brinjal) (Sunday July 1, 2007 at 1:00 pm- permalink)
Comments (24)

The New Home of Mahanandi: www.themahanandi.org

« Next PagePrevious Page »