Mahanandi

Living in Consciousness ~ Indi(r)a’s Food and Garden Weblog

Ragi Mudda (Ragi Sankati)

Ragi skipped a generation in popularity. Though our educated parents knew how to make Ragi mudda, they didn’t think of it as a cool recipe for everyday meal. Education and jobs have moved them from villages to cities and old type of recipes was not fashionable to them anymore.

Recently there is a surge of pride in our agricultural products. I call it agricultural patriotism, elicited because, some evil global corporations (US based) which tried to claim patents on turmeric. If they had gotten these patents, no one except the company would have rights on this ancient agricultural product. numerous cases of this kind of attempts to steal the agricultural rights, virtues and history of ancient herbs and products, have surfaced in the recent past. People in countries like India stood steadfast to preserve their rights and they prevailed.

Okay… anyhow coming back to Ragi…
Like quinoa of South American indigenous people, Ragi also plays important part in the nutritional makeup of South India’s village populace. Unpretentious, basic and strength to body kind of food, rich in Calcium and iron, I love my ragi. Low in price, easy to make and versatile, the basic recipe can be adopted to suit any type of palate.

Here is the recipe of ragi mudda or sankati the way we make in our home.
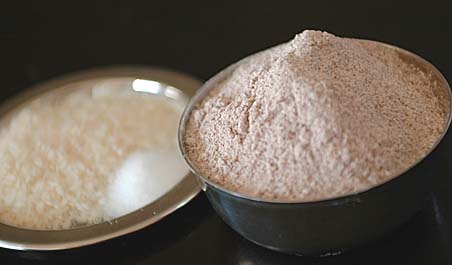
Ragi Flour, Rice and Salt - Ingredeints for Ragi Mudda

Recipe:
(for two people, for one serving)

1 cup of ragi flour
Fistful of rice
1/4 teaspoon of salt
4 cups of water
1 teaspoon of ghee

Preparation:

Take water and rice in a saucepan, add salt and bring to a boil. Cover and cook the rice until the grains are Ragi Mudda - In Final stages of preparationsoft. When the rice is soft, add – just pour or dump ragi flour into the pot. Donot stir now, this is the way folks back at home cook. Cover and put this mixture on medium heat for few minutes until the steam lifts the plate covering the pan. Remove the cover. Using a wooden masher or whisk, stir the ragi-rice mixure vigorously and thoroughly until you see no lumps.
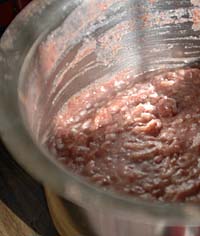
Reduce the heat to low, cover and let it steam cook for about 15 minutes. Switch off the heat. Let it cool down a little bit and make mudda or balls with it. Back home, they dip their hands in cool water first and then immediately take a portion of ragi and shape them into a ball, all done very fast. Here, I use an ice cream scooper to make round balls.

How it is served: Place the ragi mudda in a bowl and pour the sambhar over it. Not too cold and not too hot, just warm is perfect for the palate. Drizzle ghee over it. Today I made carrot sambhar for ragi mudda. It tastes quite good not only with sambhar and but also with peanut chutney, potato kurma or any other vegetable gravy curry. People in Telangana region of Andhra, are particularly fond of ragi mudda/sankati-chicken kurma combination.

How it is eaten: Using your hand or with a spoon, take small portions from the big ragi mudda, dip them into sambhar and swallow. Don’t use teeth; let the tongue do the work. Ragi can be incredibly gummy so traditionally the small balls are never bitten, they are just swallowed. Warm ragi mudda coated all around with sambhar… gives an incredible satisfaction. Children love this kind of food.

Variations: As I mentioned above, you can change the recipe to suit your taste just by changing or adding ingredients. Basic method of preparation is the same, but you can make it mildly sweet by adding jaggery or sugar. Or more rich by substituting the water with milk. You can also add one tablespoon of ghee while still cooking. Also add toasted and finely powdered cashews or peanuts to make it even richer.
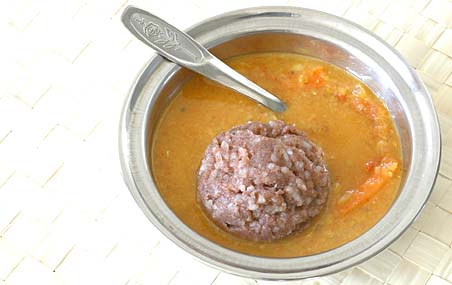
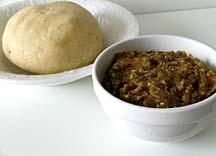
Ragi Mudda (Ragi Porridge / Ragi Sankati) in Carrot Sambhar

Ragi mudda or santaki in Carrot sambhar with ghee ~ Our meal today.

English translation of Ragi Mudda is – Ragi ball or porridge

Recipe Source: Attamma and Rajeswari – My mother in law and sister
Posted by Indira©Copyrighted in Amma & Authentic Andhra,Ragi,Ragi Flour (Wednesday December 7, 2005 at 3:47 pm- permalink)
Comments (57)

The New Home of Mahanandi: www.themahanandi.org

Murukulu (Janthikalu, Chakli)

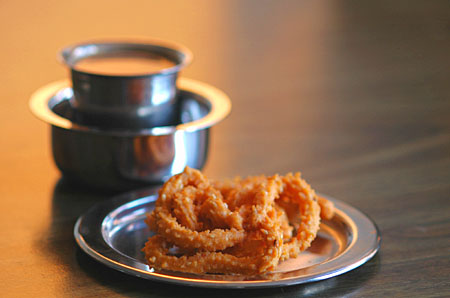
We created our own winter holiday custom; making murukulu, our favorite savory snacks. Vijay’s birthday comes during this month, and he loves murukulu more than anything. So, I make them in large quantity for his b’day and also for us, to snack all throughout the month of December, the traditional holiday season here.

Murukulu and hot tea, South Indian style, under the gorgeous golden rays of wintry Sunset.

Murukulu and Tea, served in a traditional Andhra way, on one fine evening

For the uninitiated, murukulu are India’s snack food. They are made with spiced up rice and lentil flour dough, pressed using a mold into beautiful round coils, then deep-fried in oil. Krum. karum is the sound they make when munched. Indian grocery shops usually carry several varieties of these snacks, try them out first, before trying out the recipe. For who know, love and want to try making murukulu at home, here is the recipe.

Recipe:

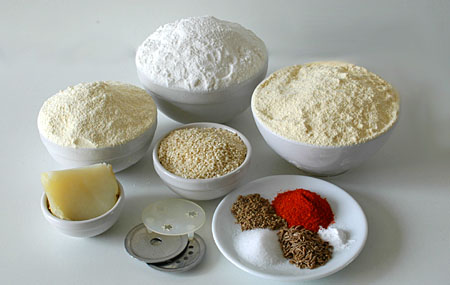
2 cups – Rice flour
1/2 cup – Gram flour (Besan)
1/2 cup – Moong flour (Pesara Pindi)

1/4 cup – sesame seeds
1 teaspoon each – cumin and ajwan/vaamu (carom seeds)
1/2 teaspoon each- red chilli powder and salt
Pinch of baking powder

Cooked Potato, Moong flour, Rice flour, Gram flour (besan), sesame seeds, Molds to make different shape murukulu and on the plate Red chilli powder, Ajwan seeds, baking powder, salt and Cumin

Some tips for good quality murukulu:

1. Boiled and Mashed Potato – a tip from my attamma for soft yet crunchy murukulu. One small potato will do for the above measurements. To make the dough more easy to work with, and as emulsifier, she substituted the ghee with the boiled and mashed potato paste. It is a great tip that works.

2. Peanut oil for deep frying – I find it that murukulu tastes great when deep-fried in peanut oil. I tried canola, corn oil… They go rancid only after 15 minutes on high heat and murukulu also taste almost bitter.

Muruku maker with discs – You can buy it in almost all major Indian grocery/appliance shops here in US, or you can try online stores. Cookie press like Sawa or Cookie guns are also good for muruku making.

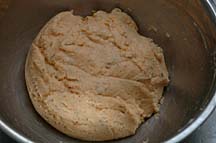
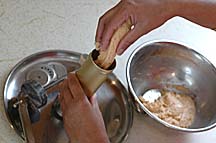
Prepared dough for murukulu making cylinder shaped log with the dough and dropping it into the muruku maker

Preparation:

Sieve and mix together the flours. Add the sesame seeds, pureed potato paste, red chilli powder, baking powder, salt, cumin and ajwan seeds. Make a soft dough by adding the water gradually. Dough shouldn’t be too stiff. Take small portion of dough and make a cylindrical shaped log and drop it into the muruku mold, like shown in the photo above.

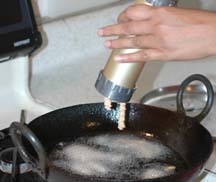
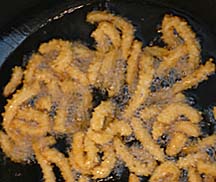
Pressing the dough into muruku shape using muruku maker into hot oil Making of Murukulu- after 5 minutes in hot oil

Deep Frying:

In a wok like deep, sturdy vessel, heat the peanut oil to hot. With your hands, press the muruku mold over the hot oil, making concentric circles, so that the coils of dough come out and drop into the hot oil in circle shape. When you are practiced at making them, you can get two to three circles of dough coils, successfully. My level of expertise at making these beautiful circles is a hit and miss. Anyway you make them, they will turn out, one tasty, crunchy snack, so don’t stress out too much about circles and technique, I don’t.

Fry both sides till golden, and then remove. It takes approximately 5 minutes to fry one batch. Repeat till all the dough is used. Let them cool and store in an airtight container.

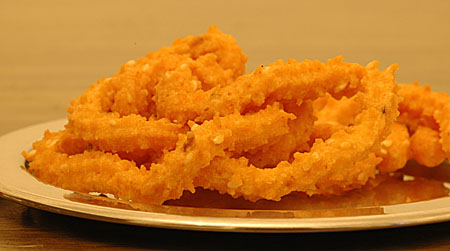
During frying, always keep the stove heat on very high. Just by changing the discs, one can make several different shaped murukulu. Shammi of Food in the Main, made recently ribbon shaped muruku for Diwali. I usually use medium round holes disc and star shaped holes disc. The ones photographed here are made using the star shaped holes disc.

Golden Murukulu - Photo taken in evening Sun light
A plate of Murukulu

Recipe Source: Attamma (MIL)

Posted by Indira©Copyrighted in Amma & Authentic Andhra,Gram Flour (Besan),Moong Flour,Rice Flour,Sesame Seeds (Monday December 5, 2005 at 2:28 am- permalink)
Comments (53)

The New Home of Mahanandi: www.themahanandi.org

Ma’amoul (Dates & Pistachios Filled Cookies)

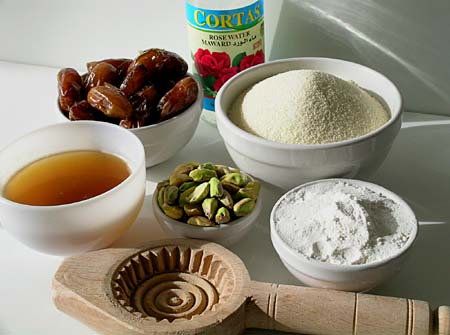
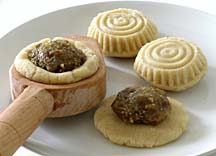
Chanit of My Mom’s Recipes and More left a comment on my blog last month. To return the compliments I visited her blog, and what I found was a very detailed recipe for mamoul (dates filled cookies) with photos. I knew I had to try it. What attracted me to this recipe more than anything is the use of semolina for dough. I did some googling on these famous Middle Eastern cookies to know more about them and how they are made. Next, I went and bought the ingredients: fine Tunisian pitted dates, pistachios and wooden ma’amoul mold from the only ethnic grocery store in our small town, Ghossians Mid East Bakery.

I did experiment with the recipe. First, I used ghee instead of butter because ghee is not only more flavorful and unlike butter has no unnecessary baggage. I reduced the ratio of all-purpose flour to semolina. I also complimented the dates filling by adding pistachios. Finally I skipped the eggs. One more thing is I prepped the mamoul mold with ghee so that when cookie dough pressed into the mold and reversed, it can come out easily without sticking to the mold.

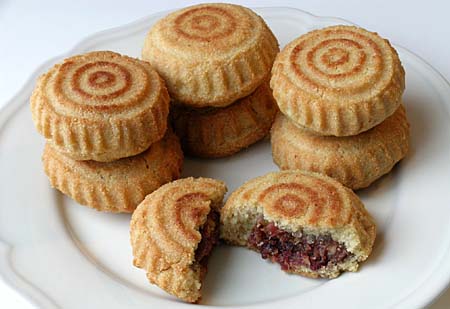
The final result of my experimentation was exquisite, one of a kind sweet cookies, the one I am going to make many more times from now on. A delicious paradox, they have a mildly sweet, crisp and grainy outside because of semolina and insides are moistly sweet and tender. Thanks Chanit! It is little bit of time consuming to make these using the ma’amoul mold but I had time and so happy with the beautiful outcome.

Ma'amoul mould, Pistachios, Dates, Rose water, Semolina, All Pupose Flour (Maida)

Recipe:

Dough:
2 cups – semolina
½ cup – all purpose flour (maida)
½ cup – melted ghee
½ cup – powdered sugar ( or more if you like sweet cookie covering)
1 tablespoon – rose water
1 teaspoon – active dried yeast melted in 1 tablespoon of luke warm water
Pinch of salt

Melt the ghee and cool it to room temperature. Sift the all purpose flour(maida) and mix it with semolina and ghee. Add the yeast water, rose water, powdered sugar and salt. Mix and make a dough by adding little bit of water. Set aside for about 3 hours, covered, to rest.

Cookie Dough after 3 hours of rest and Dates-Pistachios Filling Making of Ma'amouls - Pressing the cookies dough into ma'amoul mold

Dates- Pistachios Filling:
2 cups – fresh soft-pitted dates
½ cup shelled pistachios
¼ cup – powdered cane sugar
1 teaspoon – rose water
and Ma’amoul mould to press and shape the cookies

In a food processor, take pistachios and powder to fine. Then add the dates, sugar and rose water. Blend them together into fine paste. Remove to a cup.

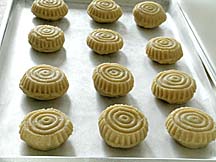
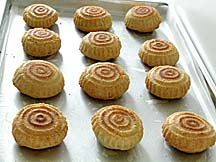
Ma'amouls (Dates-Nut filled Cookies) Ready for Oven Ma'amouls After 20 minutes in the Oven

Preparation:

After 3 hours of rest, knead and divide the dough into lime sized balls. Flatten each ball using your hand and lift the sides up to form a hollow. It is now ready for the filling. Place one tablespoon of dates-pistachios filling into the hollowed dough. Close the dough over the dates mixture. Press the edges to seal well. Press it into the ma’amoul mold to give it a decorated appearance. Reverse the mold; gently shake to loosen it from the mold. Prepare each one in this way and place them neatly in rows, on a greased/parchment paper lined baking tray.

Place the tray in a preheated oven at 350° F and bake for about 20 minutes. I reversed the cookies to the opposite side after 10 minutes in the oven for even baking. After 20 minutes or when they turn lightly golden, remove them from the oven and let them cool.

Ma'amouls (Dates-Pistachios Filled Cookies)

Ma’amoul (Dates-Pistachios Filled Cookies) ~ Delicate, rose flavored and naturally sweet. Our Thanksgiving treat and contribution to this month’s SHF-IMBB Cookie-Swap event.

Posted by Indira©Copyrighted in All-Purpose Flour(Maida),Dates (kharjuram),Ghee,Molasses,Pistachios,Sugar, Jaggery and Honey,Suji/Semolina (Friday November 25, 2005 at 8:46 pm- permalink)
Comments (63)

The New Home of Mahanandi: www.themahanandi.org

Skillet Cornbread with Okra Topping

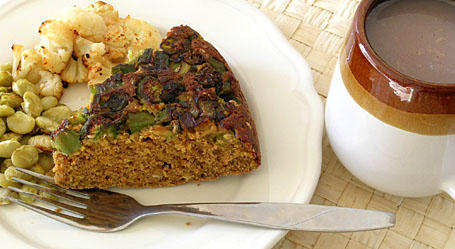
The first snow of the season has arrived this morning. The rain turned to snow for few minutes, giving us a brief glimpse of coming season. It was cold enough, so to warm the house and the stomach, I cranked up the oven to 400° F and baked cornbread with okra toppings. This is my first attempt at cornbread and it was a success, thanks to the detailed recipe written by Barbara of Tigers and Strawberries. I changed the recipe to my liking and also added crisply fried okra as cornbread topping.

Recipe:

Okra topping :
1 cup thinly sliced okra rounds, one onion, three green chillies and two garlic cloves all finely chopped. Saute them in oil, until they turn crisp and crunchy, like you normally do for a dry curry.

Cornbread Batter :
• Mix together 1 cup yellow cornmeal, 1/2 cup whole-wheat flour, 1 tsp each- baking powder and soda, 1/2 tsp salt.
• In another bowl, mix – 2 eggs (I removed yellows), 1 cup buttermilk, 4 tablespoons of molasses/sugar and 4 tablespoons of peanut oil.
• Combine the dry and wet ingredients.
• I also added half cup watermelon seeds that I brought from Nandyala to this mixture for some nutty crunch and nutritional value..

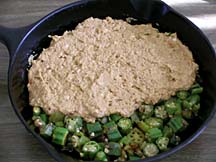
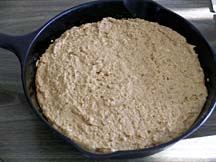
Covering sautéed okra with cornbread batter Sautéed okra fully covered with cornbread batter

Baking:

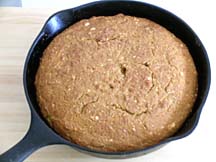
Preheat the oven to 400 ° F. When you are ready with cornbread batter and sautéed okra, place the empty iron skillet in oven and heat it up (Barbara’s tip). Remove the hot skillet from the oven. First place the okra in the skillet, then pour the cornbread batter over it. Spread the batter neat and even with a spatula. Place the iron skillet in oven, bake at 400° F, for about 20 to 30 minutes or until the top is lightly browned.

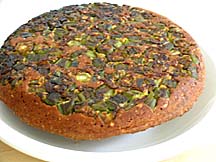
Baked Skillet Cornbread with Okra Skillet Cornbread with Okra topping

Because this is for our lunch, I also baked some cauliflower florets and some baby lima beans along with cornbread. Just tossed the baby limas and cauliflower florets in some oil, salt and pepper. Spread them on a baking sheet and baked until they turn crisp.

We both liked cornbread with okra very much. Thanks Barbara for the wonderful cornbread recipe.

Baked lima beans are good too, but cauliflower florets…oy!. Not that good. I won’t be baking cauliflower again, ever!

Skillet Cornbread with Okra and on the side Baked Lima beans, cauliflower and a drink- Ragi Malt ...Our meal today
Skillet Cornbread with okra toppings, baked baby lima beans and baked cauliflower florets & Ragi malt ~ our meal today.

Posted by Indira©Copyrighted in Benda Kaaya(Okra),Corn Meal (Thursday November 17, 2005 at 3:21 pm- permalink)
Comments (11)

The New Home of Mahanandi: www.themahanandi.org

Cranberry Upside-Down Cornbread

I love the taste of cranberries. Tangy and tart! Their flavor, like their color, is intense. Full of Vitamin C and antioxidants, they are perfect antidote to the blues of coming winter. This American fruit of holiday season does not cost that much, when purchased during the harvest time (Sep, Oct). A dollar or two for a bag of 12 ounces. A good thing for budget conscious people like me.

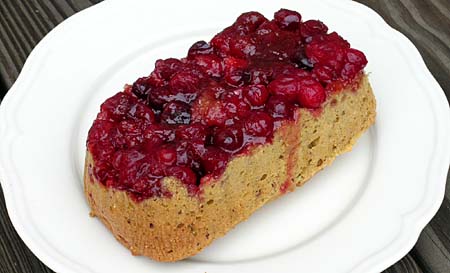
Today, I tried this recipe from W.H MD, changed it little bit to my taste and made an upside-down cranberry cornbread. The result was as the recipe says,- moist, tender cornbread with the sweet and tangy cranberry sauce on the top. Tasted really good!

Cranberry Upside-Down Cornbread

Recipe:

Cranberry Topping
1 bag (12 ounces) fresh cranberries
1 glass of orange juice, freshly squeezed
Half cup of powdered jaggery

Cornbread
1½ cup yellow cornmeal
½ cup whole-wheat flour
1 teaspoon baking powder
½ teaspoon baking soda
½ teaspoon salt
1 cup buttermilk
3 tablespoons peanut oil
1 large egg

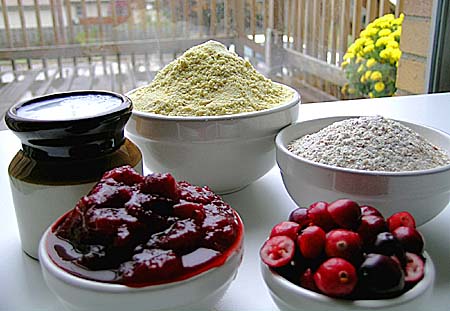
Corn Meal, Whole Wheat Flour, Fresh Cranberries, Cranberry sauce, Buttermilk

The sauce: In a saucepan, combine orange juice, jaggery and cranberries. Bring to a boil and let it simmer, stirring frequently for about 10 minutes or until berries have popped and sauce is thick.

The Cornbread: Preheat the oven to 400° F. Combine dry ingredients – cornmeal, whole-wheat flour, baking soda, baking powder and salt. In another vessel, beat the egg; combine with peanut oil and buttermilk. Add this to the flour mix and mix them thoroughly. I also added some cut cranberries to this mix. If you want, you can also add some sugar to this mix.

Grease a baking dish or bread pan with peanut oil. Pour the cranberry sauce first, then the flour mixture on top of it. Bake it at 400°F for about 30 minutes or until knife inserted in center comes out clean. Let it cool in the pan, then invert onto a plate, carefully. Serve warm or at room temperature.

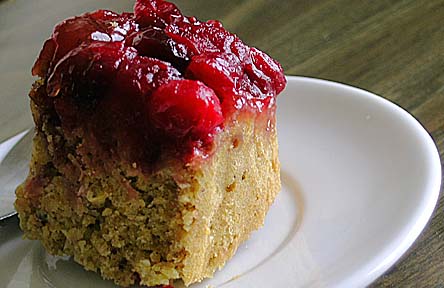
Last Slice of Cranberry Cornbread  - Just because Shammi asked for it
Last Slice of Cranberry Cornbread – Just for you Shammy:)

Posted by Indira©Copyrighted in Corn Meal,Cranberries,Jaggery (Tuesday November 8, 2005 at 9:10 pm- permalink)
Comments (33)

The New Home of Mahanandi: www.themahanandi.org

Ragi Dosa & Orange-Banana Smoothie

After 3 days of heavy meals because of Deepavali, I wanted to try something new, easy to make and somewhat light on stomach kind of meal. Two of VKN’s, My Dhaba recipes – Ragi Dosa and Orange-banana yogurt&honey drink (HOBIY) have caught my eye.

I have all the ingredients including fresh coconut (puja offering) and oranges. So I tried out these two recipes today for lunch and they turned out spectacular tastewise.

I Loved the chewy taste of ragi dosa and the smell is incredible; it’s like the smell of earth when it is raining. I had the fresh ragi flour, perhaps that may be the reason for the incredible aroma.
(You can find ragi flour in almost all Indian grocery shops here in US. Ragi (finger millet) is one of the ancient grains and very healthy source of Calcium. )

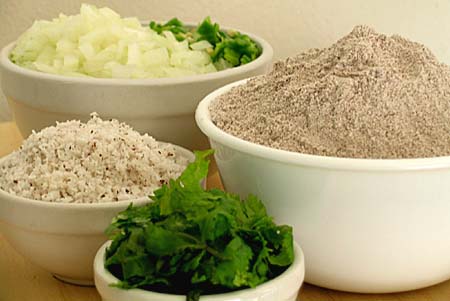
Ragi Flour, Onion, Green Chilli, Fresh Coconut and Cilantro - Ingredients for Ragi Dosa or Utappam

Recipe:

3 cups a href=”http://www.patelbrothersusa.com/show_item_details.asp?item_id=163″>ragi flour
1 cup coconut- fresh and finely grated
Onions, green chillies and cilantro – finely chopped, to taste
Salt to taste

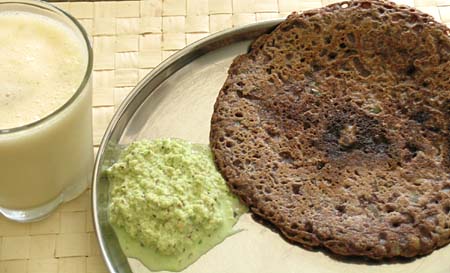
I mixed all of the above ingredients with water in a bowl, thoroughly (like dosa/pancake batter consistency) and poured ladleful of batter onto a hot griddle. Adding few drops of oil, cooked the dosa on both sides till brown and crispy. I made four of these dosas (utappams). We had them with coconut chutney.

I also made the HOBIY. When I first read about this drink, I was little bit skeptical. First of all it’s orange and banana, then it’s yogurt. I wondered about the combination. Vijay often makes himself a drink with soya milk, banana and honey. Thinking, he may like this new drink, I prepared the VKN’s signatory HOBIY drink, by blending half cup of home made yogurt, freshly squeezed juice of one naval orange, one small banana and two tablespoons of honey and few ice cubes. Again, turned out to be one refreshing drink. There was no overpowering smell of banana. Orange juice and yogurt completely masked the smell and taste of banana. I, who normally don’t like the taste of banana in drink form, also enjoyed it.

Ragi Dosa, Coconut Chutney and Banana-Orange Yogurt Drink
Our meal today ~ Ragi Dosa with Coconut Chutney and Banana-Orange Yogurt Smoothie.

Thanks VKN for sharing these two wonderful, traditional, tasty family recipes with us.

Posted by Indira©Copyrighted in Bananas,Flour(Pindi),Green Chillies,Ragi,Ragi Flour (Thursday November 3, 2005 at 5:20 pm- permalink)
Comments (23)

The New Home of Mahanandi: www.themahanandi.org

Stuffed Green Chilli Bajjis (Mirapakaya Bajjilu)

Stuffed green chilli bajjis – whole green chillies are filled with different kinds of mixtures then dipped in gram flour batter and deep fried in oil. They are often served as accompaniment to a main meal in South India, but they are delicious as an appetizer/first course with a cup of yogurt on the side or with a glass of water:)-.

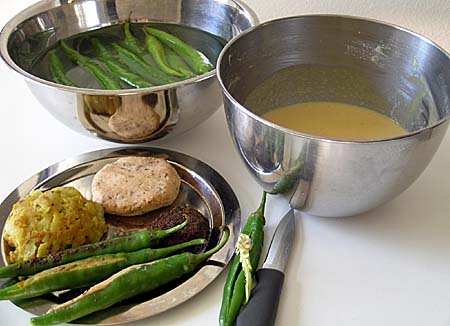
Besan Batter, Slit and deseeded green chillies floating in salted water, 3 different stuffings and green chillies filled with stuffing

Recipe:
(For 10 to 15 green chillies)

Green chillies – Special type of green chillies are used to make stuffed bajjis. You can find them usually in Indian grocery shops. Select straight green chillies, wash and dry them first. Take a green chilli, make a slit lengthwise in the middle, keeping the ends intact. With a knife or a spoon remove the seeds, clean the insides and make space for stuffing. Put these slit, cleaned green chillies in bowl of salted water. If you are sensitive to green chillies, it’s better to wear gloves, take heed of Mrs D and Chopper Dave advise.

Stuffing: I’ve prepared three different kinds of stuffing. (I’ve had them already in my kitchen, what I did was just put them together).

First one is my favorite, traditional Raayala Seema fare that my mother prepares at home:

Half cup of roasted chana dal(dalia), 2 tablespoons of dry coconut powder and tamarind juice, 1 tsp of cumin, 1/4 tsp of salt – powder them together.

The second type of stuffing is what one can find in bajjis from street side stalls in Hyderabad. Very famous and long lines in front of these stalls for bajjis, particularly during monsoon season.

Half cup of sesame seeds, 1 tsp each of coriander seeds and cumin (all three roasted), 3 tablespoons of coconut powder and tamarind juice – mixed and made into thick paste.

The third variety is more of a North Indian fare, learned from a friend.

I had some leftover potato curry – (Fried potato and onions seasoned with garam masala powder) – I reheated the curry in microwave and mashed the potatoes into thick paste.

Batter: One cup of gram flour (besan), quarter cup of rice flour, pinch of baking soda, salt to taste and half to one glass of water – mix them all thoroughly into thick batter (more like dosa/pancake batter consistency).

Oil – Peanut oil for deep-frying.

green chillies filled with different types of stuffing - all ready for a dip in the batter and fry in hot oil
Green chillies filled with 3 different kinds of stuffing

Fill up the gap with stuffing of all the green chillies one by one and keep them on a plate. Again, one by one, dip them into the batter, drop them gently into hot oil, deep-fry them until golden, turning frequently. Remove them with a slotted spoon and drain well on absorbent paper towels.

If you want your bajjis more like street stall bajjis, what you have to do is, first dip each green chilli into batter fully, slide the side opposite of slit side onto edge of vessel, so that side of green chilli has no batter covering it and will be in direct contact with the hot oil, when deep fried. That exposed green chilli will taste crunchy.

But for an authentic taste of street food, double dip and fry again. (Dip the fried green chillibajjis in batter, this time coating them all around and deep fry in hot oil till golden. You can see both varieties in the picture below.)

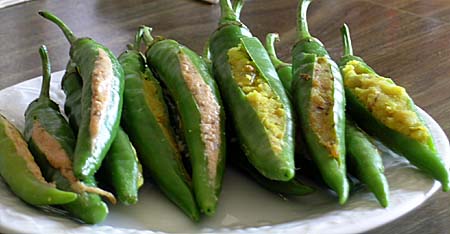
Stuffed Green Chilli Bajjis (Mirchi Bajjis)
Stuffed green chilli bajjis – both, single and double dipped and fried.

Posted by Indira©Copyrighted in Amma & Authentic Andhra,Gram Flour (Besan),Green Chillies,Peppers,Rice Flour (Wednesday November 2, 2005 at 8:44 pm- permalink)
Comments (35)

The New Home of Mahanandi: www.themahanandi.org

Steelers Pizza

Steelers Logo from www.seatseek.comI consider Pittsburgh as my hometown in US because it was where we arrived in US from India. We spent three wonderful years full of firsts; first snow fall, first snow storm, first time assembling the furniture for our house from Ikea, first of lot of things.
And Pittsburgh is a sports town, Steelers is THE team, they all route for. Naturally we couldn’t escape the enthusiasm of locals and now we are also turned into full-fledged, The Terrible Towel waving, Steelers flag in front of the house kind of fans.

Last year was particularly exciting for us Steelers fans. The rookie quarterback brought the team almost to the finals. I could have prepared ‘Roethlis-berger’ in his honor for last years wonderful play, alas I am not a meat eater.

So instead I prepared our favorite game party food – Pizza, for this month’s sport theme party hosted by lovely Stephanie of Dispensing Happiness. Not any pizza but a pizza resembling the Steelers logo and wishing for a season of Steelers super bowl.

Steelers Pizza with Mozzarella and goat cheese with yellow, red bell peppers and olives as toppings

Steelers Pizza:

This Pizza is made with a basic white dough base, flavored with tomato sauce and topped with mozzarella and goat cheese and also roasted yellow and red bell peppers and olives.

Our lunch today:)-

Posted by Indira©Copyrighted in All-Purpose Flour(Maida),Bell Pepper,Cheese,Goduma (Wheat) (Thursday October 20, 2005 at 3:01 pm- permalink)
Comments (14)

The New Home of Mahanandi: www.themahanandi.org

Honey Whole Wheat Bread

I learned the basics of bread making by watching Breaking-Bread series by Father Dominic on PBS. His show demystified the whole bread making process for me. I grew up in Andhra Pradesh, the rice bowl of India, where bread is not an everyday food. It is an exotic thing associated with sickness, prescribed by doctors as an easy digestable food for people when they are ill. Only time I had bread was when I was under the weather and that too quite reluctantly.

When we moved to US, it took some time to get know that bread is not a bland tasteless cardboard kind of food that I remembered and also to separate the bread-sickness association from my mind. I was fascinated by the completely unknown world of bread making and different varieties of bread. I was curious and eager to learn the process so I tried the cook books about baking bread. With information overload, the whole process of bread making felt as easy as preparing for an entrance exam or tooth pulling.:)

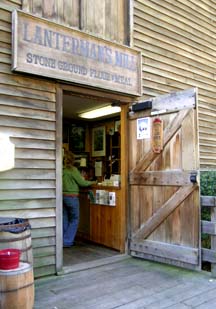
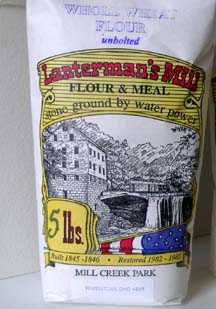
During that time, Breaking Bread series by Father Dominic started on PBS. This chubby, homely monk with a pleasant, fatherly disposition and witty, calming narrative showed the bread making in such a way, that I felt confident to try out. The bread I first baked was a plain whole wheat bread loaf. We both liked the taste of it and later on I experimented with adding honey, nuts etc., After moving to Ohio, I am using the whole wheat flour, produced in old style – stone grinding powered by water at Lanterman’s Mill (not only the major tourist attraction but also a functioning working flour mill of Boardman, Ohio) for my bread. The difference in taste is tremendous, the close thing I can compare it is that of great harvest bakery whole wheat bread. Lot of texture and full of flavor, just two slices would fill us up good.

Last weekend I tried again my bread making skills. Although the dough behaved with a mind of it’s own because of excessive rainy and humid weather, the loaf cameout good after baking. Here is the recipe and the whole process in images:

Lanterman's Mill, Youngstown, OhioStone ground Whole wheat flour  - Purchased at Lanterman's water mill, Ohio
Lanterman’s Mill……………..Stone ground Whole Wheat Flour

Recipe:

1 cup coarsely ground whole wheat flour from Lanterman’s mill
1 cup whole wheat flour (King Arthur brand)
1/4 ounce packet of dry active yeast
1 cup water
½ cup buttermilk
½ cup honey
½ cup of golden raisins and chopped walnuts
¼ cup of oil

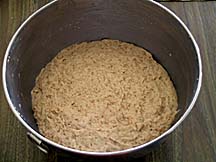
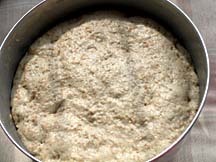
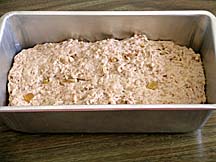
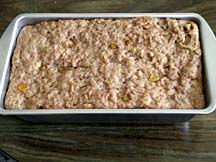
Just Prepared dough, waiting for a rise Two hours after - the dough has risen

First Rise:
Dissolve yeast in half cup of warm water. Measure the flours in a big bowl. Mix buttermilk, oil, honey, water and yeast mixture into the flour to make soft, sticky dough. Take the dough on a wooden board and knead it for about 5 to 10 minutes, handling it gently. Use a spatula to pick up the sticky dough and turn it over as you work. Place this kneaded dough back in the bowl, cover and place the bowl in a warm place and let the yeast do the work. Wait until it tripled in size for about 2 to 3 hours.

The Second rising in the Bread Pan Second rising done

The Second Rise:
When the dough has finished rising, add nuts and raisins and prepare the dough for the second rise. Take the dough again on flour board, deflate it by pressing the dough flat. Now sprinkle finely chopped walnuts and gloden raisins. Incorporate them into the dough by kneading for few minutes. Place the dough in a loaf plan, cover and let it rise to the top of pan, takes about another two to three hours.

After this final rise, place the loaf pan in preheated oven at 400° F and bake for about 30 to 45 minutes or until golden brown. Remove it from oven, bread slides out of the pan easily and let it cool completely before slicing.

The pearls of wisdom, I learned from Father Dominic is ” Let the dough rest and don’t peek and poke it too often”. Very true for successful bread making.

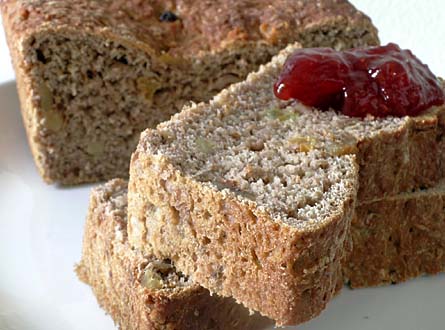
Honey Whole Wheat Bread with Walnuts and Golden Raisins with strawberry jam
Honey whole wheat bread with walnuts and golden raisins
Our weekend breakfast, lunch and dinner

Recipe Source: Cooking Show on Television.

Posted by Indira©Copyrighted in Goduma (Wheat),Honey,Sugar, Jaggery and Honey,Walnuts,Whole Wheat Flour (Monday October 17, 2005 at 12:15 pm- permalink)
Comments (22)

The New Home of Mahanandi: www.themahanandi.org

Bajji(Pakora, Bhajjia)

Festival feast without bajjis – no way

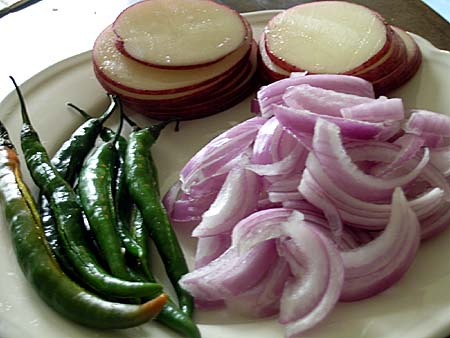
Bajji Platter- Potato Slices, Red Onion slices, Green Chillies slit in the middle

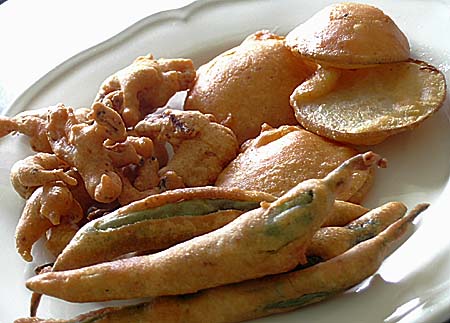
Dipped them in a batter, prepared with gram flour(besan), red chilli powder, salt, baking soda, ajwain seeds(Vaamu) and water. (Check out this post for ingredients photo.) Then deep fried them in hot oil.

Bajji (Pakoras, Bhajjias) Platter - Potato, Green Chilli and Onion Bajjis
Platefull of Chilli-Onion-Potato Bajjis

Posted by Indira©Copyrighted in Amma & Authentic Andhra,Gram Flour (Besan),Green Chillies,Onions,Potato (Friday October 14, 2005 at 10:12 am- permalink)
Comments (14)

The New Home of Mahanandi: www.themahanandi.org

Bhakshalu (Bobbatlu, Puran Poli)

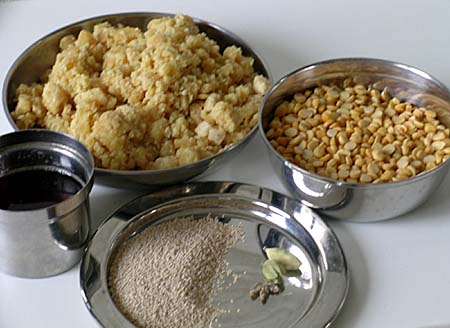
Chana Dal (Sanaga pappu), Jaggery, Ghee, Gasa Gasaalu (Poppy Seeds, Kash Kash), and Cardamom

Ingredients:

For Purnam
One cup chana dal(sanaga pappu)
One to one and half cups of jaggery– powdered
One tablespoon of poppy seeds(gasa gasaalu)
Two cardamom pods, seeds powdered
Purnam Wrap
One cup all purpose flour (maida)
Quarter cup of ghee
Half cup of water

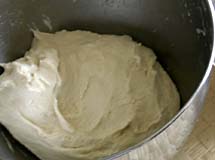
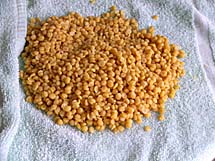
Dough made with All purpose flour(Maida) and ghee Cooked Chanadal on a towel

Preparation:

Step 1:(Two hours before)

Prepare soft, pliable dough with all purpose flour, water and ghee(1 or 2 tablespoons).

Pressure cook chana dal in plenty of water until one whistle. Do not Overcook the dal. The cooked dal must be rigidly soft and not broken. Drain using a colander. (We make a tasty rasam with this dal water called bhakshala rasam.) Spread out the cooked chana dal on a clean cotton cloth or on paper towels, for atleast one hour, so that all the moisture is absorbed from them.

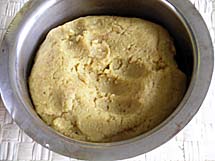
Purnam - Chanadal, Jaggery, Cardamom paste Purnam on maida wrap on a aluminium sheet

Step 2:(one hour before)

Purnam: Using a food processor/blender make a paste of cooked and now completely dried chana dal and powdered jaggery, cardamom powder. Do not add water. The purnam should come out as firm ball. In case if it is more on the runny side or soggy, cook it on stove top on medium-low heat for about 5 to 10 minutes, continuously stirring and let it cool. This will definitely make the purnam firmer and that is what we want consistency-wise for this recipe.

Take the dough on a flat surface, add ghee and knead it for few minutes then punch with your fist few times. Pour ghee knead and punch, do these steps for at least 5 to 10 minutes. All this is to make the dough more pliable and when pulled, it should stretch without breaking.

Making Bobbatlu/Puran Poli Making Bobbatlu/PuranPoli on Iron griddle

Step 3:(Show time)

Divide the dough into marble sized balls.

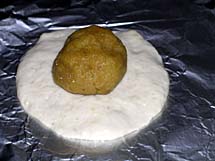
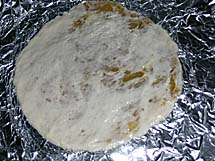
On aluminum foil or on the back of a steel plate (traditionally banana leaf is used), apply liberal amounts ghee and roll out each ball into a small round using a rolling pin or with your hand. Keep a lime sized Purnam in the middle and cover it by bringing the edges together. Dip your fingers in oil and using them, flatten the ball, starting at the edges, gradually pressing towards the center, into a thin, flat, circular shape.

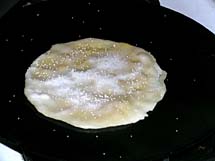
Lay the foil on the griddle and carefully using a spatula, separate the bhaksham from the foil onto the warm(not hot) iron griddle. Fry or cook it on medium-low heat, applying liberal amounts of ghee, till golden (14 carat gold), on both sides. Sprinkle some poppy seeds on each side, keep on the griddle for few more minutes and remove.

Naivedyam is ready.

Bhakshalu / Bobbatlu / Puran Poli / Holige

Serve them with ghee, chitrannam and some bajjis. Festival Feast is ready!

Recipe Source: Family – Amma & Attamma

Posted by Indira©Copyrighted in All-Purpose Flour(Maida),Amma & Authentic Andhra,Chana Dal,Indian Sweets 101,Jaggery,Naivedyam(Festival Sweets) (Thursday October 13, 2005 at 4:58 pm- permalink)
Comments (40)

The New Home of Mahanandi: www.themahanandi.org

Samosas with a Twist

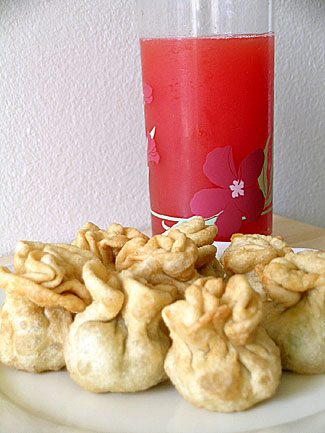
For my first ever virtual blog party, a monthly event started and hosted by lovely Stephanie of Dispensing Happiness, I made these little golden parcels of potato-pea filling in all purpose flour wraps and a pitcher of refreshing watermelon juice.

Little Golden Parcels (Samosas with a Twist) & Watermelon Juice

They are a hit in my house, a party of two. Hope the hostess approves my contribution.

Recipe of Little Golden Parcels:

For Curry:Preparing Little Golden Parcels aka Samosas with a Twist
1 cup of mashed potato
Half onion, two green chillies, half cup of fresh peas, coarsely grinded
Pinch of turmeric and salt to taste
Prepare the curry by sautéing the above ingredients.

Wraps:
1. Prepare a firm dough by mixing one cup of all-purpose flour, half cup of water and a pinch of baking powder & salt. Keep it aside for at least half an hour. Meanwhile prepare the curry. When the curry is ready and cool enough to handle, take out and divide the dough into small balls. And with a rolling pin, roll out the rounds. Or simply use wonton wraps.

2. Take one teaspoon of cornstarch in a cup, make a paste by adding little water.

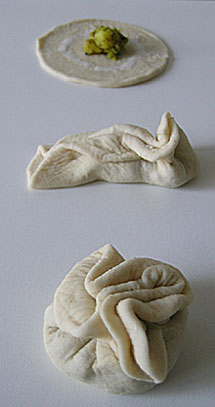
3. In each wrap, put a teaspoonful of curry mixture in the center. Make a line of cornstarch paste around, about half inch from the edge. Bring all four corners to the center and press together firmly to form little bags.

4. In batches, deep-fry them in oil until golden brown. Makes about 15 to 20. I don’t have chives at home right now; otherwise I could have tied a chive around the neck of each bag as garnish.

5. Serve them with a dipping sauce of your choice.

Posted by Indira©Copyrighted in All-Purpose Flour(Maida),Goduma (Wheat),Potato (Thursday September 22, 2005 at 2:08 pm- permalink)
Comments (18)

The New Home of Mahanandi: www.themahanandi.org

Mysore Pak

I don’t know why but we both are losing weight, significant amounts, since coming back from India. We are not doing anything out of ordinary and on our recent yearly medical checkup, the family doctor billed our medical reports as excellent, so no problems there. This sudden weight loss is baffling us. The only reason for this I can think of is homesickness. Leaving the dear and near ones back home, I thought it would get easy with age and time, but not so in our case, it seems. The life we created here seems so dull, empty and purposeless. Is this what happens in 30’s, if so, I would love to go back to the carefree 20’s. Little bit early for a midlife crisis, I know.

To counter the weight loss and also to satiate my cravings for an Indian sweet, we made Mysore Pak last Sunday. A deliciously rich, decadent sweet, made of chickpea flour and pure ghee. South India’s favorite. The sweet is as colorful and mouthful as its name sounds. All of our sweets names are like that, unique and colorful… Badusha, Chandra Kala, Mohan Bhag etc.,

There are no shortcuts for this sweet; you need quality ingredients and no cutbacks on the amount of ghee. Otherwise you end up with not so tasty, yellow brick kind of mixture. So use freshest possible ingredients, mainly besan flour for this recipe. And also you need an extra pair of hands. So keep family or friends on the side.

Recipe:
1 cup Besan flour, sift to aerate & to remove any lumps
1 cup ghee, melted & at room temperature
3/4 to 1 cup sugar – your wish
2 cardamom pods, seeds powdered

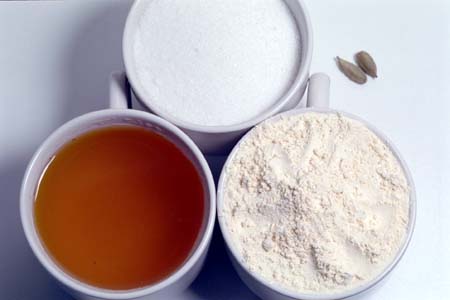
Besan Flour, Ghee, Sugar and Cardamom Pods

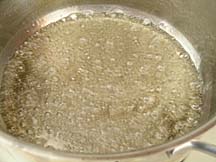
In a big sturdy pot, take one cup of water, add sugar and bring them to boil till the sugar syrup reaches one string consistency. Reduce the heat.
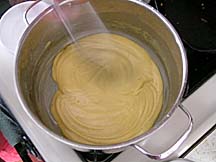
Now pour the ghee and besan flour in a steady stream into the sugar syrup while stirring. You need an extra hand here. Continuously and thoroughly stirring, cook until the ghee starts to leave the sides of the pan and the mixture starts to thicken and turns to become porous and light gold in color. Stir in the cardamom powder.

Sugar Syrup On the Stove Pouring Besan Flour in Sugar&Ghee Syrup

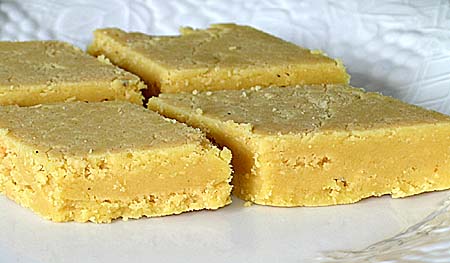
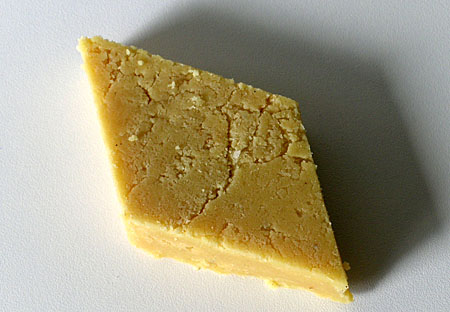
Immediately pour onto a greased tray & evenly level it out with a spatula. When it is still hot, cut into diamond shapes. Makes about 10 to 12 pieces.

Mysore Pak Right Out Of the Stove, On to the Plate, Cut into Diamonds

Mysore Pak - Traditional Indian Sweet
Mysore Pak – Simple, sinfully rich tasting, sweet golden diamond

Posted by Indira©Copyrighted in Amma & Authentic Andhra,Ghee,Gram Flour (Besan),Indian Sweets 101,Mitai,Molasses (Wednesday September 21, 2005 at 3:59 pm- permalink)
Comments (91)

The New Home of Mahanandi: www.themahanandi.org

Pizza with Red Beans & Tomato Chutney

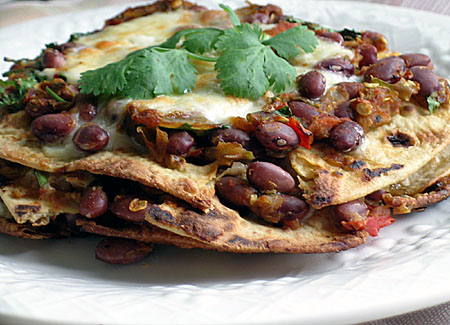
Red Bean Pizza

When it’s this easy to make flavorful, delicious pizza at home, I can only imagine restaurants suffer. Why? This homemade crisp pizza tastes as good or better as any thin crust pizza I have ever had in a restaurant.

I started with few leftover chapatis of yesterday. I added the tomato chutney layer and topped with red beans and cheese. Baked in an oven for few minutes, the outcome was a scrumptious looking, saliva inducing meal. An impressively, easy way to satiate the pizza cravings without doing the back-breaking pizza labor.

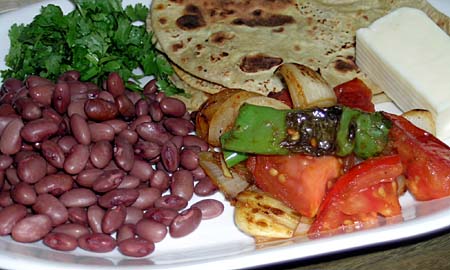
Red Beans, Onion, Garlic, Chilli, Tomato, Cheese and Chapati

Recipe:

1. Pressure cook: One cup red beans(soaked in water overnight beforehand) to tender or use the canned red beans.

2. Prepare chutney: In a skillet, add oil and cook coarsely chopped one onion, two tomatoes, three cloves of garlic and four chillies to brown. Cool, then add salt and blend to coarse puree.

3. Take fresh or leftover chapatis, about 4 to 6. Cut each chapati to 4 wedge-shaped pieces of equal size.

4. Slice to thin strips or grate cheese. I used Monterey Jack cheese in this recipe – About half cup.

Layering Chapati pieces, Tomato, chutney, red beans and cheese in an iron skillet

Before Meal Time:

Preheat the oven to 400°F.

In an iron skillet or in an ovenproof dish:
First, place the chapati pieces, then on top, add and spread tomato chutney to a thin layer. Sprinkle some red beans, cheese and cilantro. Continue until the last chapati, ending with a layer of the chutney, beans and cheese on top. Place the skillet in the oven and bake at 400°F for about 10-15 minutes, until the cheese melts and chapatis start to brown. Remove, slice and serve.

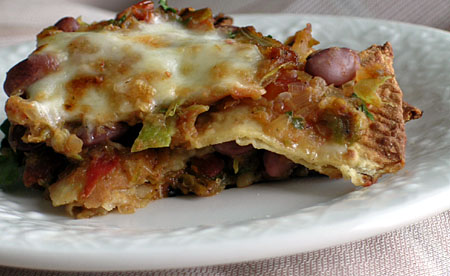
The whole combination of baked chapatis, spicy tomato chutney, red beans and cheese came out very well and tasted real good.

Slice of Red Bean Pizza

Posted by Indira©Copyrighted in Cheese,Red Beans (Chori),Tomato,Wheat Flour (Durum Atta) (Monday September 19, 2005 at 11:44 am- permalink)
Comments (12)

The New Home of Mahanandi: www.themahanandi.org

Mini Custard Tarts

Lovely Elise of Simply Recipes selected custards for this month’s “Sugar High Fridays” theme. I know that I am not a big fan of custards. Still I wanted to give it a try. Why not? How I felt about certain foods changed with time and may be with the recipe I selected, I might like it. You never know until you try. So, I baked mini custard tarts.

The recipe is simple with only 5 ingredients. All Purpose Flour, butter, powered sugar, eggs and milk. Tart shell is made with the first three ingredients and the custard filling is made with the last three ingredients. All basic, nothing fancy sounds easy, right, so I gave it a try!

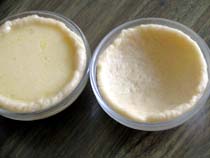
Recipe: Tart Shell, One Empty & the Other Filled with Custard

1 cup of all purpose flour
4 tablespoons of butter
2 tablespoons of powdered sugar
2 tablespoons of water

To make the dough, sift the all purpose flour into a bowl. Add the powdered sugar, butter and water. Mix and knead to form a smooth, firm dough. Cover and leave to chill in the refrigerator. Meanwhile prepare the custard filling.

Custard:

2 eggs
1/4 cup of powdered sugar
3/4 cup of milk

To make the custard, beat the eggs and sugar together. Gradually add milk and beat until well combined.

Take out the dough from the fridge; divide it into even sized pieces (makes about 6). Flatten the dough pieces into rounds and press into shallow tiny pans. Spoon the custard into the tart shells and cook in a preheated oven at 325° F, for about 30 minutes or until set. Remove the dishes, set aside to cool. To serve, run a knife around the edge of each dish and turn out onto a serving plate. Serve hot or chilled with or without cream.

Custard Tart

The outcome looked, smelled and tasted good. But I am not going to go ga-ga over custard anytime soon. I should have baked a cheesecake instead. I read somewhere that cheesecake is also a sort of custard. Yum… that’d be the one I like more!

Take a look at custard and its many avatars at Elise’s Blog .

Posted by Indira©Copyrighted in All-Purpose Flour(Maida),Eggs,Milk & Products,Molasses (Friday September 16, 2005 at 9:21 am- permalink)
Comments (18)

The New Home of Mahanandi: www.themahanandi.org

« Next PagePrevious Page »