Mahanandi

Living in Consciousness ~ Indi(r)a’s Food and Garden Weblog

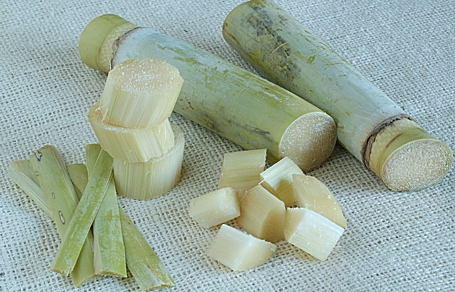
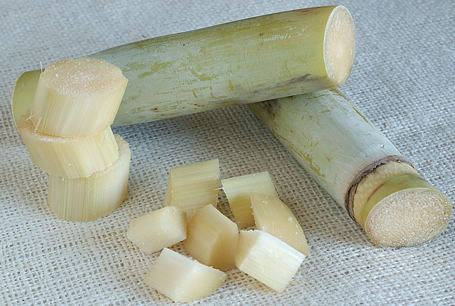
Fresh Sugar Cane

Fresh Sugar Cane

Fresh Sugar Cane and Sweet, Juicy Cubed Treats of Sugar Cane
~ for this week’s Indian Kitchen

Fresh Sugar Cane

Posted by Indira©Copyrighted in Indian Ingredients,Indian Kitchen,Jaggery,Molasses,Sugar (Sunday January 21, 2007 at 2:41 pm- permalink)
Comments (15)

The New Home of Mahanandi: www.themahanandi.org

Peanut ~ Jaggery Chutney

Peanut – jaggery chutney is a timeless classic. Like the comfort of the Kashmir shawl wrap on a cold day and the elegance of kumkum bottu on the forehead after a visit to the temple, it can be relied on to instantly make the meal both totally comforting and effortlessly elegant.

Stylish enough for a special elaborate meal and at the same time, casual enough for a spur of the moment put-together breakfast or light lunch – Peanut jaggery chutney is a rural Andhra classic side dish and much beloved recipe from my home. Usually prepared in a rolu (mortar) and served during Makara Sankranthi with pulagam or pongali and ghee.

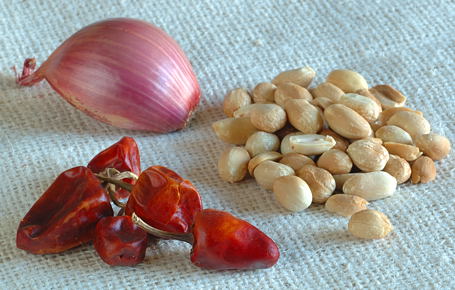
 Shallot, Dried Red Chillies, Roasted Peanuts
Shallot, Dried Red Chillies and Roasted Peanuts

Recipe:

Peanuts – 1 cup
Shallots 4 or one big red onion – cut to chunks
Dried red chillies – 6 to 10. I usually add at least 8 for a cup of peanuts
Tamarind – small marbleround size
Jaggery pieces – 1 tablespoon or to your liking
Salt – 1 teaspoon

Roast peanuts to light brown color. Cool and remove the skins.

In a skillet, heat a tablespoon of peanut oil. Add and fry shallot/onion pieces and dried red chillies to brown color. Let cool to room temperature.

Soak tamarind in a quarter cup of hot water for about 10 minutes, to soften.

Take them all in a blender or in a mortar. Add jaggery and salt. Grind to smooth consistency. Remove to a cup and serve with breakfast items or with chapati/rice along with ghee.

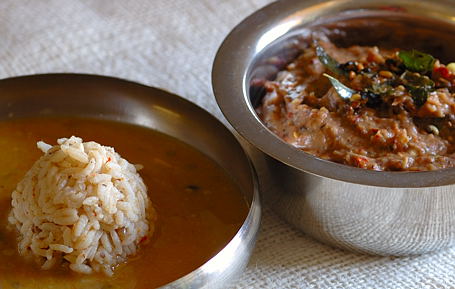
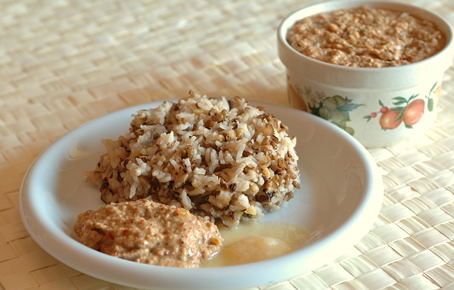
Peanut-Jaggery Chutney with Pulagam and Ghee

Posted by Indira©Copyrighted in Amma & Authentic Andhra,Jaggery,Peanuts,Shallots (Wednesday January 17, 2007 at 8:26 pm- permalink)
Comments (11)

The New Home of Mahanandi: www.themahanandi.org

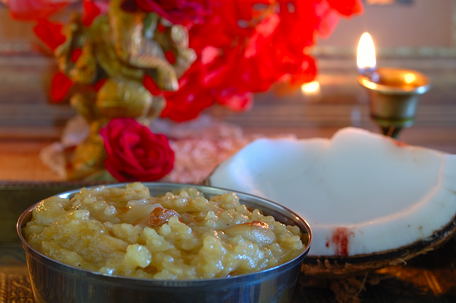
Sankranthi Prasadam ~ Bellam Paramannam (Jaggery Rice Pudding)

Sankranthi Prasadam ~ Bellam Paramannam (Jaggery Rice)
Sankranthi Prasadam ~ Bellam Paramannam (Sweet Jaggery Rice)

Bellam Paramannam or jaggery sweet rice pudding is a creamy rice dessert with a difference, being sweetened by old world sugar – “jaggery” and subtly flavored with cardamom. It is wonderful warm or cold and usually served as puja prasadam on festivals like Sankranthi (the harvest festival).

Recipe:

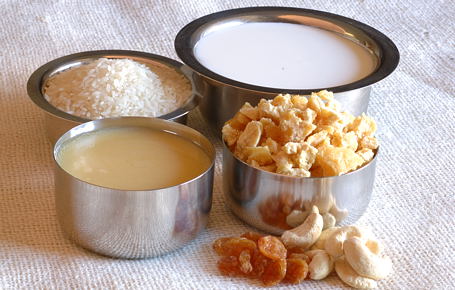
1 cup Sona Masuri rice
2 cups milk + 2 cups water
2 cups jaggery + 1 cup water
½ cup each – cashews and golden raisins
¼ cup – ghee
4 cardamom pods – seed powdered

This is how I prepare this traditional sweet:

Cook rice in milk and water to very tender, falling apart stage.

Melt jaggery in water and simmer to plain syrup stage.

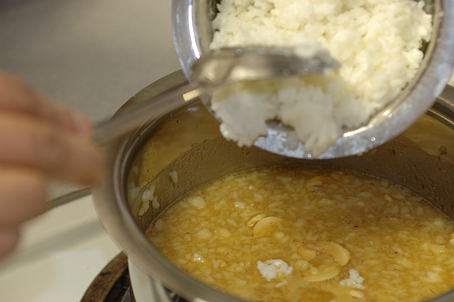
Add cooked rice to jaggery syrup. Mix and cook on medium-low heat.

Meanwhile, in a small skillet, heat ghee on medium heat. First fry cashews and then golden raisins to light gold color. Add the whole thing – ghee along with fried cashews and golden raisins to the rice-jaggery mixture.

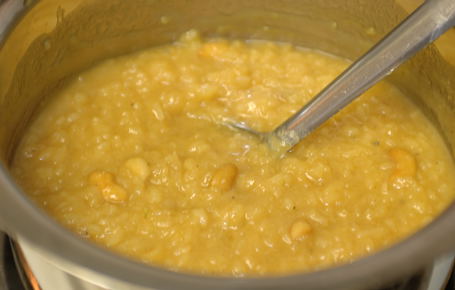
Simmer on medium-low heat stirring in-between, until the whole thing thickens a bit and comes together to moist, firm mass.

Just before turning off the heat, stir in cardamom powder and mix thoroughly. Serve warm or cold.

Milk, Rice, Ghee, Jaggery, Golden Raisins and Cashews ~ Ingredients for Bellam Paramannam

Adding the cooked rice to Jaggery Syrup

Bellam Paramannam
Bellam Paramannam to celebrate Sankranthi

Kitchen notes:
When directly added, jaggery sometimes could separate milk avaialble here, into curds and whey. Preparing rice with milk first and then adding it to jaggery syrup is my way for fail proof bellam paramannam prasadam.
Paramannam with sugar ~ Recipe
Sweet Pongal (Tiyya Pongali) ~ Recipe
From Telugu to English: Bellam = jaggery, Paramannam = Sweet rice

Posted by Indira©Copyrighted in Amma & Authentic Andhra,Biyyamu (Rice),Ghee,Indian Sweets 101,Jaggery,Naivedyam(Festival Sweets),Sona Masuri Rice (Monday January 15, 2007 at 3:52 pm- permalink)
Comments (45)

The New Home of Mahanandi: www.themahanandi.org

Besan-Coconut Burfi, the 7-cup magic

Besan Coconut Burfi ~ The 7-cup magic
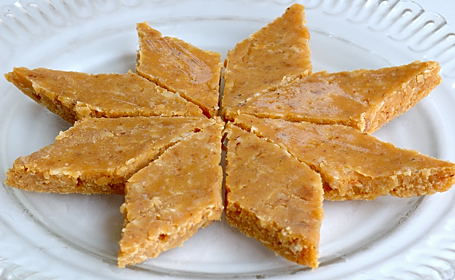
Besan-Coconut Burfi ~ The 7-cup Magic for Indian Sweets 101

Experienced cooks would curl up into hardball position. The kitchen novice can crack up. Watching sugar melting for sweets preparation can do that to the cooks. Like Linda mentioned, the softball, the hardball, the numerous stages of sugar syrup have the effect of melting one’s brains.:) Toffees and Burfis turned to payasams, to hard bricks, to concrete mixture – I have seen them all. One recipe that has always come to my rescue during my beginner days of cooking was Besan-coconut burfi. Also known as 7-cup burfi.

7 cups refer to the ingredients’ quantity, which is easy to remember. There is no skill involved to prepare this sweet. Only thing one need is a steel heart. Coconut, sugar and ghee are liberally used and the sweet also liberates one from fear of burfi making. A true delight and Kitchen newbies favorite, I always remember this sweet fondly as 7-cup magic.

Recipe:
1 cup besan (gram flour, shanaga pindi)
1 cup fresh grated coconut
1-2 cups ghee
2 cups sugar – powdered
Cardamom to taste
Wide, sturdy pot, big slotted sturdy spoon and a steel heart.
——- ——-
Place a wide, sturdy pot on stove. Bring to warm on medium-low heat.
Add besan and fry it constantly stirring to copper-toned gold jewelry color.
Add the fresh grated coconut to the besan and fry it for about 5 to 10 minutes again on medium-low heat, until it leaves the raw smell.
Slowly stir in the powdered sugar and cardamom powder.
Mix thoroughly and cook, constantly adding ghee. Until the whole thing comes together to a porous, firm mass. Takes about 20-30 minutes on medium-low heat.
Remove to a ghee-coated plate/pan. Press evenly and cut diamond shaped pieces.
Or shape the mixture to round laddus, once the mixture is cooled enough to touch.
Enjoy the delicious taste of 7-cup burfi.

More 7-cup sweets:
7-cup cake from Vidhya Rajesh
7-cup sweet from Pavani

Posted by Indira©Copyrighted in Coconut (Fresh),Ghee,Gram Flour (Besan),Indian Sweets 101,Mitai,Sugar (Friday December 8, 2006 at 10:28 pm- permalink)
Comments (31)

The New Home of Mahanandi: www.themahanandi.org

Jaggery~Coconut Puffs


Jaggery-Coconut Puffs

Many thanks to lovely Kay for hosting this month’s Jihva. Being a first time mother of two month old baby girl, she could have easily said “no” to very demanding and time consuming work of event hosting, which she booked 7 months ago. I asked her to see if she’d take a break, but she insisted to do it. I restect people who keep their word without missing a beat. I also commend Kay for her dedication towards Jihva and also all the participants for their enthusiastic support with interesting entries. To make this event hosting as smooth as possible for Kay, I would greatly appreciate if you could send your entries with the details she requested (blog name, entry URL and images etc), so that she could do the recap of the event in short time. Thank you.

Kay also requested for new jaggery recipes. So here is one – Jaggery-Coconut puffs. Homemade puff pastry and sweet jaggery coconut filling. I borrowed the recipe idea from Fethiye of Yogurt land. I have changed the recipe little bit. Instead of egg in dough, I have added mashed ripe banana as I was preparing the puffs for naivedyam (puja offering) and also used ghee. Preparation was easy, and the end result was smooth silky puffs with sweet filling. We liked them a lot and they are definitely going to join my cherished recipe list. Thanks Fethiye for a great recipe idea, thanks Kay for inspiring me to experiment.


Dough, melted ghee, jaggery-coconut filling and jaggery-chana dal purnam filling

Recipe:
for 12 to 14 sweet puffs

For filling:

I’ve prepared two different fillings.
1: jaggery-coconut lauju: Follow coconut burfi recipe. Replace sugar with jaggery and stop cooking before the sweet reaches burfi stage. I have also added sesame seeds to the lauju.
2: jaggery-chana dal purnam : like we do for Bhakshalu (bobbatlu, puran poli, holige). Recipe is here. Small quantity, just half cup each is enough and can be done in 30 minutes with some preplanning.

For dough:

3 cups of all purpose flour
1 cup of warm milk
1 ripe banana – mashed smoothly
¼ cup of oil
1 teaspoon each – sugar, salt and cardamom powder
1 teaspoon of active dry yeast, stirred in 1 T of warm water

Take them all in a bowl and mix thoroughly. Prepare the dough like we do for chapatis, sprinkling warm water if necessary. Without giving any rest period, divide the dough into 8 rounds. Roll out small salad plate shaped rounds.

Apply general coating of ghee or melted butter to each one, on one side and layer them. (See the photo below).

Roll again these 8 rounds into one big dinner plate shaped circle of about 10 inches in diameter and ¼ inch thick. The size is really big, and I had to roll out on my kitchen countertop. Divide and cut this circle into 12 to 14 triangles of equal size.

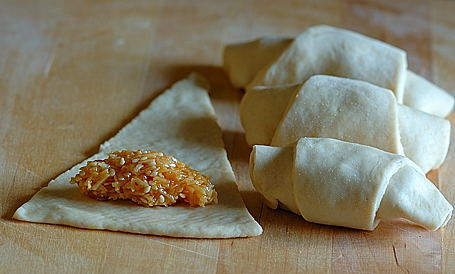
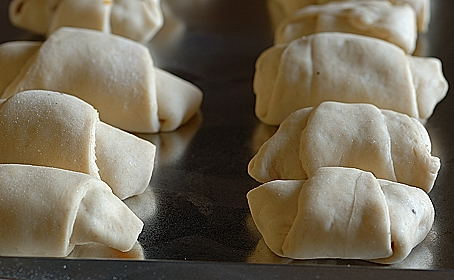
Top the wide edge of each portion with 1 tablespoon of filling. Start rolling from the wide edge down to the tip. Curve in tips to close the gap on the sides. Now the rolling part is over, give the dough a break and allow to rest for about 15 minutes so that yeast can work its magic.

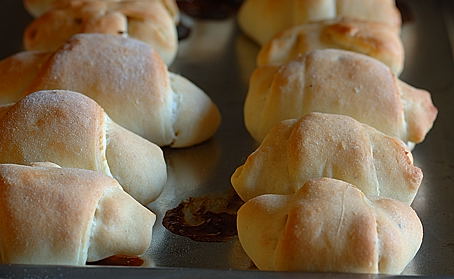
Arrange them nearly in rows on a greased baking sheet, leaving a little space between pieces. Bake in a preheated oven at 350 F for about 15 to 20 minutes or until golden brown.

Serve warm.


Rolling out the rounds and arranging one over another after applying ghee


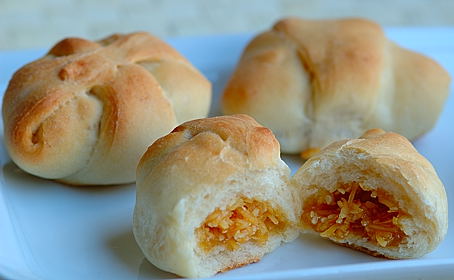
Placing the jaggery-coconut filling and rolling the wedges to croissant shape


After a 15 minute rest period, the puffs are ready for baking


Hot Jaggery-Coconut Puffs for Birthday Girl Kay and my entry to JFI-Jaggery.


Recipe adapted from Yogurt Land
Flour Choice: King Arthur Unbleached All-Purpose Flour

Posted by Indira©Copyrighted in All-Purpose Flour(Maida),Chana Dal,Coconut (Fresh),Jaggery,Mitai (Friday December 1, 2006 at 7:25 pm- permalink)
Comments (34)

The New Home of Mahanandi: www.themahanandi.org

Borugula (Murmura) laddu (Homemade Rice-Jaggery Crispy Sweet from India)


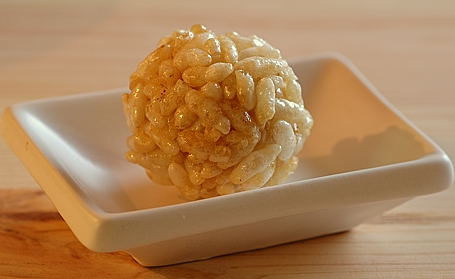
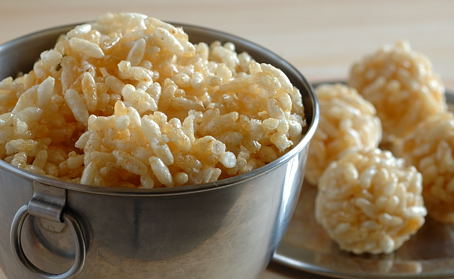
Golden Borugula Laddu under Evening Sunlight

How can one convey nostalgia? I am no wordsmith and sometimes words escape me, so I try it with my camera lens.

A nourishing and delightfully scented, not so sweet but fun kind of treat from my childhood days is murmura laddu. Also known as borugula mudda in Telugu and rice crispies in English.

During December and January months (Sankranthi time), when parents are busy with harvesting rice and sugarcane, grand parents prepare these crunchy, homely sweets for children with freshly popped murmura from rice battis and just minted 24 karat quality jaggery. Jaggery syrup is prepared and murmura are added – just these two ingredients and tiny touch of cardamom – that’s it. Magical, irresistible laddus would be ready to keep us children (mouths) busy.

I am happy that I am finally able to recreate this Sankranthi magic on Mahanandi. Though recipe looks simple, I know how difficult it is to prepare these kinds of sweets, so I measured and timed the process to make it fail proof and for decent results. Give it a try.


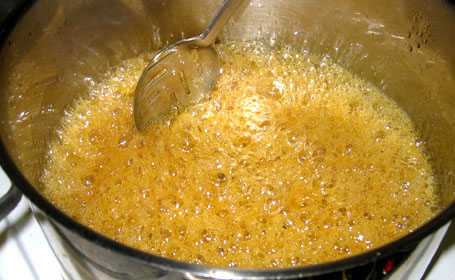
Preparing Jaggery Syrup for Murmura laddus

Recipe:

Murmura (borugulu, puffed rice)one quart
Jaggeryone cup (powdered)
Water – one cup
Cardamom – 2 (seeds powdered)
To test jaggery syrup readiness – Keep a small plate with cold water ready by stove side.

In a big, sturdy, thick-bottomed vessel, add water and jaggery. Cook on medium-high heat. Jaggery melts and begins to concentrate. When it starts foaming like shown in the photo above, it reached the consistency we want for this recipe. To test, add few drops of jaggery syrup to the cold water. When pushed with fingers, if the syrup can be rolled to a round and keeps share without melting in spite of tilting the plate to different directions, it is done and the syrup is ready. This whole process takes about 15 to 20 minutes.

Constantly stirring, add murmura. Also sprinkle in cardamom powder. Within one or two minutes, murmura starts to soak up the syrup and comes together in to dry mass. Turn off the heat. Remove the pot from the stovetop to countertop.

Wait for about 5 minutes for murmura-jaggery mixture to cool down and then start making laddus. Take a spoonful of mixture into hands and press gently into round shape. Keep a bowl of cold water on the side. Dip your hands in-between laddu making to keep hands unsticky and cool. Or ladle off the whole mixture into a greased pan. Press firmly and evenly. Cut into squares and let it cool. Break along the lines to separate the pieces.

Makes about 12 medium sized laddus or squares.


Hot Murmura-Jaggery Mixture and Making of Laddus


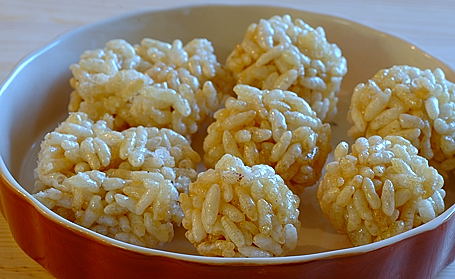
Murmura (borugulu, puffed rice) laddus and squares
Fun Jaggery-Rice Crispy Treats From India for Kay’s JFI

Kitchen Notes:
1 quart = 2 pints = 4 cups = 32 fluid ounces =.95 liter
Murmura and Jaggery are available at local Indian grocery shops.
Prepare this sweet with fresh, crunchy tasting murmura only, for best results.
One more recipe for murmura laddu – from Cooking Medley

Posted by Indira©Copyrighted in Amma & Authentic Andhra,Biyyamu (Rice),Indian Sweets 101,Jaggery,Mitai,Murmura (Borugulu) (Thursday November 30, 2006 at 10:05 pm- permalink)
Comments (55)

The New Home of Mahanandi: www.themahanandi.org

Brinjal~Jaggery Chutney (Vankaya Bellam Pacchadi)

Cooking is an ultimate balance act, isn’t it? Take time to learn and practice to achieve that balance, the rewards are high. Not only good health, but also a balanced mood. Some ingredients and recipes are easy to balance and master. But for some, one needs yogi’s kind of patience and sadhana. Jaggery, particularly in savory recipes, is one such ingredient that I needed to practice a lot to achieve the balance. Consistency and quantity are difficult to explain and I had to rely on my flavor senses for guidance in my beginner days of cooking. I hope you do the same when you cook with jaggery in savory recipes, like the one I am posting today, as part of my weeklong Jihva jaggery journey.

Brinjal-Jaggery chutney (Vankaya-Bellam pacchadi) is a classic Andhra (Nandyala) recipe where young brinjals, dried red chillies and ginger are first roasted and then grinded together with jaggery, tamarind and salt. The result is a mouthwatering side dish with all 5 flavors and some extra smoky flavor, usually eaten with rice, ghee and dal or sambar. If you like baingan burtha, baba ghanouj style brinjal preparations, where brinjal is grilled and mashed, then this chutney is also your style.


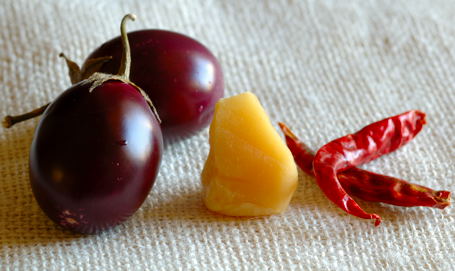
Brinjals, Jaggery and Dried Red Chillies

Recipe:

8 young brinjals – ends removed and sliced lengthwise
8 dried red chillies
1 rupee coin sized ginger
1 red onion or shallot – sliced lengthwise
1 tablespoon each of powdered jaggery and tamarind juice
¼ teaspoon of salt or to taste

Heat two tablespoons of peanut oil in an iron skillet. Bring the oil to smoking point. Now add brinjal, onion and ginger. On high heat, grill them. Do not cook and soften but brown them -secret to tasty chutney. If you are one of those ‘gifted’ with charring or blackening all things you cook, then you need to use that gift here, my friend. Leave the care to the world and char the brinjals’ white flesh to your hearts content. Remove them to a plate. Add and grill dried red chillies for few seconds.

In a food processor or blender, take grilled brinjals, onion, ginger and dried red chillies. Add salt, tamarind juice and jaggery. Hit pulse button and coarsely puree. Remove to a cup. Traditionally popu or tadka (toasting cumin, mustard seeds and curry leaves in one teaspoon of oil) is added to the chutney at the end but this step is entirely optional. Sometimes I do it, sometimes I don’t, depends on my time and patience.

Serve with rice, ghee and dal or with pappu chaaru/sambhar.


Brinjal-Jaggery chutney mixed with Rice in Pappu chaaru – Savory Jaggery Entry to Kay’s JFI

Posted by Indira©Copyrighted in Amma & Authentic Andhra,Jaggery,Vankaya (Brinjal) (Wednesday November 29, 2006 at 9:40 pm- permalink)
Comments (33)

The New Home of Mahanandi: www.themahanandi.org

Cranberry~Clove Marmalade

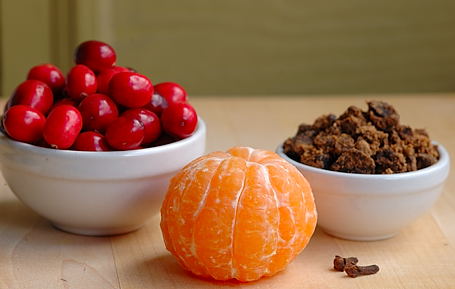
Cranberries, Orange (mandarin, battayi), Cloves, Palm Jaggery (Taati Bellam
Cranberries, Orange (mandarin, battayi), Cloves, Palm Jaggery (Taati Bellam)

Before going in to weeklong JFI jaggery journey, I would like to know and I hope you all had nice time with your family and friends during Thanksgiving holiday weekend. For us, it was a working as well as relaxing weekend. I prepared some decent meals, read a funny book called ‘Food Moods’ and Vijay was working on his assignments and required readings. We mostly stayed home because of the weather here. It was raining and snowing. Yes, snow in Seattle. I didn’t expect that, but it also snows in Seattle. What a nice surprise.

Cranberries, chestnuts, pecan pie and plum (fruit) cake – these are the things I look forward to during holiday season in US, every year. Their rich color, beauty and taste brighten up otherwise dreary cold days here. Cranberries in particular. Their bitter-tart taste is perfect antidote for too much fancy food that is common during this season.

Last weekend among other things, I also prepared marmalade with cranberries. In addition to oranges and jaggery, I have added cloves on a whim and cloves fresh, refreshing aroma brightened up not only our breath but also our otherwise mundane morning jam-bread breakfast routine.

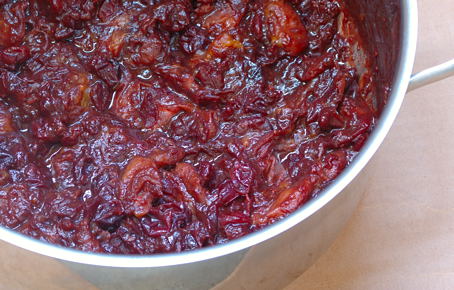
Cooking the marmalade

Recipe:

Cranberries – 2 to 2½ cups (12 ounces)
Oranges – 2 cups of cut fruit (6 seedless fruits, I used mandarins (battayi) for this recipe)
Palm Jaggery – 1 cup powdered
Cloves – 6
Water – 1 cup

Wash and remove bad cranberries. Peel orange and separate into segments over a bowl (to catch the juices). Powder the jaggery and measure. Make a fine powder of cloves.

In a heavy pot, bring one cup of water to a boil. Add jaggery and wait until jaggery melts. Add cranberries and orange pieces. Cook, until the fruit breaks down, turn to mush and come together to a firm quivering mass. Takes about 15 to 20 minutes. Just before turning off the heat, sprinkle powdered cloves. Cook few more minutes and turn off the heat. Let marmalade cool completely. Store in a tight lidded, clean jar and refrigerate.

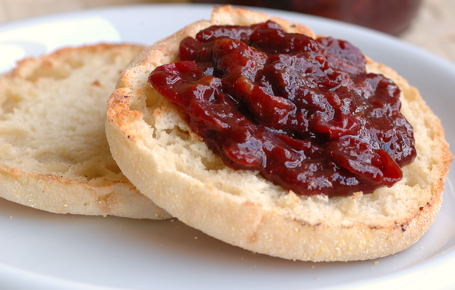
Cranberry~Clove Marmalade and Toasted Bread
Cranberry~Clove Marmalade & Toasted Bread
for JFI-Jaggery hosted by Kay of ‘Towards A Better Tomorrow’

Kitchen Notes:
Fills about 14 oz (400grams) jar.
I’ve prepared mildly sweet marmalade. Adjust jaggery quantity to suit your taste.
Recipe Source: My own creation.

Posted by Indira©Copyrighted in Citrus Family,Cranberries,Jaggery,Sugar, Jaggery and Honey (Tuesday November 28, 2006 at 11:29 am- permalink)
Comments (30)

The New Home of Mahanandi: www.themahanandi.org

Jaggery (Gur, Bellam) ~ Sugarcane and Palm

Jaggery (Gur in Hindi and Bellam in Telugu) ~ Sugarcane and Palm
Sugar cane Jaggery and Palm Jaggery ~ For this week’s Indian Kitchen

Jaggery and sugar are India’s gifts to the world!

I do not know how many of you know this but ancient Bharath (India) pioneered the sugar making technique. Harold McGee, the author of entertaining and educational cookbook “The Science and Lore of the Kitchen” describes in detail how thousands of years ago, India enamored the world with the taste and technique of sugar making. This is the first ‘spice’ that was exported from India. These ancient traditions still continue and along with sugar, jaggery is also prominently used in Indian cooking.

There are two types of jaggery available in India as far as I know. One is from sugarcane and the second type is from Palmyra palm tree (toddy palm or taadi chettu) . Sugarcane juice (for cane jaggery) sap (for palm jaggery) from trees is boiled down hours and hours. And the concentrated liquid is poured into molds to dry. Depending on the mold used, you would see jaggery in different shapes- cylindrical blocks, smooth round balls and half spheres etc. Depending on the sweetness level and color, the jaggery is two types. Pale gold colored one – this is what’s available in most of the Indian grocery shops here in US. This is popular mainly because of my generation’s penchant for all things pale colored. Good, decent taste, I use it regularly in my cooking. But my parents and grand parents back in India prefer the dark colored jaggery. Aging or curing the freshly prepared jaggery for sometime will result in potently sweet, distinct flavored dark colored jaggery. For them, pale colored ones are inferior in taste. I agree that there is a significant difference between those two types. Because of this fact, often in our homes for marriages and special occasions, the dark colored jaggery is preferred to prepare sweetmeats.

When it comes to taste – jaggery has a distinct taste. English language, perhaps the most powerful tool and expression of current day culture, has millions of words but none of which are really good enough I think and there is no word in English that completely serves to describe the taste of Jaggery. If you have tasted one, cooked with one, smelled one, then you know the subtle sublime scrumptiousness Jaggery brings to a recipe. Otherwise, a translation attempt ‘tastes like molasses, brown sugar or maple syrup‘ is either an incomplete and false hint, for anyone who doesn’t know the taste of jaggery, or is simply annoyingly weak and unevocative.

Jaggery stores well. Once in 3 or 4 months, I buy a big block of jaggery from Indian stores. I break it using a knife and hammer. Place the knife in the middle of the block and lightly hit it with hammer. Jaggery breaks into pieces. Further gentle tapping with hammer results in small pieces and powdered jaggery. I keep what I need in a small container in kitchen cabinet and store the remaining pieces for later use in a Ziploc bag in the refrigerator. Just with 15 minutes work, I would be set for at least 3 months. I use jaggery in different traditional Indian preparations – to sweeten the curry sauces, for pappu chaaru and also to prepare sweets like payasam, kheer and cashew sweets etc. Back in home, in India, people often prepare sweets with jaggery. Particularly for naivedyam, jaggery sweets are preferred to sugar sweets. Our elders, they may not have degrees, but they do know where the ingredients come from and how they are made. They avoid sugar in naivedyam because after all sugar is processed by using dead animals bone meal.

One complaint I often hear about jaggery is presense of sand or dust particles in it. The reason for it is jaggery is still prepared in ancient way, in the fields. There will be harvesting of sugar cane going on one side and on the other end concentrating the sugar cane juice will be going on. Air carries some particles into this liquid. The farmers do filter the liquid before pouring into molds but one or two particles always find a way to join in. For some, these particles are reason why they avoid jaggery and prefer sugar. For me, I prefer sand particles to bonechar contamination anytime of the day. Atleast I know how to deal with jaggery impurities – melt and strain.

For the month of December, for Jihva – the online food blogging event, we the food bloggers are going to celebrate the goodness of Jaggery. All thanks to the new mom and the host of JFI, Kay, for her wonderful selection. Whether you are an already ordained admirer of jaggery by birth or it is your first time, join and (re)discover the subtle, sublime scrumptiousness of jaggery cooking, both in sweet and savory recipes.

Posted by Indira©Copyrighted in Amma & Authentic Andhra,Indian Ingredients,Indian Kitchen,Jaggery,Sugar, Jaggery and Honey (Sunday November 26, 2006 at 8:35 pm- permalink)
Comments (310)

The New Home of Mahanandi: www.themahanandi.org

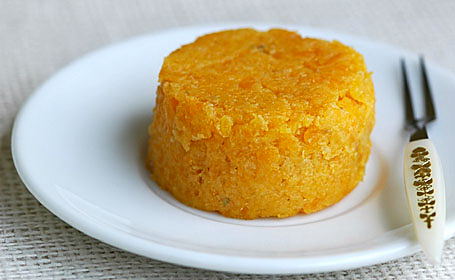
Pumpkin Halwa with Butternut Squash


Pumpkin Halwa with Butternut Squash and Almonds ~ For JFI:Deepavali Treats

When talented food writer, photographer and blogger Vee of Past, Present and Me announced special edition of Jihva to celebrate Diwali festival, I was really elated and thought it was an appropriate idea. “Jihva for Ingredients” (JFI), is an online food blogging event, created to celebrate the natural ingredients and what they can do for our Jihva.

The ingredients that we use in our cooking may not be constant but love, family and tradition, the natural, real ingredients that we share to celebrate the Deepavali festival are going to be constant and would always be there to sustain us through our life journey. Also if there is one festival that truly unites India, it is Deepavali~the festival of lights. All ages and religions joyously participate – Lighting the divas, sharing sweets, presents or enjoying firework displays. The festival has something for everyone. Even the grinch among us would shine and smile during this time.

Deepavali is also about giving and receiving a second chance in life and I am glad to share with you my second chance with pumpkin.:) To tell you the truth, I am not a big fan of pumpkin, I never was. My dislike of this vegetable started in my childhood, continued through upto now. But after seeing several of my fellow food bloggers’ fabulous creations with this vegetable, I too wanted to join the fun. But would the pumpkin accept me, I was skeptical. So I took the help of almonds, milk kova and of course our true friend that would instantly bring joy to any occasion, ‘the sugar’. With the help of all these ingredients I have prepared pumpkin halwa with butternut squash. Boy, oh boy, what a delight that was. I was astounded by how generous the pumpkin was with its gentle sweetness and its ready mixing with other ingredients. It may look all bulky and intimidating, but the vegetable has a sweet taste of a kind giant.

Many thanks to my fellow food bloggers (dear InjiPennu , where are you?), to my new friend pumpkin for inspring me to take this second chance and also to lovely Vee for hosting this special edition of Jihva. If it’s not for you guys, I would have never tried pumpkin again, I think. And this pumpkin halwa sweet truly is a special Diwali treat for us, and is going to be a tradition from now on in my family.


Butternut Squash ~ Cut in Half and Grated

Recipe:

Butternut Squash, almonds, milk and sugar
Ghee, rose water and cardamom

Prep work:

1. Almonds – Soak half-cup almonds in warm water for about 2 hours. Remove the skins and make a smooth powder in a food processor.

2. Butternut squash (2 pounder) – Peel the skin and cut into half lengthwise. Remove the seeds and finely grate using a mandoline. Comes about 3 cups of tightly packed grated squash.

3. Meanwhile prepare milk-sugar syrup: take 5 cups of whole milk and 2 cups of sugar in a big, thick-bottomed vessel. Cook the mixture until is gets thick and is reduced to about one fourths of the original quantity. Takes about 30 to 45 minutes.

4. Take 8 cardamoms, remove the skins and in a mortar pound the seeds into fine powder with a pestle.

Showtime:

1. In a big sturdy, wide bottomed vessel, heat about 2 tablespoons of ghee on medium heat.

2. Add the grated pumpkin to the melted ghee. And with a big slotted spoon, gently mix and cook the pumpkin. Cook for about 20 minutes, stirring in between, until the raw smell of pumpkin disappears and color changes from yellow to orange-yellow.

3. Add the almond powder and condensed milk-sugar kova. Add cardamom powder and two teaspoons of rose water. Gently mix and constantly stirring, cook the whole mixture until it comes together into a solid firm mass. Takes about 10 to 15 minutes.

4. Remove the halwa to a pan. Level it even and let cool. Keep it in the freezer for about one hour to firm it up even more. Remove and cut into squares or use a cookie cutter to cut round shape discs.

5. Serve chilled.

I think this halwa can stay fresh upto one week, when refrigerated.
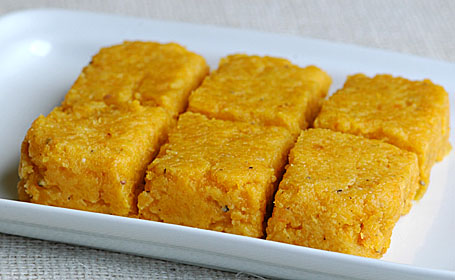

Pumpkin Halwa ~ Our Diwali Treat ~ For 101 Indian Sweets
and My Entry to VKN’s “Festival Foods” Event

Recipe source: My own creation
I have prepared this halwa on less sweet side. My preference. Increase the sugar quantity if you like more sugary sweet taste.
Posted by Indira©Copyrighted in Almonds,Indian Sweets 101,Milk,Mitai,Pumpkin,Sugar (Thursday October 19, 2006 at 2:08 pm- permalink)
Comments (57)

The New Home of Mahanandi: www.themahanandi.org

Banana Halwa (Nenthra Pazham Haluva)

For Independence Day Food Parade, following recipe is contributed by the regular comment poster at “Mahanandi”, always entertaining ‘Kerala Girl (KG)’:

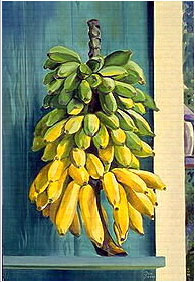
Banana Painting  - From My Home
Oil Painting of Bananas

I have chosen a dish from my hometown – Calicut/Kozhikode (land of Banana chips and Halwas) from Kerala for IDFP. Kerala – the God’s own country is also land of Kera (coconut). To a malayalee, banana or the plantains probably come next to coconut but still it’s importance is written all over the malayalee’s life. Banana is one plant whose every part is useful in one or the other form. In addition to the banana fruit we also eat it’s flowers and the softer inner trunk. The leaves of the banana plant are the less sophisticated version of today’s disposable plates. Traditional Kerala cuisine is incomplete without the pleasant taste of bananas.

Another reason why I have chosen banana as ingredient for this event is I hail from Calicut – the land famous for Calicut Halwa and one of the best halwa’s I have tasted there is banana halwa (a hard jelly like sweet). Calicut is very famous for its sweets and one the famous places in Calicut is Sweet Meat Street (SM Street). It is the busiest street in Calicut and derives its name from the times when the street was lined with sweetmeat stalls. So I thought of celebrating our independence with my favorite sweet – Banana Halwa (Nenthra Pazham Haluva). The recipe source is one of the old recipe books by the great cookbook author Mrs.K.M.Mathew. Here’s the recipe:

Ingredients:

Ripe Bananas – 1 and 1/2 Bananas
Sugar – 2 and 1/2 cups
Water – 1/2 cup
Lemon juice – 1/4 cup
Ghee – 3/4 cup
Cardamom powder – 1/4 tsp
Cashews roasted or plain – handful for decoration
All purpose flour – 3 tsp

Method:

Pressure-cook the bananas until soft. Remove the outer skin and deseed (remove the black layer inside). Mash the bananas to a paste in a food processor or blender.

Make syrup of sugar by dissolving in 1/2 cup of water. It should be of string consistency. When this consistency is reached add the lemon juice and again allow it to reach the same thick consistency. To this add the mashed bananas.

To thicken the halwa, at this stage add flour dissolved in 1/4 cup water. Keep on stirring the mix to attain a thick mass. Add ghee little by little. When this becomes a thick mass add the cardamom powder. Mix well and pour into a pan greased with ghee. Decorate with cashews.
When cool cut and enjoy. This can be stored in refrigerator for a week minimum.

A Toast to our independence with this sweet dish!

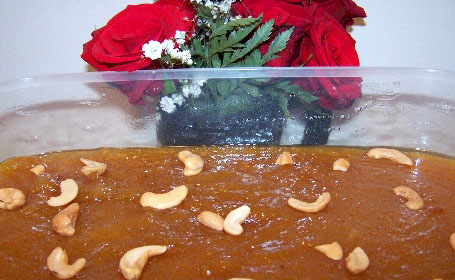
Banana Halwa
Banana Halwa for IDFP

~ Guest Post by Kerala Girl (KG)

Posted by Indira©Copyrighted in Bananas,Cashews,Fruits,Mitai,Sugar,Zen (Personal) (Monday August 14, 2006 at 2:21 pm- permalink)
Comments (22)

The New Home of Mahanandi: www.themahanandi.org

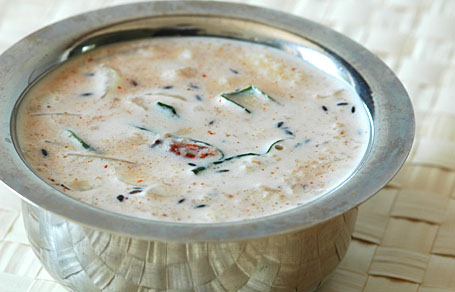
Peanut Pachhi Pulusu (Peanut Cold Rasam)

For Independence Day Food Parade on August 15th, I’ve decided to write three recipes which are near and dear to my heart. One each from – my hometown, my state and my country. Today’s one is from my hometown. Some recipes are truly local, like a needlepoint, known and popular only in few homes in a town and surrounding villages. Peanut pachhi pulusu (pachhi =raw/unboiled, pulusu=rasam/soup) is one such recipe from “land of Nandis” – Nandyala, Rayalaseema region.

Peanuts are roasted to golden color, skins removed and then made into smooth paste along with salt, chilli powder, tamarind and jaggery. By adding water, the paste is made into rasam like consistency. Finely sliced onions are added and seasoning is done by popu/tadka. That’s it. This is sort of cold, no-boil rasam and perfect during hot summer days. Often prepared and served with pongal and potato curry, the whole combination tastes awesome and comforting.


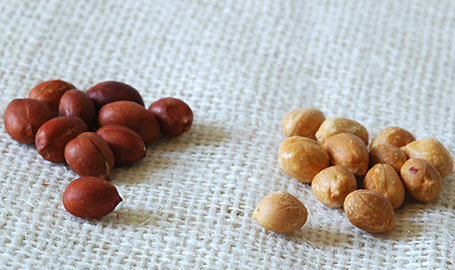
Peanuts – Roasted and Golden (Skins Removed)

Recipe:

Roast Peanuts:
Take 2 cups of peanuts in a large skillet and on medium-high heat, roast them to golden color (see photo above) mixing and turning often to prevent scorching. Allow to cool. Rub them with hands to loosen the skins and remove the skins. (Roasting peanuts to golden color is important. Spend few minutes & pay attention to roasting process. Taste of this recipe depends on this step.)

Make a paste:
2 cups of Peanuts – roasted and skins removed (from above)
½ teaspoon of chilli powder
1 teaspoon of salt or to taste
1 tablespoon tamarind juice
2 tablespoons of powdered jaggery
Take all the above in a blender or in a mortar, crush them to smooth paste by adding 1 cup of water in between.

Finely Slice:
1 big onion – lengthwise, slice thinly and wash them in water to separate the onions pieces and to remove that raw onion smell.

Do the popu/tadka:
Heat 1 tsp of oil in a big vessel. Add and toast – few pieces of curry leaves, dried chillies and half teaspoon of mustard seeds and cumin. To this popu/tadka:
Add the smooth peanut paste.
Add the onions.
Stir in about 1 to 2 cups of cold water. Mix and serve.
Make the rasam like thick buttermilk consistency. Have a taste and adjust salt, sweet and sour levels to your taste.
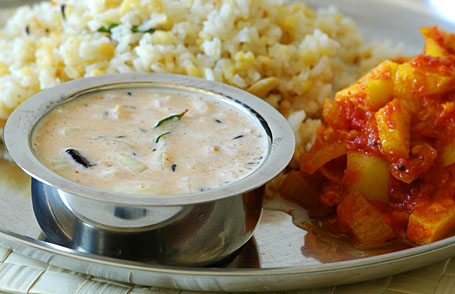
Serve with pongal. This pachhi pulusu (cold rasam) has all 5 essential ruchulu (flavors) and is guaranteed to make one feel cool as a cucumber on a hot day.


Peanut Pachhi Pulusu with Pongal and Potato Kurma ~ Our Fabulous Meal:) Today

Posted by Indira©Copyrighted in Amma & Authentic Andhra,Jaggery,Onions,Peanuts (Thursday August 10, 2006 at 3:39 pm- permalink)
Comments (30)

The New Home of Mahanandi: www.themahanandi.org

Bottle Gourd in Sesame (Sorakaya-Nuvvula Kura)

Few months ago, I wrote about my mother’s recipe of bottle gourd. It is a standard, no fuss kind of recipe with minimum ingredients. I like the taste of that curry and played around with the recipe little bit and came up with this one. It is also a simple no-nonsense recipe and supplies carbos (bottle gourd), protein (black chana) and fat (sesame seeds). I love the taste and also the ease with which it can be prepared.

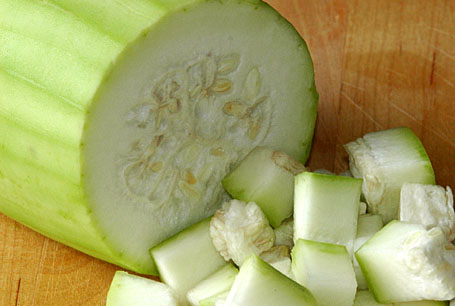
Bottle gourd Pieces (Sorakaya, Lauki)
Bottle Gourd (Sorakaya, Dudhi) – Peeled, Cut into Cubes

Recipe:

Prep Work:
One cup of black chickpeas (kala chana) soaked in water overnight.
Half of medium-sized bottle gourd (sora kaya, dudhi), peeled and cut into half-inch pieces (about 2 cups)

Cook:
Heat a teaspoon of peanut oil. Toast a teaspoon of cumin, mustard seeds and curry leaves (for tadka).
Add the bottle gourd pieces and soaked kala chana. Saut? for few minutes on medium heat. Add about a cup of water and close the lid and cook.

SesameDalia paste:
Meanwhile prepare the curry thickener. Grind in a blender:
3 tablespoons of each – sesame seeds and dalia
½ tablespoon of each – tamarind juice and powdered jaggery
1 teaspoon of each – coriander seeds (dhania), cumin and red chilli powder
½ teaspoon of salt or to taste
Grind them to smooth paste by adding about one cup of water.

Simmer:
Add the sesame-dalia paste to the curry. Stir in half teaspoon of turmeric. Mix and on medium heat, simmer for about 15 to 20 minutes, until the curry reaches the consistency you desire.
Tastes great with chapatis/naans and with sorghum rotis.

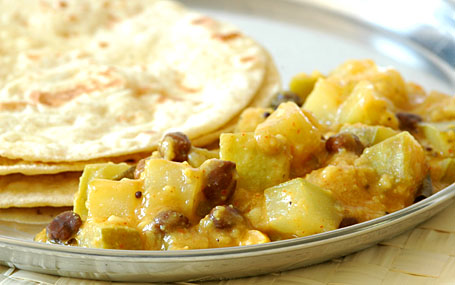
Bottle gourd curry with chapatis

Posted by Indira©Copyrighted in Chana Dal-Roasted (Dalia),Jaggery,Sesame Seeds,Sorakaya(Dudhi,Lauki) (Tuesday July 18, 2006 at 7:21 pm- permalink)
Comments (15)

The New Home of Mahanandi: www.themahanandi.org

Chocolate~Chilli~Pecan Mini Cakes

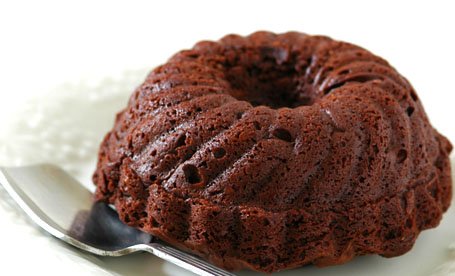
chocolate cake

To the naive palate, cheese is mind numbingly bland. But with few tries, one would know that there are many subtle flavors even in cheese blandness. Same thing with chillies. They are hot, but there is remarkable variation of “heat” among chillies and within any given chilli type. When added to taste, chillies would bring incredible flavor to all types of foods. One example that I recently found out is chocolate. The South and Central American culture often combine cocoa and chillies in recipes and their cuisine is famous for this terrific combination for centuries.
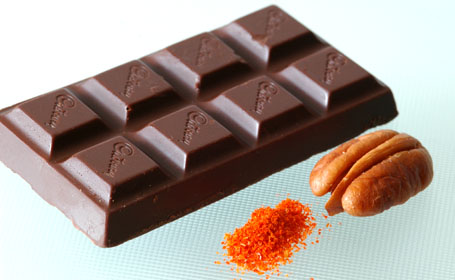
Last weekend, I tried this ancient tradition at my home and baked some little cakes of chocolate-chilli-pecan combination. I went as far as I could go to follow the tradition:). I couldn’t get pure (or good quality) chocolate but was able to buy few bars of dark chocolate. I experimented by adding half teaspoon of pure chilli powder from India, to the melted chocolate. The recipe I followed is from “Bittersweet” by Alice Medrich, is actually for cookies. Recipe title is “bittersweet decadence cookies”, and in her introduction to these cookies she wrote “Ultrachocolatey and richer than sin, slightly crunchy on the outside with a divinely soft center, these are not delicate or subtle, but the jolt of bittersweet is irresistible.”
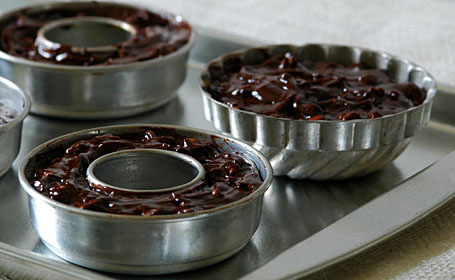
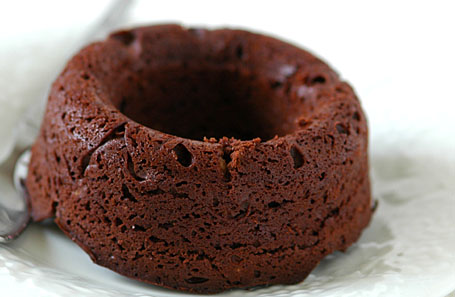
They were all that and more. Trembling with anticipation, that is how I felt while preparing these little dark delights. The taste was purely out of this world and I give full credit to the recipe that I followed (adapted) and of course to the almighty, all-powerful chilli.


Chocolate, Chilli Powder and Pecan – Ingredients for the mini cakes (cookies)


Mini Cakes Ready for Baking

Recipe:

Flour and chilli:
All-purpose flour – ¼ cup
Pecans – roasted and finely chopped about 2 cups
Chilli Powder – ½ tsp
Baking Powder – ¼ tsp
Salt – ¼tsp
Sift the flour in a vessel and stir in the remaining ingredients.

Sugar and Eggs:
Eggs – 2
Sugar – ½ cup
Vanilla extract – 1 tsp
Break eggs in a vessel (I have removed yellows, my preference). Stir in sugar and vanilla. Whisk for atleast 2 minutes.

Chocolate and Butter:
Bittersweet or semi sweet chocolate – 8 Oz (2 chocolate bars)
Unsalted butter – 2 tablespoons
Break chocolate bars and chop them finely to small pieces. Take them in a microwavable bowl and add butter. I microwaved the bowl for about 1 minute. After stirring once, I put it in the microwave for another minute. Chocolate melted to smooth and was warm but not hot. (I waited few more minutes for warm chocolate to cool little bit and then added the egg mixture. This is done to prevent egg curdling.)

Mixing and Baking:
Add the egg mixture to chocolate and combine. Stir in the flour and nut mixture. Mix thoroughly.
Preheat the oven to 350 F.
This recipe is actually for cookies and the cookbook author instructed to line 2 baking sheets with parchment paper and scoop the batter into small rounds and place them 1½ inches apart. And bake for about 12 to 14 minutes, until the surface of the cookies looks dry and set.

I, on the otherhand scooped the batter into tiny aluminum cake pans that I bought recently and baked them for about 20 minutes at 350 F.

End result looked like this and tasted really good.


Mini Chocolate-Chilli-Pecan Cake ~ My Entry to Barbara’s “Spice is Right – Chilli” Event

Recipe adapted from Bittersweet by Alice Medrich
Ebay Listing for mini cake pans – Here

Posted by Indira©Copyrighted in Caffeine,Chicory & Cocoa,Chocolate,Sugar (Thursday July 13, 2006 at 4:19 pm- permalink)
Comments (37)

The New Home of Mahanandi: www.themahanandi.org

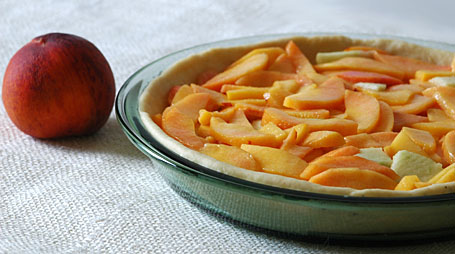
Peach Pie

I am not an American still I like pies! Apple, peach pies and from my Houston days the pecan pie of Texas, are my favorites. One of the new recipes that I tried for my friends visit last weekend was baking a lattice topped peach pie. Lattice topped pies are the prettiest pies of all I think. They look so delicate and so delectable, you just want to rip off the lattice top and devour.

Though the traditional American pie is made with enough butter that a ordinary Indian would eat in a year, I designed my pie keeping health in mind – reduced the butter quantity in pie shell drastically, still it came out great. The base was like thin crust pizza pie base, and the peach fruit topping – I read that peaches are the kind of fruits that would come alive with touch of heat. I picked peach filling mainly for that reason and I agree, they tasted great after baking. And the lattice top – it was fun to weave the top.

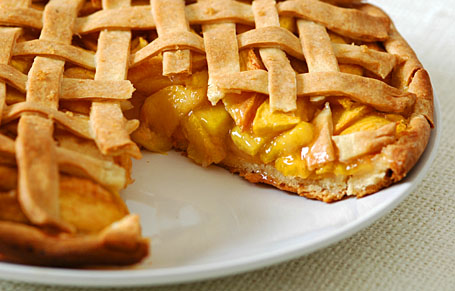
Both Vijay and I, we are the offspring of silk and cotton weavers, so it didn’t take long for us to figure out how to weave the dough strips, and also Barbara’s post helped me a lot. Thanks Barbara. All and all, even with shortcuts, the pie came out good, I imagine just like a traditional rural pie would; firm-flaky crust that tasted little more than browned butter and flour and a peach filling that was naturally sweet and juicy. A blue ribbon winner for sure.:) If you are interested to try this recipe, please keep in mind that peach pie is little bit acquired taste, also depends entirely on the quality/ripeness of peaches.

Recipe:
(for 9-inch pie pan)

Prepare the dough:
2 cups of all-purpose flour (sifted),
Quarter cup of cold, solid butter finely chopped and
1 tablespoon of sugar and 1 teaspoon of salt –
Take them in a vessel. Mix (rub) the flour with butter pieces and adding few drops of cold water inbetween – prepare a tight dough. Cover the dough and keep it in the refrigerator for at least 30 minutes. Meanwhile prepare the fruit filling.

Fruit filling:
6 to 8 ripe peaches – peel, cut and remove the seed. Slice the fruit into thin pieces lengthwise
Quarter cup of sugar
2 tablespoons of corn starch (added to absorb the fruit juices and to prevent saggy base)
1 teaspoon of limejuice
Take sliced peaches in a vessel; add sugar, cornstarch and limejuice, toss to mix. (Because this fruit mix could ooze lot of juice with time, mixing with sugar etc., do it just after you roll out the pie shell.)

Rolling out the dough:
Remove the pie dough from the refrigerator. Divide it into two portions, ¾ and ¼ part, the big one for pie shell and the small part for lattice top. Roll the big portion of dough into a big round that would fit the pie pan. Lift and place neatly into the pie pan.
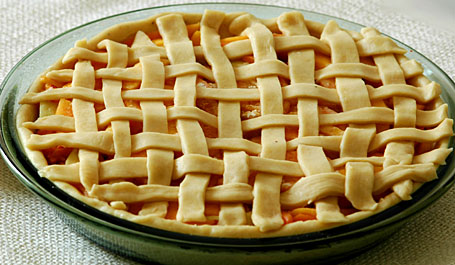
With the remaining small portion of dough – roll it into another big round. Cut the dough into thin strips lengthwise with a sharp knife. Make a lattice weave following the instructions here. (Do you remember how folks back home weave cotton rope layers for sleeping cot? Same thing here, quite easy.) I did it on the back of wax paper covered steel plate; it was easy to place the lattice top on the pie.

Assembling and baking:
Fill the pie shell with fruit slices neatly in a level, to the top. Carefully place the lattice weaved dough strips onto the fruit pie. Brush the top with milk and sprinkle some sugar on top.
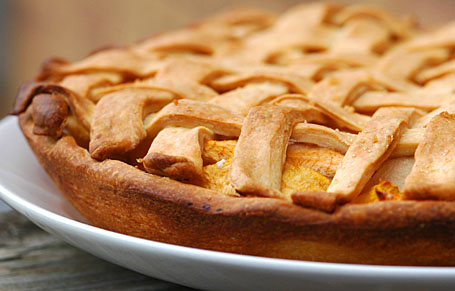
Preheat the oven to 400 F. Place the pie pan on a flat big baking sheet and bake at 400F for about 20 minutes and then at 350F, for about 30 minutes, until the top turns to golden brown and fruit inside becomes soft and juicy. Do not underbake.
Remove and cool. Slice and serve.


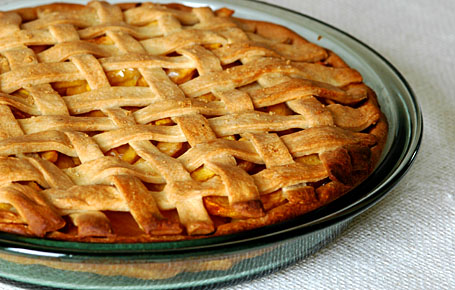
Lattice Topped Peach Pie – Ready For Baking


Baked Pie Removed to a Plate to Cool


Peach Pie


Traditional American apple pie – Recipe in images.
How to weave lattice top for pies – Barbara’s post here.

Posted by Indira©Copyrighted in All-Purpose Flour(Maida),Fruits,Peaches,Sugar (Wednesday July 12, 2006 at 1:39 pm- permalink)
Comments (26)

The New Home of Mahanandi: www.themahanandi.org

« Next PagePrevious Page »